Blueberry Cupcakes with Toasted Meringue

Oh, hello there. Can we be friends again, please?!

July was one hell of a month—two of my friends got married, I spent over a week in Maine for my own wedding stuff, marathon training got really intense!! Just everything is happening in a beautiful 2-3 month period, and I can’t bring myself to chill for a sec and bake! I mean I did allow myself to binge read the new Harry Potter book in a couple of days—that’s as wild as I get!

I love when life is crazy busy and exciting, but like, hold up, can I have a day or two when I can think about nothing and just nap?! Maybe I’ll take a nice winter hibernation this year…

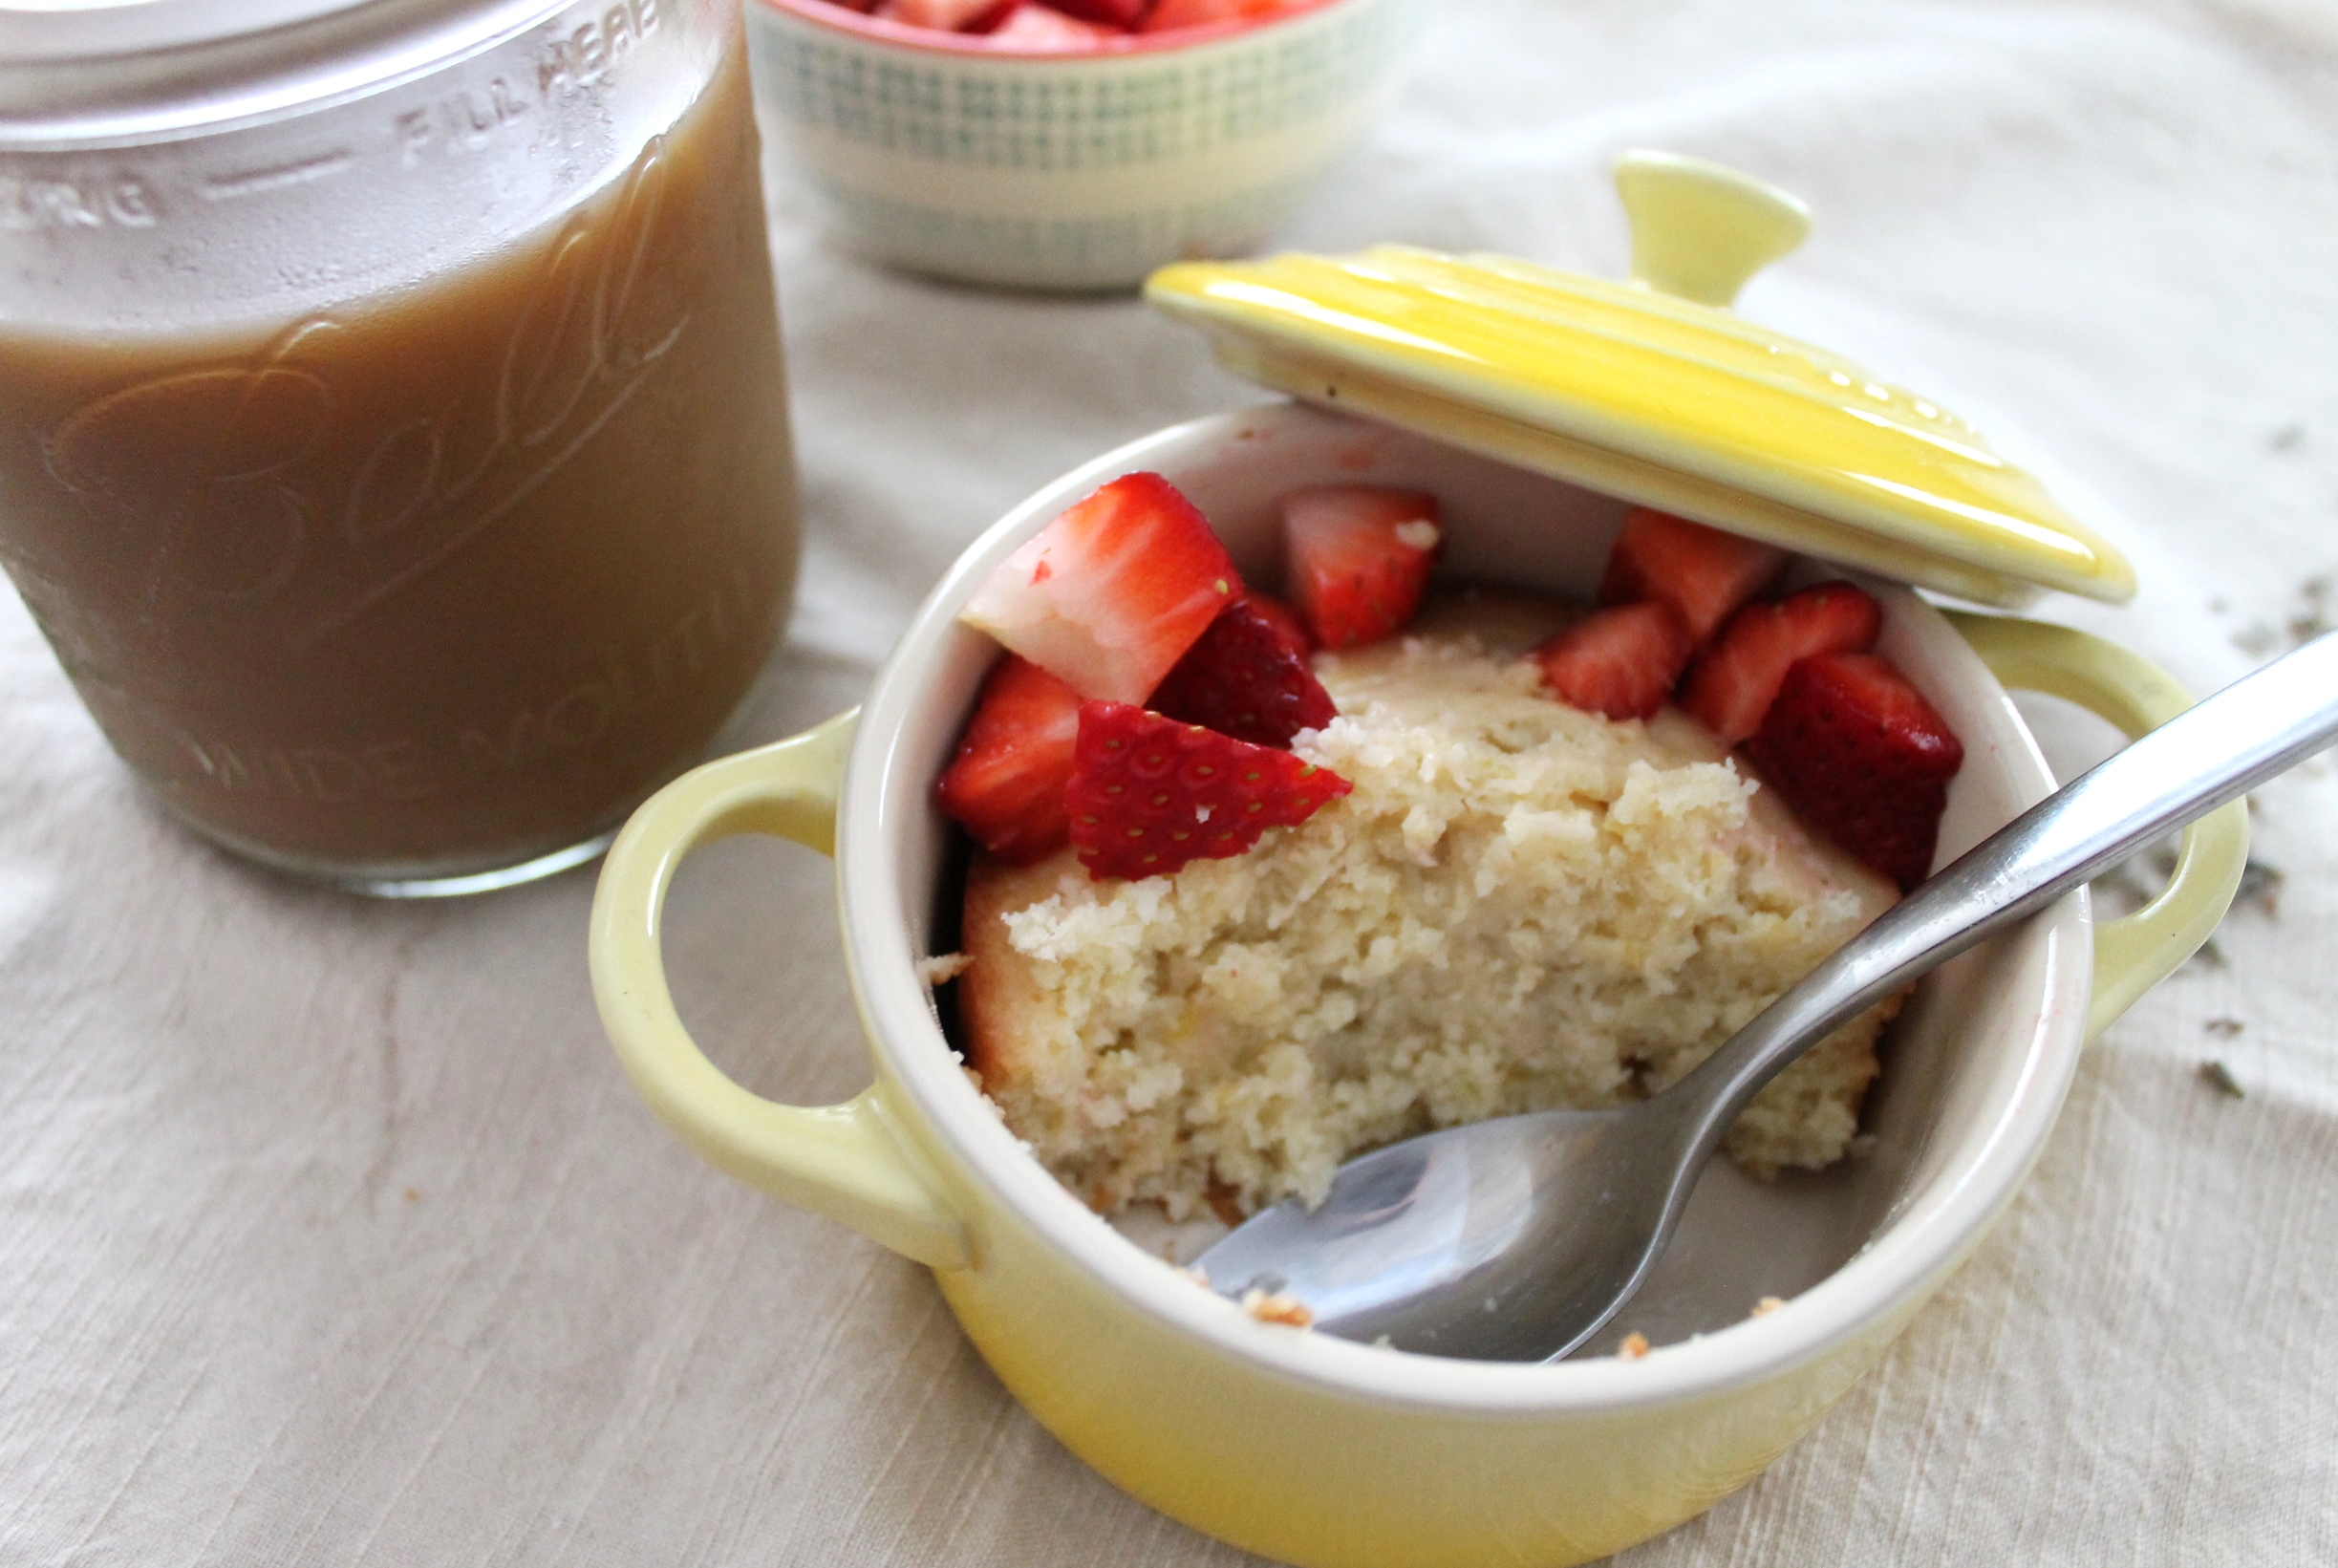
So, while being at my mom’s house, I forgot how much I absolutely love waking up every morning and picking fresh raspberries and blueberries from all of the bushes we have around the house! It doesn’t get much better than that—I mean maybe when I would bring my dogs with me to pick them and they would smush their faces into the berries, then leave them on the ground. I suppose that was pretty cute…even though they wasted so many beautiful berries…

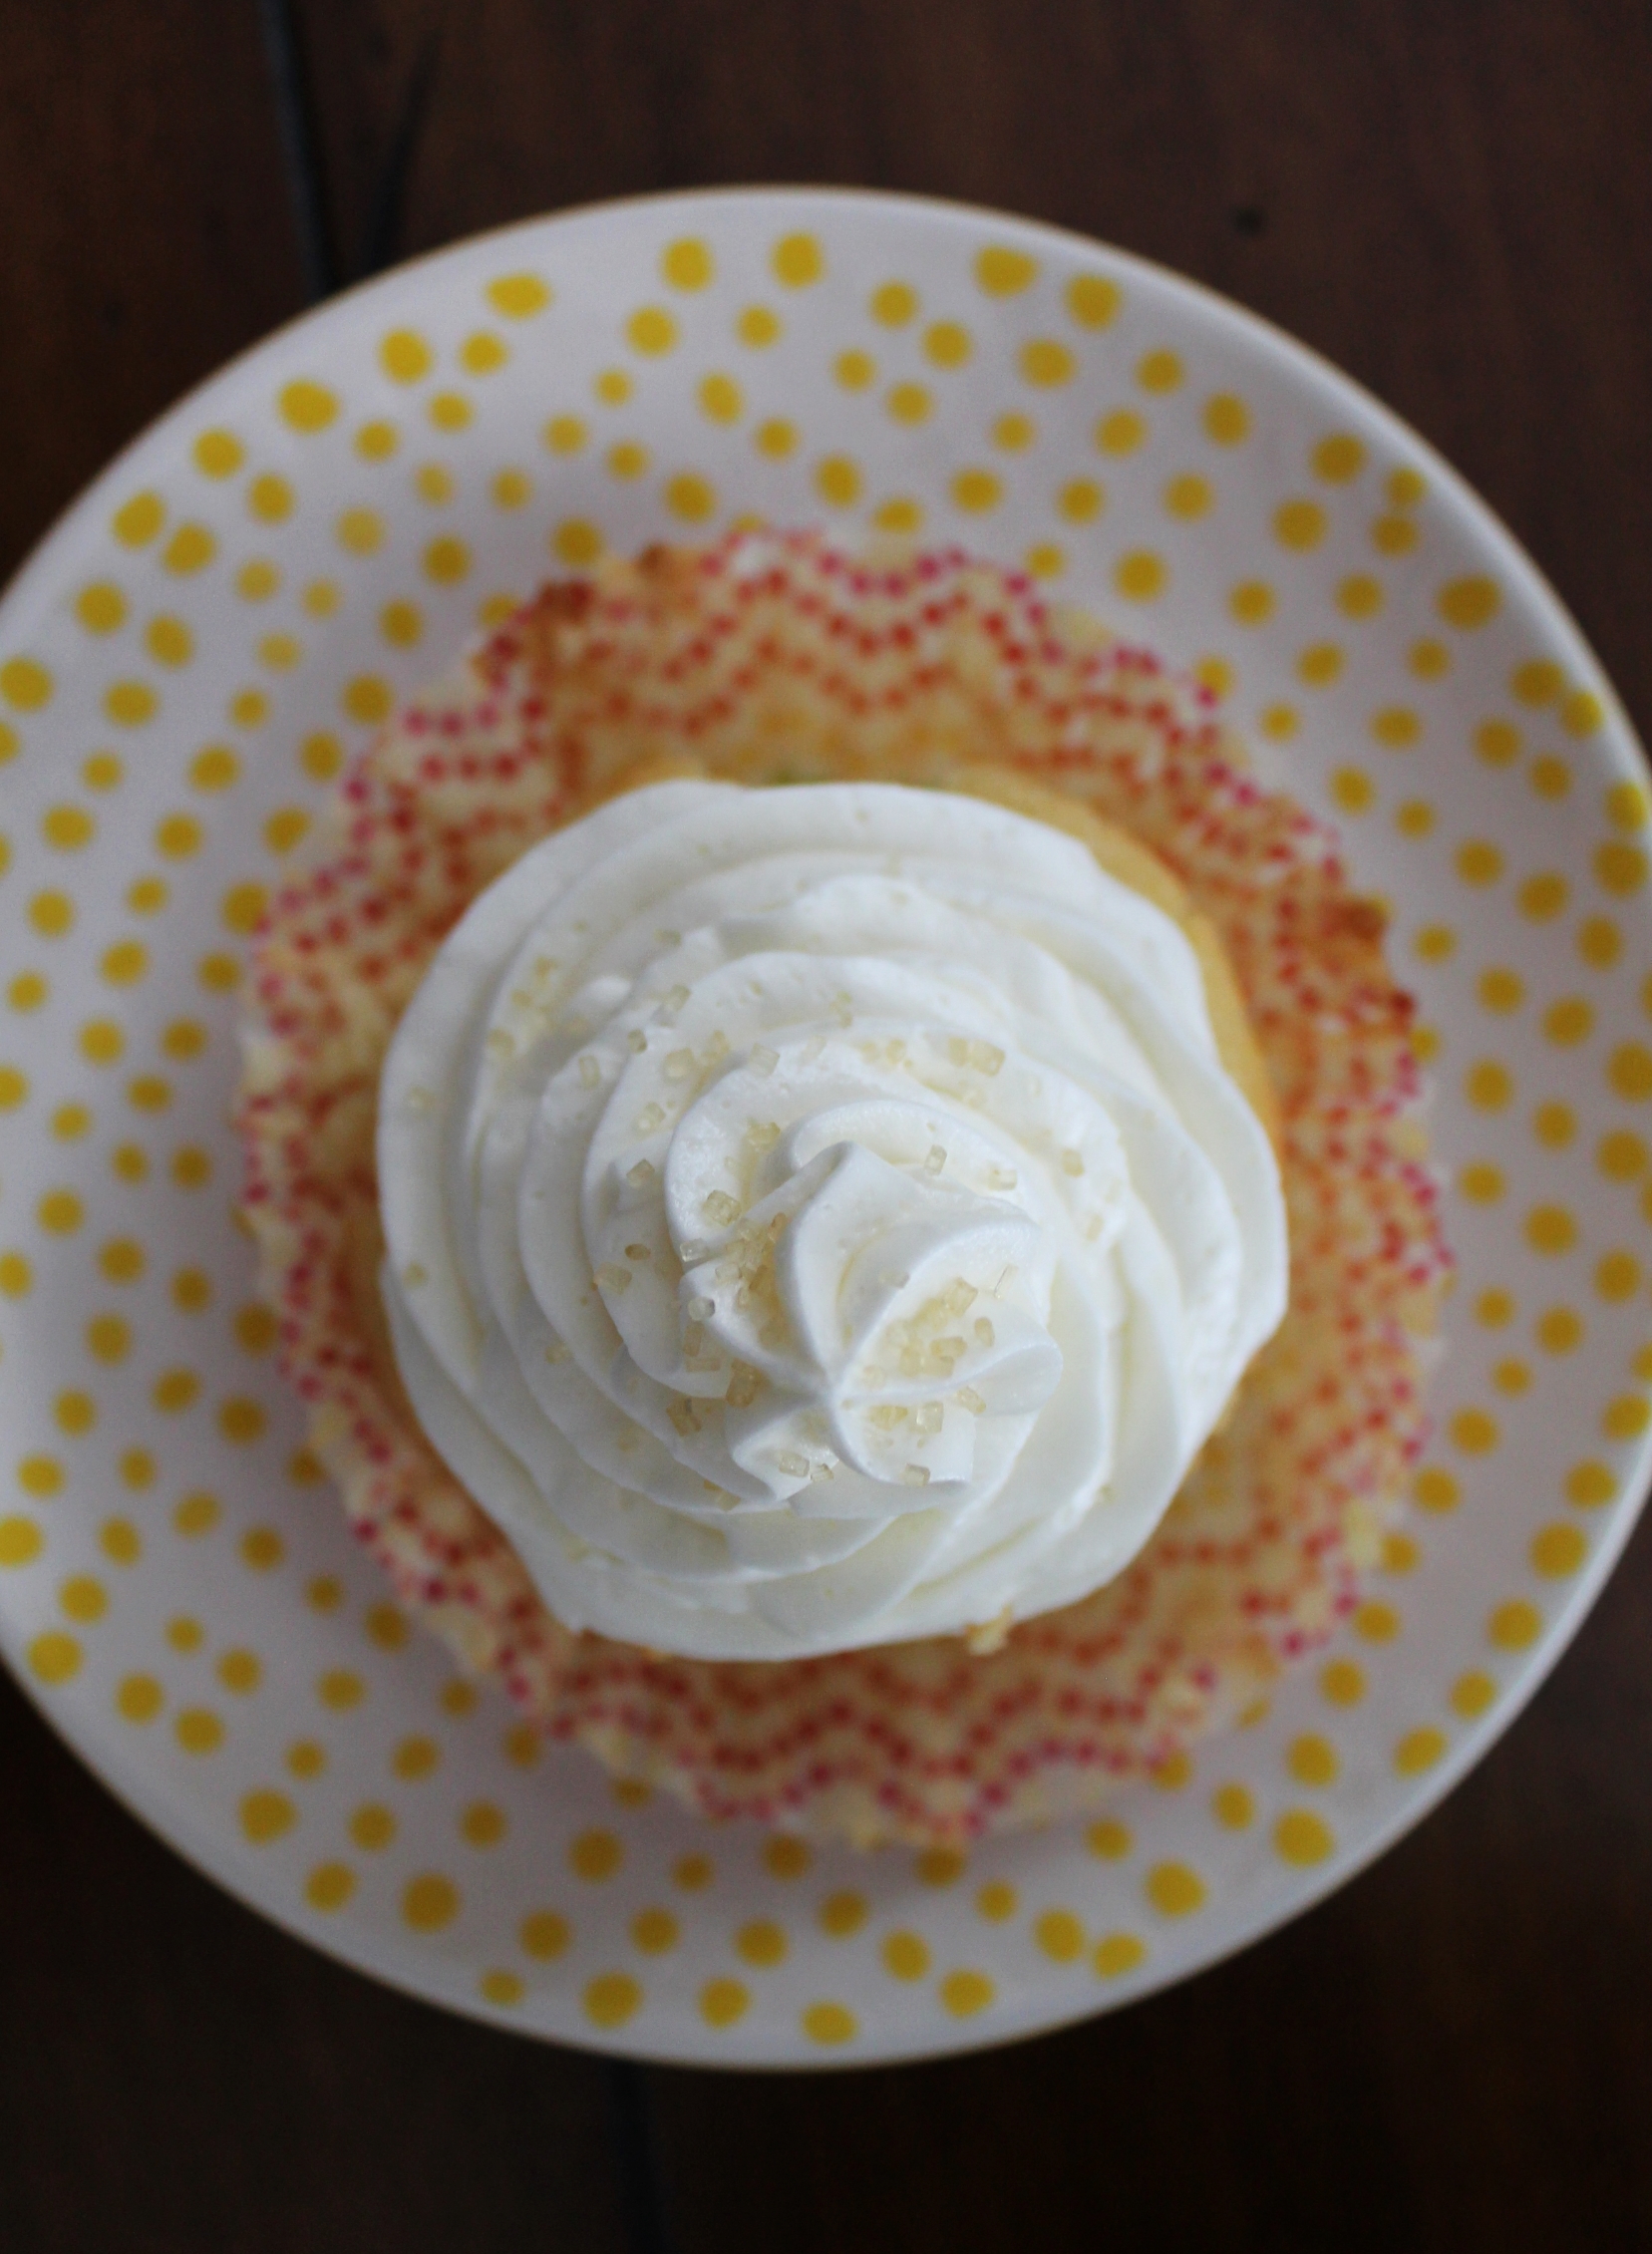
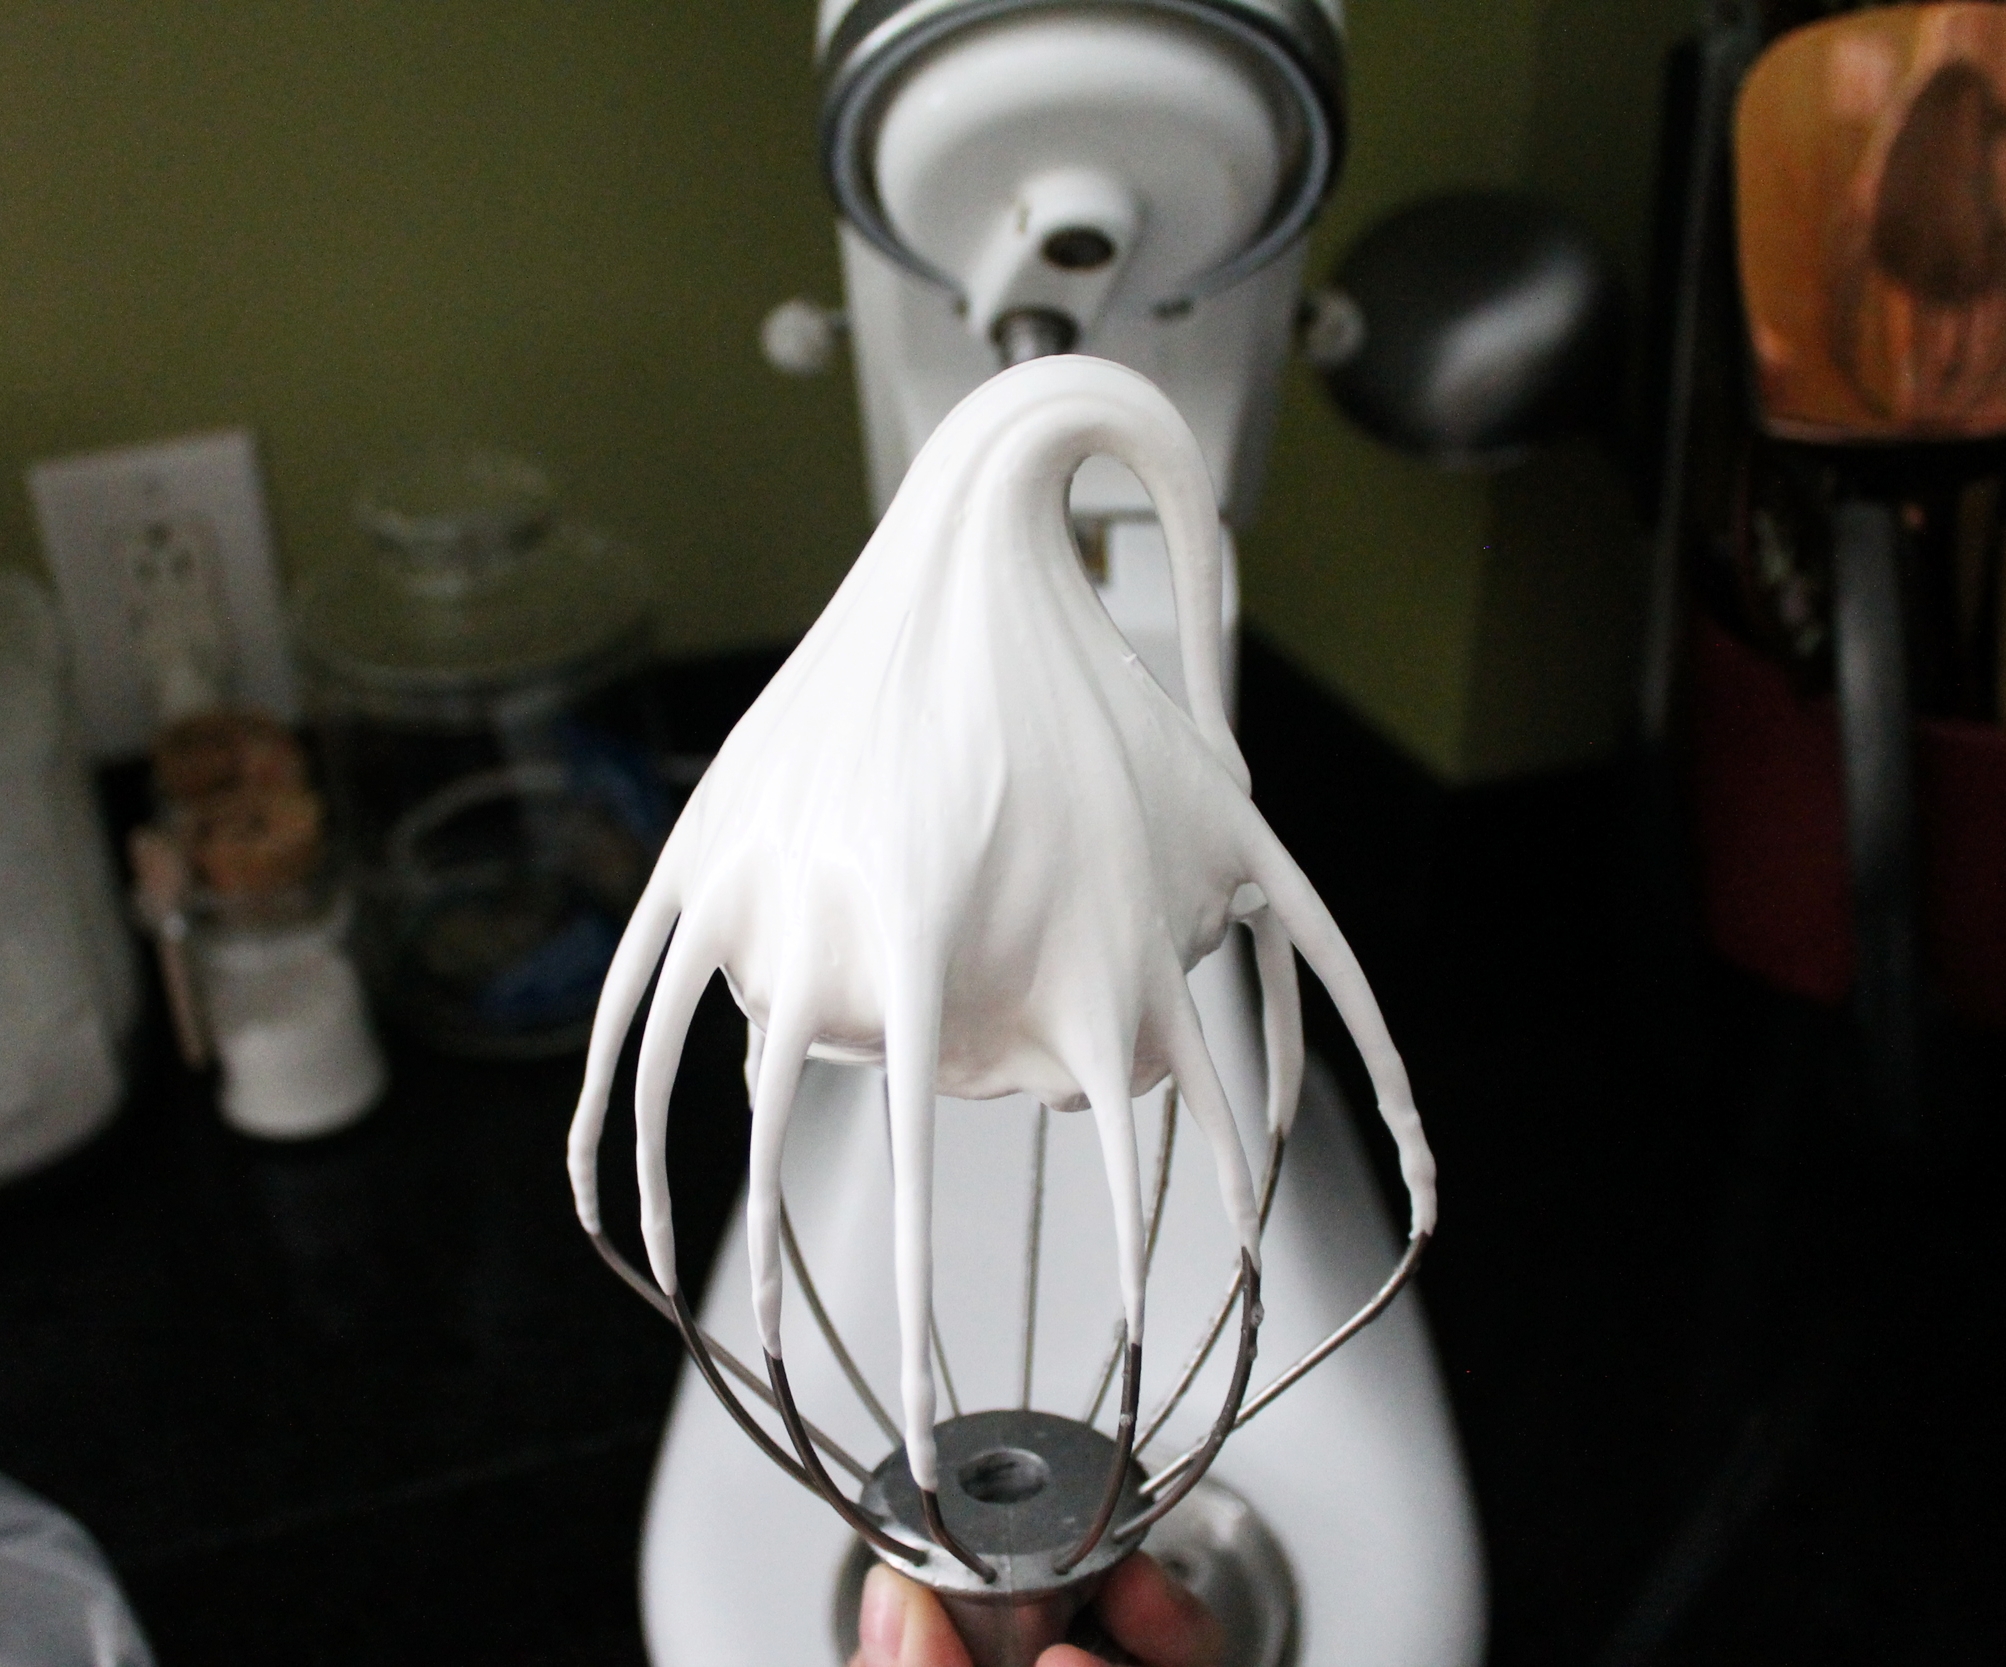
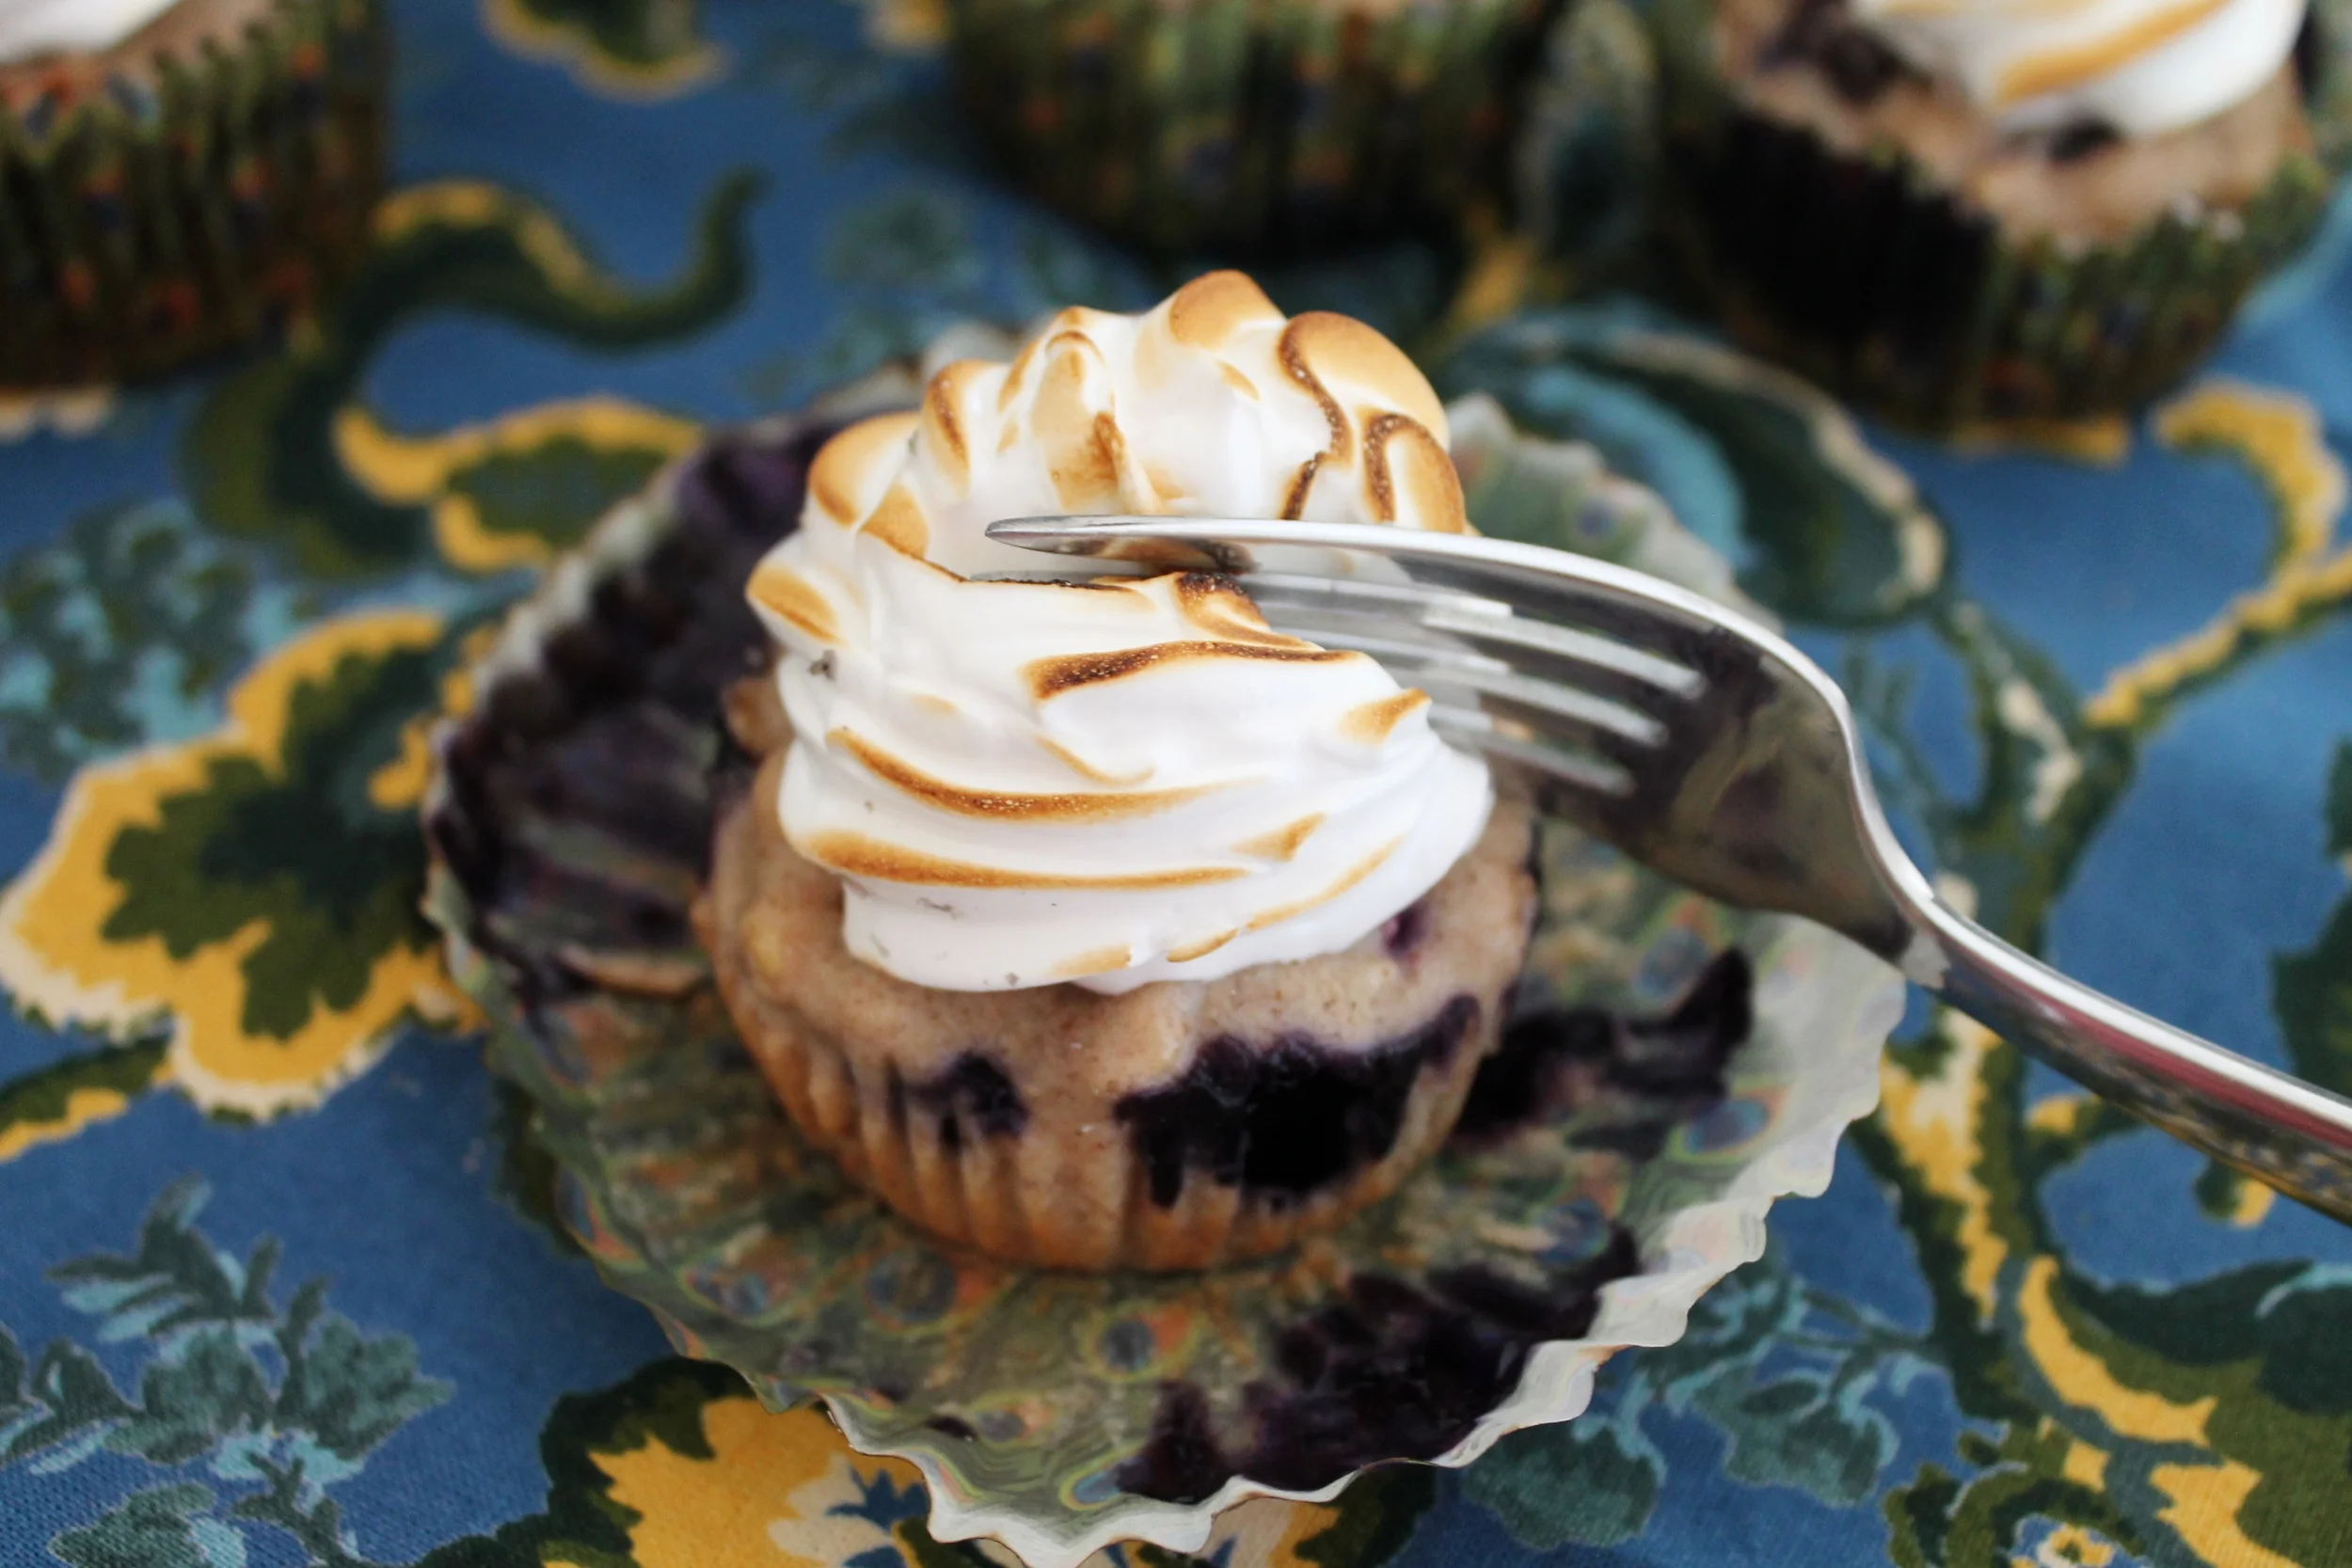
ANYWAYS! That there is the inspiration for these moist, berry-filled cakes I’ve made for you. There is just something so satisfying about homegrown produce, and when you can bake with it, I mean, that is the ultimate! Oh wait, then I added some meringue on top—even torched it with my brand new flame! This has been on my “must have” list for like, a lifetime, and my friends were too kind to have gotten it for me!

And let me tell you, it does so much more than just torch meringue, it lights candles, it lights cupcake liners on fire, it makes fruit taste burnt, it’s just all-around fun!

When I stopped lighting nonsense on fire with my new torch, I actually toasted the meringue, and Oh. My. Gosh. Hi campfire on you gorgeous little blueberry cakes! If I hadn’t felt such a sugar high, I would have just torched ALL of the meringue and eaten it like that. The balance of the sugary meringue, the tart berries and the toastiness on top of it all—it’s one of the most perfect bites in my opinion!

I can’t get over it, clearly shown by all of my exclamation points in the last paragraph! And now!

Being at home, in Maine, means the ocean, the fresh air, the weird accents, bonfires, family, lots of dog snuggles, and, of course, fruit picking! Having a beautiful bowl of handpicked berries on the back patio on a cool summer morning is just beyond comforting and relaxing. While these cupcakes are not exactly that, it’s pretty damn close!—I give you yummy blueberries stuffed into cupcakes and topped with (way too much) toasted meringue!

It’s light, it’s happy, it’s summery, and it screams all things Katie! 

cake ingredients

Butter—2 oz, 4 TBL

Sugar—2.75 oz, or 1/3 C

Vanilla Extract—½ tsp

Eggs—2

Plain Yogurt—4 oz, or ½ C

Flour—5.5 oz, or 1 C

Oats—1 oz, or ¼ C

Baking Powder—½ tsp

Salt—½ tsp

Cinnamon—1 tsp

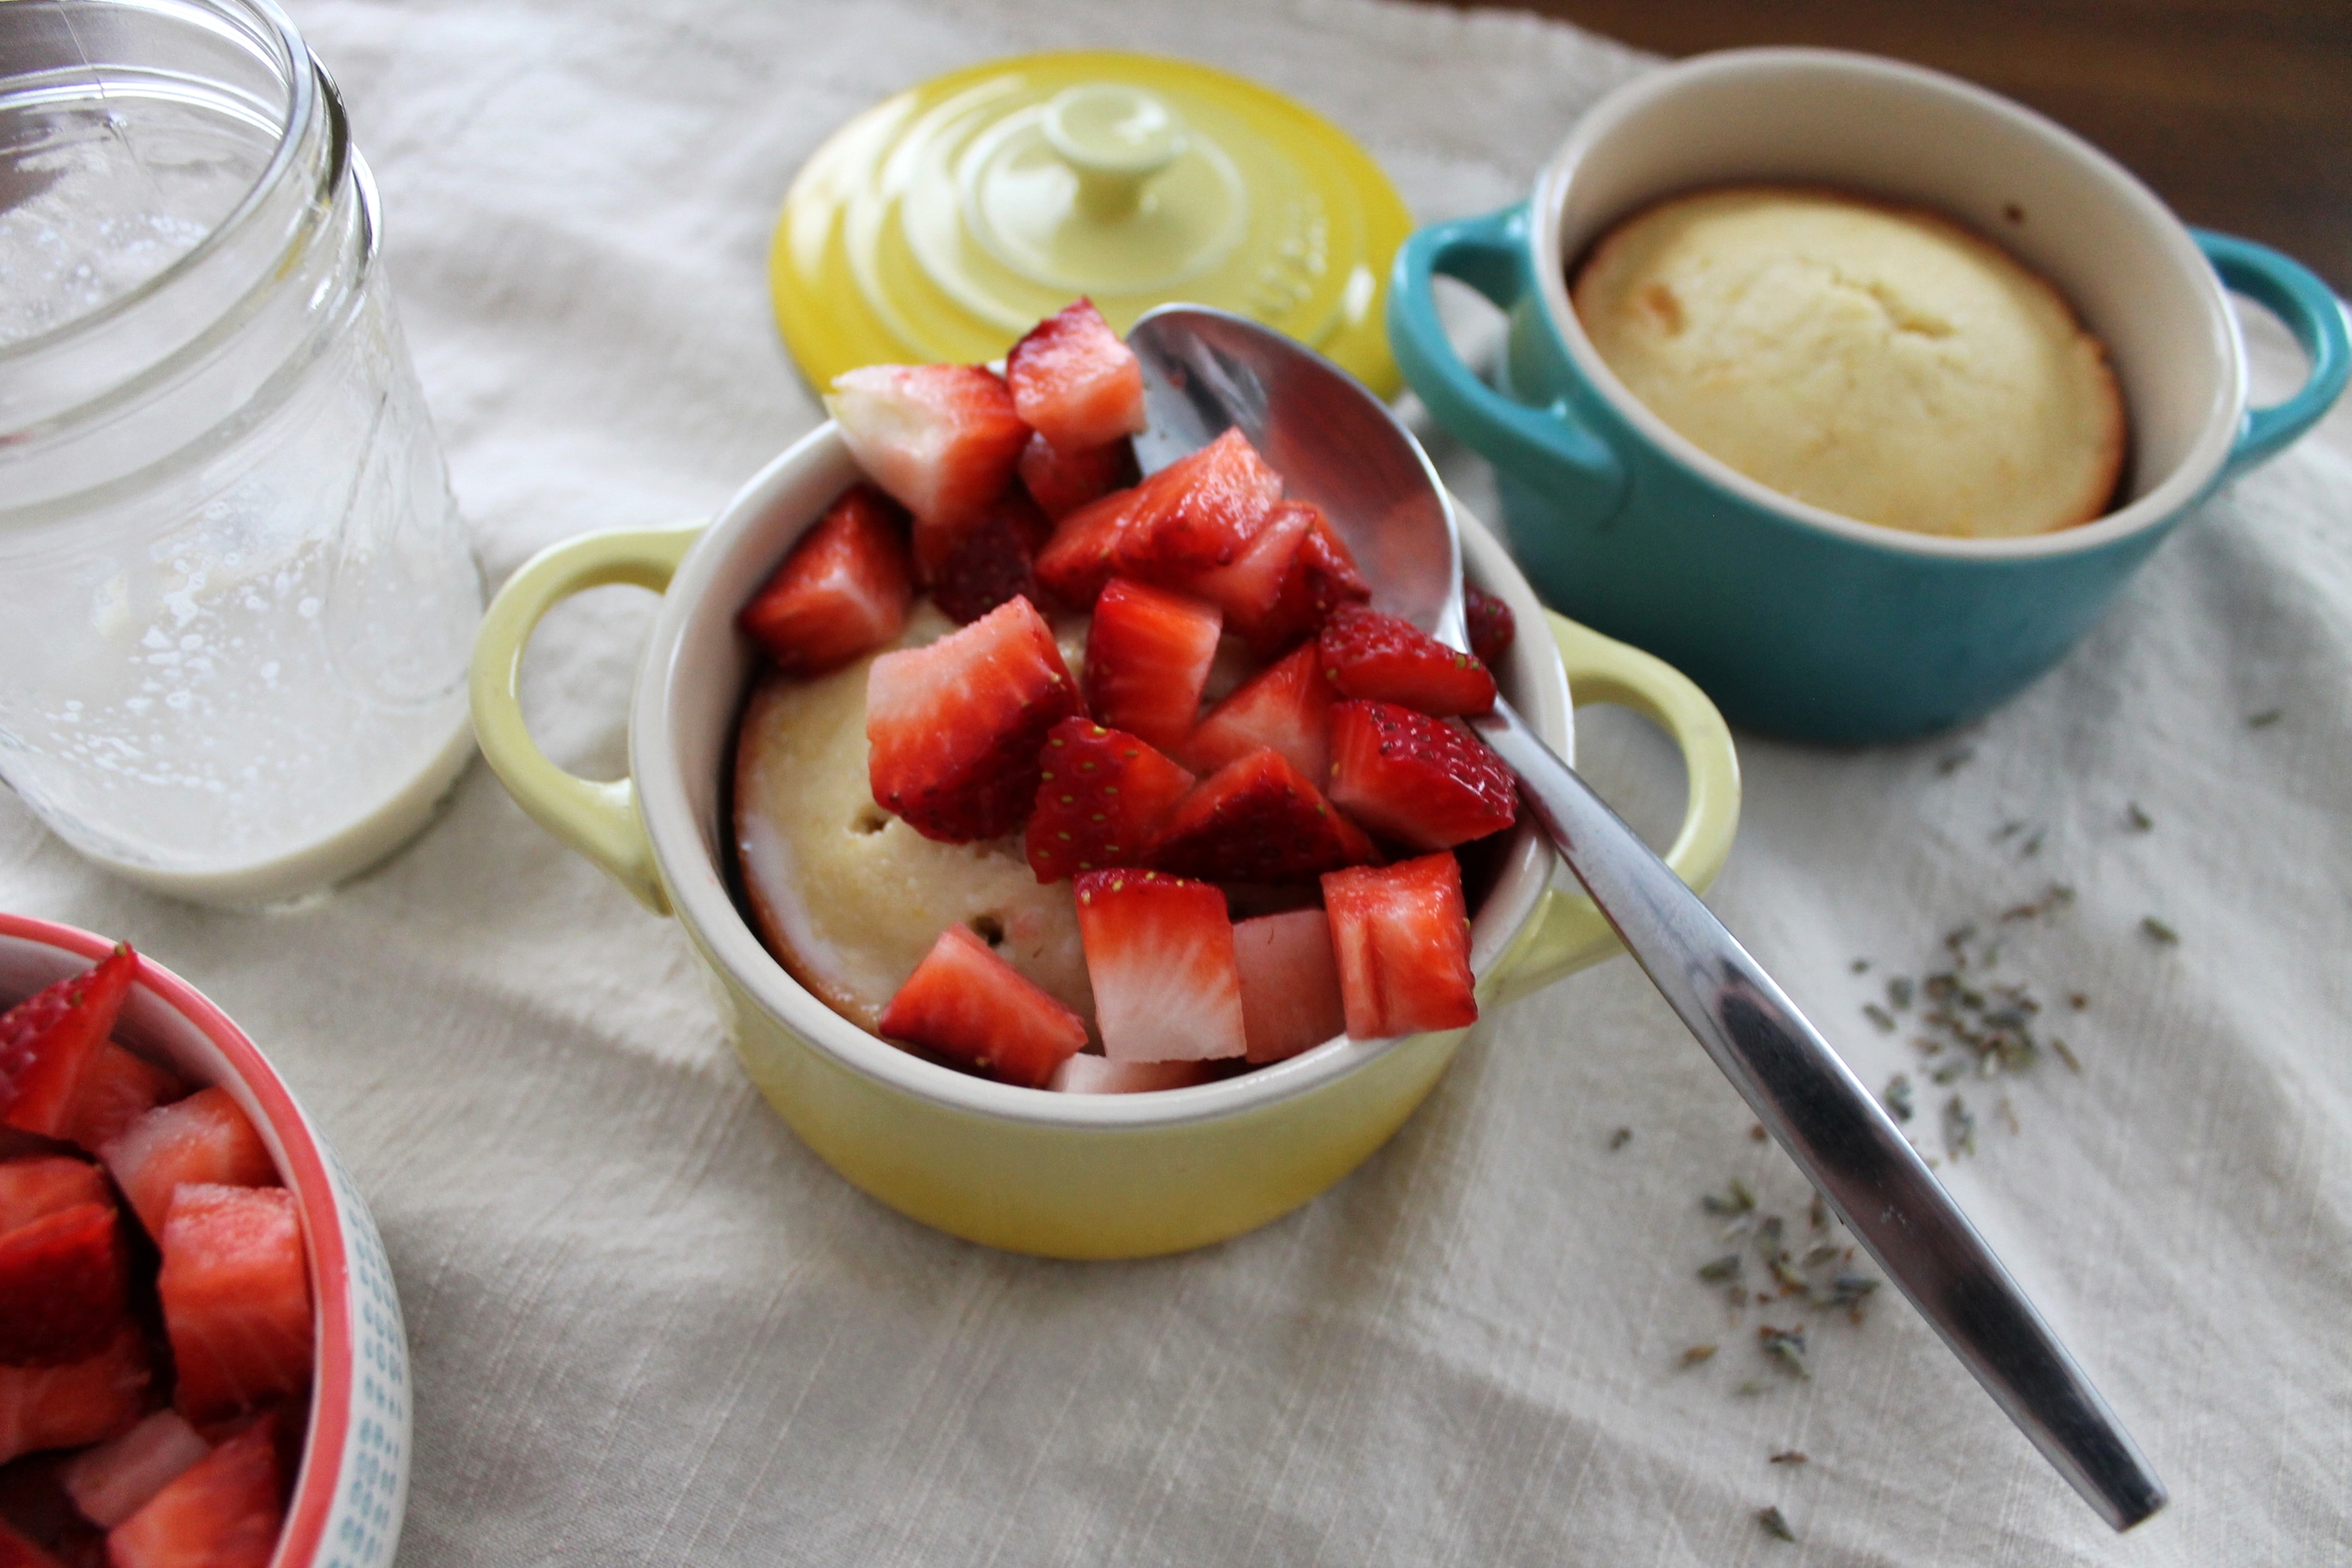
Blueberries—5 oz, or ~1 C


process

Preheat your oven to 350˚ F.

In a large bowl, combine the flour, oats, baking powder, salt and cinnamon.

In the bowl of your mixer, cream together the butter and sugar.

Once light and fluffy, add in the vanilla and eggs.

Scrape down the sides of the bowl.

Alternating between the yogurt (I prefer Greek!) and the dry ingredients, add about ½ of each at a time until you have finished both.

Fold in the blueberries.

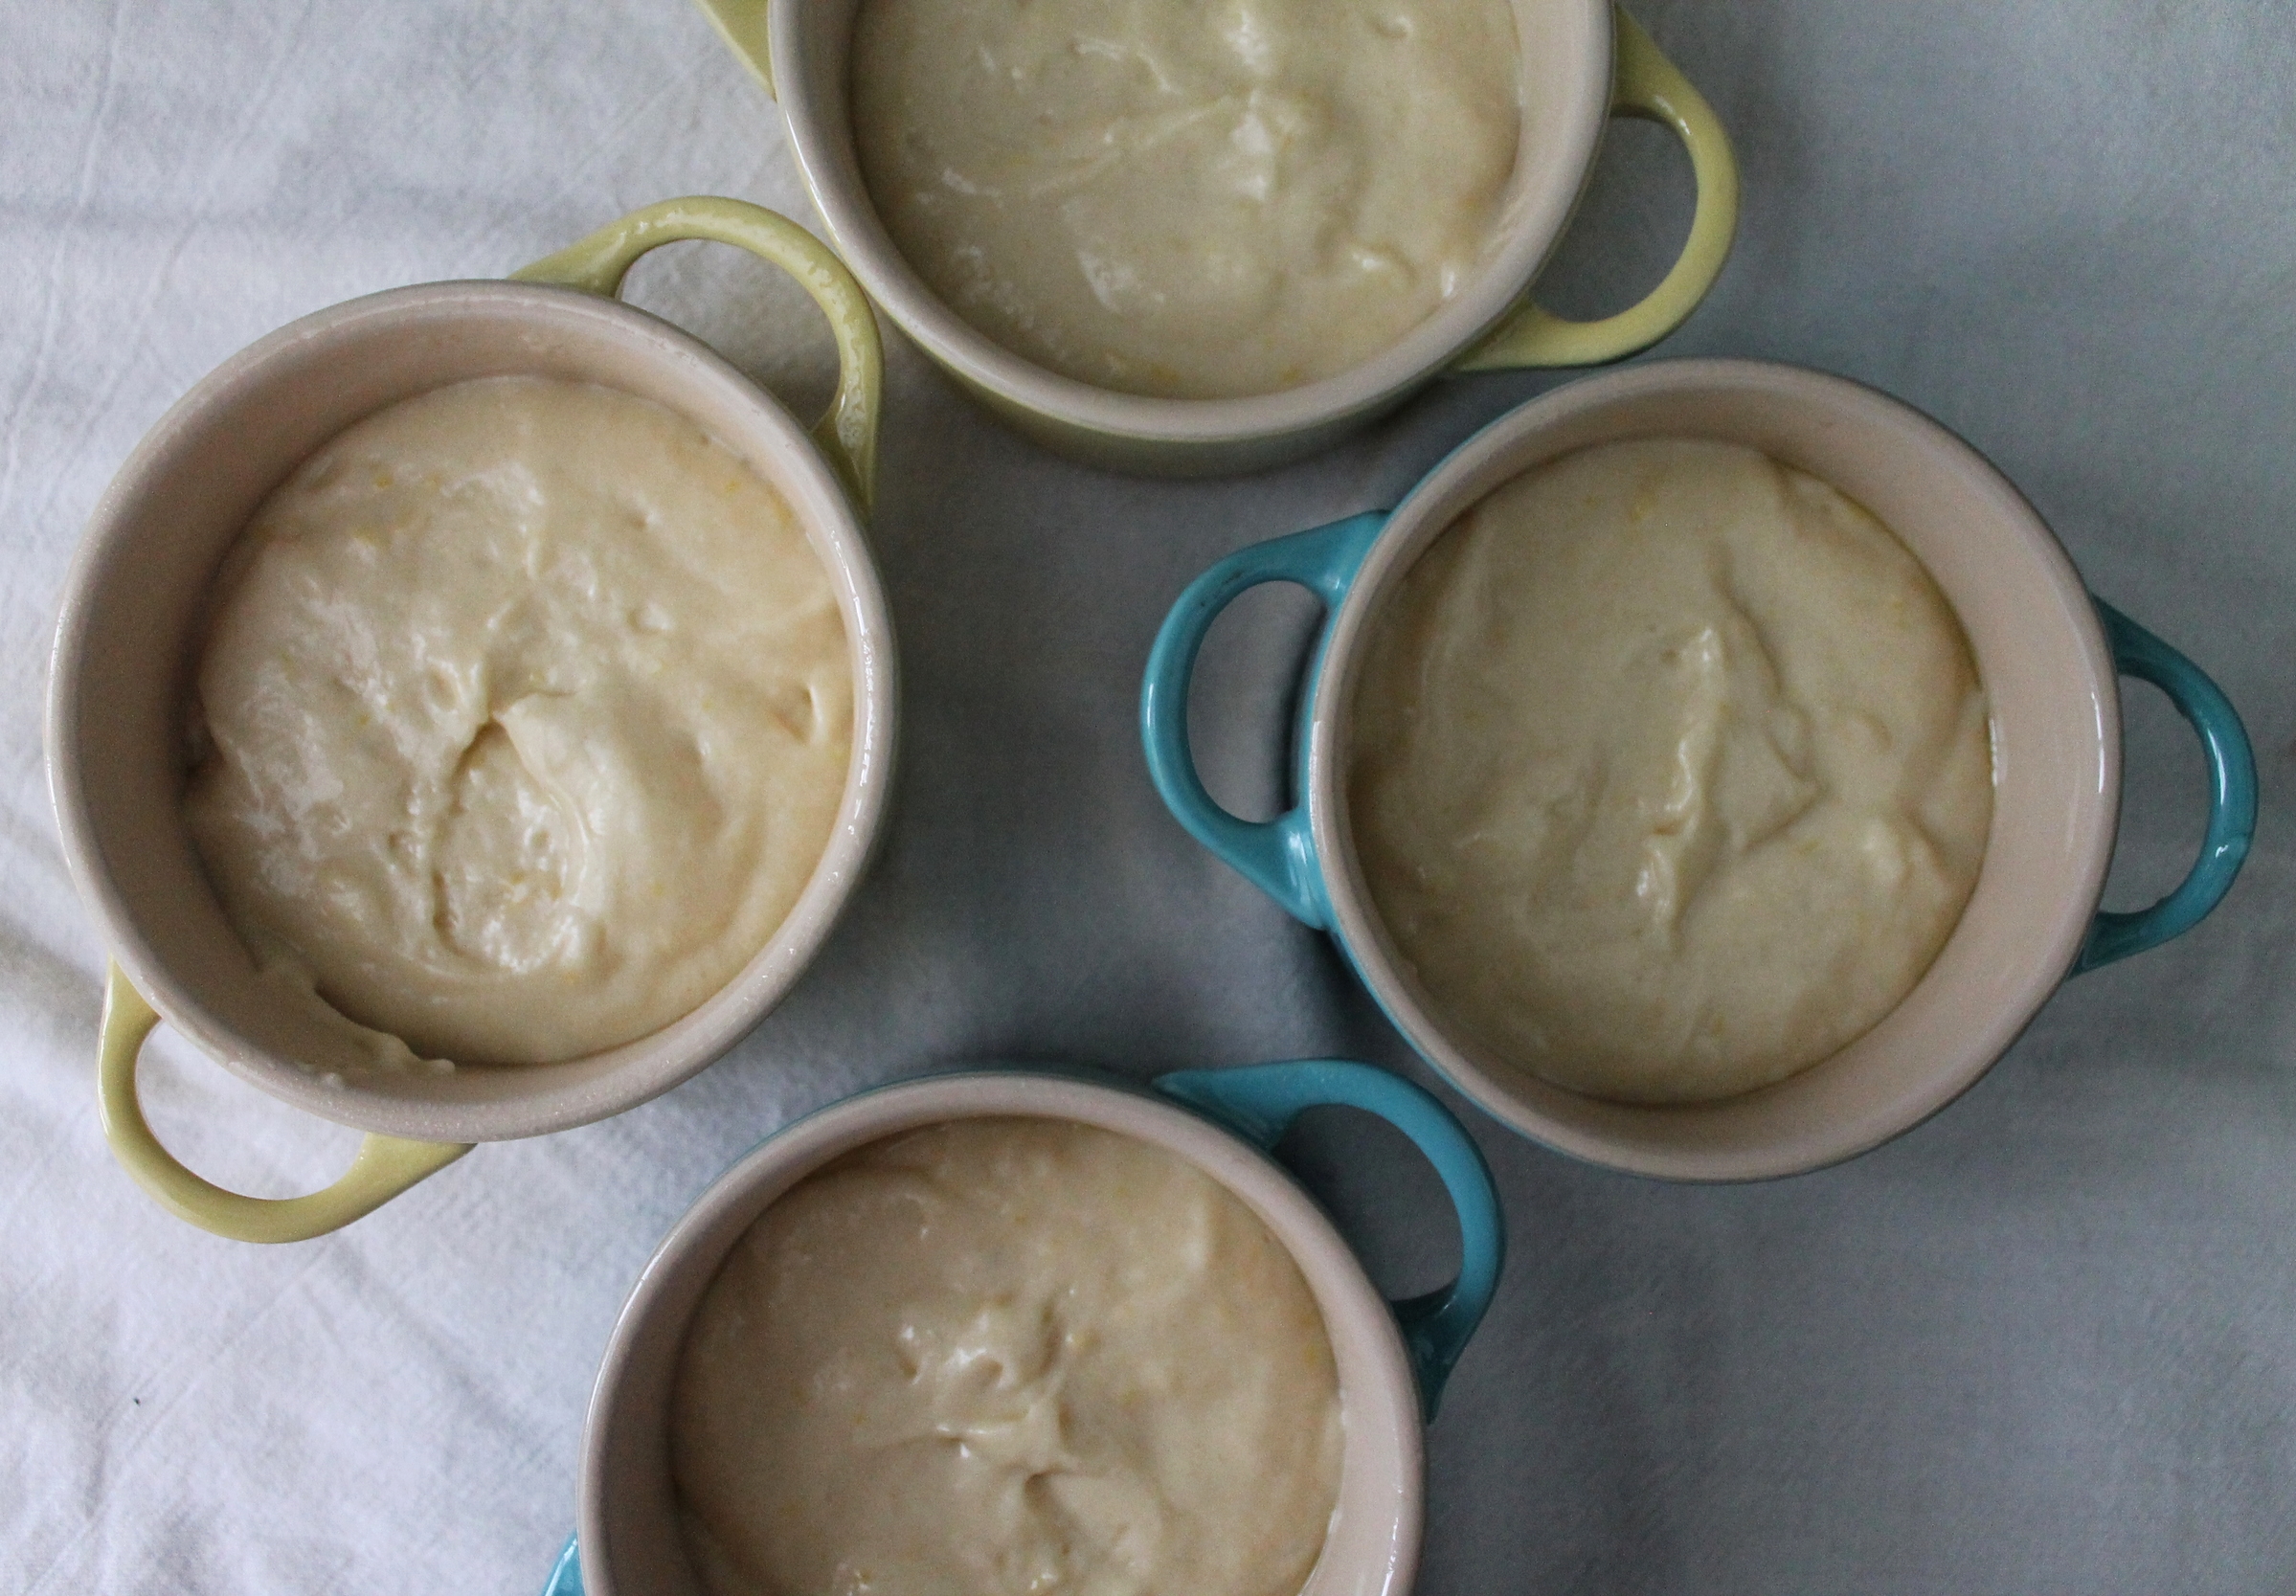
In a lined muffin pan, fill each cup up about halfway with the cake batter.

Bake in your preheated oven for 15-18 minutes, until the top springs back just slightly.

Allow to cool completely before putting the meringue on top!


For the meringue, it is this recipe here, but I halved it to use for this recipe (you can even quarter it if you’d like). Also, torching the meringue is, of course, optional, but if you have a cute little kitchen torch, I highly suggest using it—adds for a great toasty flavor!


Bon Appétit!

Graham Cracker Donut Ice Cream Sandwiches

Hello, my friends! I am back, and I am sorry! I haven’t posted for weeks, and I promise I have a sort of excuse, and I am giving you an insane recipe that may trump all ice cream sandwiches…ever…

So. Let’s see. Since I last posted, my brother visited me in WV, my fiancé came back from two too-long months away for work, we went to Germany for a week for a birthday party of a dear friend, and now I am back—about to head home to Maine for a week for even more fun festivities! Basically, the month of July is all about traveling and not staying in one place for too long, which I am loving because it’s just been amazing.

First off, Germany. Need I say more? We were in Munich and then a small town outside of the city for many celebrations. Oh, and guess what? My best friend is living in Munich for a couple of years, so hello to Luci-Katie time!!

Secondly, we are headed to Connecticut to see two of my incredible friends (who I met in WV, go figure!) tie the knot! I am so excited, like can’t contain my excitement, can’t wait to see my friend in a gold sequined dress, can’t wait to dance the night away with the two brides, kind of pumped. I’ve been counting down the days to this weekend in forever. Ugh. SO MUCH LOVE!

And last, but not least, I am then headed to beautiful little Maine for a week. This includes dress alteration #1, my bachelorette party, bridal shower, so much dog snuggles and friend cuddles…tell me how could this be any better?! Oh shoot, and beach time. Lots and lots of beach time—heart eye emoji here, please.

By the time I am back, it’ll be almost August and summer will have slipped away…ugh why did I have to make that so sad so quickly?!

Back to the happiness and sugar-high!

Okay, okay…so I made these ice cream sandwiches, right? But what is so mind-blowing about them to me is that they use graham cracker donuts. Like, this is basically a s’more, but with an ice cream center and two fluffy donuts to hold it altogether. Yeah, this girl is ALL about the campfires, bonfires, s’more fires…but with the heat clouding my thoughts, I needed something to cool me down some.

And boom—donuts + ice-cream = new obsession!

Yes, you can use whatever flavor ice cream you want, I chose peach because we just made it at work, and it just screams summertime in my opinion! Final touch? Drizzle on melted chocolate for an even messier, even tastier treat.

Yep…mouth salivating, going to walk to the freezer to get one right now...

So, while I may have been MIA for a couple of weeks, and will be going up and down the east coast quite a bit over the remainder of the month, I hope that you all can forgive me and make these ASAP! Trust me, this drippy mess is worth every sticky little bite!

ingredients

Flour—5.5 oz, or 1 C + 1TBL

Graham Cracker Crumbs—1.75 oz, or 1/3 C

Brown Sugar—4 oz, or ½ C

Baking Soda—¾ tsp

Salt—½ tsp

Eggs—1

Milk—4 oz, or ½ C

Vanilla Extract—1 tsp

Butter, melted—2 oz, or 4 TBL


process

Preheat your oven to 375˚ F.

In a bowl, combine the flour, crumbs, brown sugar, baking soda and salt.

In another bowl, mix together the egg, milk and vanilla.

Add the wet ingredients into the dry. Mix until almost combined.

Add in the melted butter.

Mix.

Pour your donut batter into either a piping bag or a large sealable baggie.

Spray your donut pan with nonstick spray.

Fill each section about ½ - ¾ full of batter.

Bake in your preheated oven for 8 minutes, until the donut springs back when touched.

Allow to cool before assembling ice cream sandwiches.


assembly

Once your donuts have cooled, it’s time to fill them!

For this recipe, I used homemade peach ice cream that I had made at work, but any and all flavors will work!

Take one generous scoop of ice cream and put it in the center of your donut.

Gently press down with either a spoon or an offset spatula.

Place another donut on top, press firmly to hold in place.

Now you may either wrap in plastic wrap and put in the freezer, or cover the ouside with more graham cracker crumbs and sprinkles, and then freeze!—clearly the second option is the route I took.

While the ice cream sandwiches are firming up, melt some chocolate over a double boiler.

Drizzle over the ice cream sandwiches, and now it’s time to eat!


Bon Appétit!

Raspberry Rosé Cake

You know how they say that you shouldn’t go to the grocery store hungry, because then you’re just going to buy all of the bad food? WELL! That’s sorta, kinda how this recipe stumbled into my head…

I was, as always, craving cake, but then also the day was pretty spectacular—the warmth of the summer sun was upon my skin, the sound of birds chirping was all over, the flowers were blooming gorgeously, and people were just happy. It’s days like these that no matter what, I can’t be brought down—and then I thought why not add a little rosé wine into the mix?!

And so I did.

I went to the store and bought too many bottles for a little taste-testing afternoon. No regrets!

…Except maybe the fact that I have been missing out for a whiiilllle. Like, can someone please tell me why I’ve never been a rosé drinker? Because I sure can’t! I’m a true Riesling gal in the warm months, I can’t get enough of it—but this cake has led me rethink my summer beverage choices. The crispness, slight sweetness, with just the hint of a red wine, there are no bad qualities to this wine!! Well, maybe the fact that I drank an entire bottle while perfecting the recipe—hey, what can you do!?

So, along with the glorious addition of wine to this recipe, fresh fruit also shows its face. Like, hellooooo juicy and luscious raspberries. Gosh, I am so obsessed with this season and all of the beauty it produces, fruit will be making many, many appearances over the next few months for sure! Et voila my friends, a masterpiece was created, and just in time for the true start of the summer—Memorial Day Weekend!

Yes, a barbeque, a big fruit salad, some cold beers, that may be your go to, but I promise that this cake will 1. Be a huge hit, 2. Fill up those alcohol filled tummies and 3. Get people to switch to an ice-cold glass of rosé…quite a classy BBQ if I do say so myself!

Oh, and did I mention that I soak the raspberries in the wine as well?! You’re welcome.

…And now we are at the end of this nice long rant about my newfound love for pretty pink wine. So see, my hunger made me want cake, which made me step out into the beautiful sunshine to pick up some fresh fruit, then some rosé, and then I made a beautiful, Welcome Summer cake. Not all cravings are bad, and I sure hope that this one satisfies yours!

cake ingredients

Butter, room temperature—4 oz, or 8 TBL

Sugar—8 oz, or 1 C

Eggs—2

Vanilla—2 tsp

Flour—12 oz, or 2 C

Baking Powder—2 ½ tsp

Salt—½ tsp

Milk—4oz, or ½ C

Lemon Juice—3.5 oz, or ½ C

Lemon Zest—2 medium


process

Preheat your oven to 350˚ F.

In the bowl of your mixer, cream the butter and sugar.

Once light and fluffy, add in the eggs and vanilla. Scrape.

In a separate bowl, sift together the flour, baking powder and salt.

Alternating between the sifted ingredients and the milk/lemon juice, slowly add to the mixer in 4-5 increments.

Add in the zest.

Once you have all of the ingredients combined and mixed together, pour into 2-6” cake pans that have been sprayed with nonstick spray and lined with parchment or a light dusting of flour.

Bake the cakes for 35-40 minutes, until the top springs back slightly when touched.

*Note: if you do not have 2-6” cake pans, cut the recipe in half and just make in two separate batches!*

Allow to cool completely before building your cake


buttercream ingredients

Butter, room temperature—12 oz, or 1 ½ C/3 sticks

Confectioner’s Sugar—18 oz, or 4 C

Vanilla—1 tsp

Rosé Wine—2 oz, or 4 TBL


process

In the bowl of your mixer, cream the butter until very, very smooth.

In a separate bowl, sift the confectioner’s sugar, and then slowly add to the creamed butter.

When all smooth and incorporated, add in the vanilla, and then slowly stream in the rosé.

Optional—if you want a light pink color, add in just the smallest drop of red food coloring!

Turn the mixer up to high and whip the buttercream for about a minute, this will make it light, fluffy, and easy to apply to the cake!


filling ingredients

Raspberries—6 oz, or ~1C

Rosé—2 oz, or 4 TBL


process

In a small bowl, combine the berries and the wine.

Smash a little bit with the back of a spoon, and allow to marinate just slightly before putting them in between your two cake layers.


assembly

Once both of your cake layers have cooled completely, trim off the tops of each of the cakes so that they are flat in both sides.

Place one cake layer on either a plate or a turntable, whatever you are going to decorate on.

Fill either a piping bag, or a plastic baggie that seals shut, with the buttercream; make a moat around the outside edge of your cake, about ½” thick—this will help make sure that your cake is level, and the filling will not ooze out of the cake.

Take a dollop of buttercream and spread evenly inside of the moat you just made.

Slightly strain the wine soaked raspberries, and add on top of the buttercream.

Place your second layer of cake on top of the first, making sure to press just slightly.

Take another big spatula-full of buttercream and place on the top of your cake, smoothing it out.

Now, some of that will go over the sides, which is great, and you can just use it to cover the sides of your cake as well.

Once you have finished and are satisfied, you make decorate however you would like—naturally I went for the star sprinkles—and take a nice big piece to enjoy.


Bon Appétit!

Spicy Pineapple Margarita Cupcakes

How are we at Cinco de Mayo again already?! Wasn’t I just making that Mexican Hot Chocolate Cake?! While I am not complaining—the quicker the days go by, the sooner I get to marry the handsome man in my life!—it’s just hard to believe May is here already.

These unreal and unbelievably tasty cupcakes were inspired by one of my most wonderful of friends…all because we love our margaritas, and she sure loves hers spicy.

So, there’s this little restaurant in downtown Charleston, Black Sheep, and they have all things we seem to love the most. Chips, salsa, guacamole, beer, and, most importantly, margaritas! Their margs are the size of my head (almost!) and only $4.50 during Happy Hour…2 being my limit. I am a house margarita kind of gal, but my food and drink enthusiast friend, Elena, gets the Spicy Pineapple Margarita, extra spicy, please. She tells them exactly how she wants it each time, the hotter the better, and won’t take it any other way!

This all started last year when the weather began to get toasty a little earlier than we thought, so patio happy hour it was—time to vent, get sort of sun burnt, and each pick out, without knowing, what would be our go-to drink in the many months to come.

Now, here we are, over a year later, too many margaritas down to say, and we are all moving in the next handful of months to places far too far from one another—yes, tears all around, my friends!

So, to highlight an amazing friend, and a holiday that I will forever love, I made these salty, spicy, sweet little cakes! Moist pineapple cupcake, check! Tart and spicy jalapeño lime curd, absolutely! And what is better than some sweet tequila buttercream? Nothing if you ask me! Naturally, you top these drinks-in-cake-form with a little bit of salt or sugar, and there you have it. Whether throwing a little 5th of May fiesta, lounging on your porch, or wishing safe travels to one of your nearest and dearest friends, there’s hardly a better addition to the party than these Spicy Margarita Cupcakes!

cake ingredients

Butter, room temperature—2 oz, or 4 TBL/½ C

Sugar—4 oz, or ½ C

Eggs—1

Vanilla—1 tsp

Flour—6 oz, or 1 C

Baking Powder—1 ¼ tsp

Salt—½ tsp

Milk—2 oz, or ¼ C

Pineapple Chunks—3 oz, or ½ C


process

Preheat your oven to 350˚ F.

In the bowl of your mixer, cream together the butter and sugar.

Add in the egg and vanilla, making sure to scrape down the sides of the bowl.

Sift together the flour, baking powder and salt.

Combine the milk and pineapple chunks—blend them together.

*Note: if you do not have a blender, chopping the pineapple into tiny pieces will be just fine!*

Alternate adding some of the dry ingredients with the pineapple milk until all is added.

Line a cupcake tin with liners and fill each one up about ¾ of the way.

Bake in your preheated oven for 20-22 minutes, until the cake springs back when touched.

Allow to cool completely before cutting out the middles to fill with curd.


curd ingredients

Lime Juice—3 oz, or ½ C

Egg Yolks—3

Sugar—4 oz, or ½ C

Butter—2 oz, or 4 TBL

Salt—1 tsp

Jalapeño—½, split with seeds


process

In a small saucepan, combine the lime juice, sugar, butter, salt and chopped jalapeño.

Put the egg yolks in another bowl large enough to temper into.

Bring the lime juice mixture to a boil.

Once boil, slowly temper it into the egg yolks—doing this by constantly whisking the yolks and slowly streaming in the boiling liquid, maybe sure not to cook the eggs.

Transfer everything back into the small saucepot and bring to a second boil, constantly whisking.

When it comes to a second boil, strain the curd (catching the jalapeño) into a heatproof container, covering very tightly on the curd with plastic wrap so that no film will form.

Refrigerate until you are ready to use.

To use—cut out the centers of the cupcakes and put about 1 tsp of curd (or however much to fill it) in the centers, and then top with the buttercream.


buttercream ingredients

Butter, room temperature—4 oz, or 1 stick

Confectioner’s Sugar—9 oz, or 1 ¾ C

Tequila—1 oz, or 2 TBL


process

In the bowl of your mixer, cream the butter until smooth.

Slowly add in the sifted confectioner’s sugar.

Once all is added, scrape down the sides of your bowl.

Stream in the tequila.

Turn the mixer up to high so that the buttercream becomes nicely whipped and white.

Pipe onto your cupcakes!—I use a star tip, but any can be used or you can smear it on with a spatula.

Sprinkle the top with either some salt or sugar for added flavor and texture!


Bon Appétit!

Lemon Honey Poke Cake with Lavender Cream

April showers bring May flowers, right? Well with all of this rain that we are experiencing in Charleston right now, there better be a dang field of flowers growing all over this entire city once May hits! Yes, I love the rain, I love the smell, I love how peaceful it can be if you happen to be walking in the rain—with a parapluie of course—I am all about the rain, don’t get me wrong! Yet this kind of rain isn’t the cute kind, isn’t the let’s go dancing in it and splash in puddles and be adorable, it’s the aw shoot. We are about to get some slight flooding, some really drenched lawns, and I’ll definitely be getting splashed walking to work—that kind of rain.

So, my ever so sweet baking friends, I have decided to play a little bit of pretend!

Don’t worry, I realize that I am almost 26, but this is the acceptable kind of make believe.

While making this recipe, I turned on some good ol’ Edith Piaf and pretended it was springtime in Paris; just another reason that rain can be absolutely gorgeous and romantic. I then began to daydream about this time last year, when I was actually in Paris, having my fair share of Champagne and people watching, which is probably one of my best talents…

…Okay, back to reality! Yes I love rain, I love France, I love springtime, and what do all of those add up to? Me craving lavender. Lots and lots of lavender. And voilá, I give you a cake that is soaked in lavender! Of course, mes amies, you read that right, and it’s every bit delicieuse as it sounds. I made these little cakes, well, petits! In my opinion, single serving, and when you drench the lemon honey cakes in lavender infused cream, I mean, need I say more?!

Oh and remember why rain is so magnifique?! This cake was born during a terrible rain storm, yet filled with the most love and happiness and lavender!

Here you have it, my April showers please bring May all of the flowers poke cake—poking being what you must do to the cake in order to create some nice little homes for the lavender cream to seep into! As I listen to the rain come crashing down outside, my ears are filled with a little bit of “…je ne regrette rien…” and my tummy is stuffed full of a yummy, light little cake!

cake ingredients

Butter—2 oz, or ¼ C

Sugar—3 oz, or ¼ C + 2 TBL

Honey—1 oz, or2TBL

Eggs—1

Flour—6 oz, or 1 C

Baking Powder—1 tsp

Salt—¼ tsp

Lemon Zest—1 lemon

Lemon Juice—1.5 oz, or 3 TBL

Milk—4 oz, or ½ C


process

Preheat your oven to 350˚ F.

In the bowl of your mixer, cream together the butter, sugar and honey.

Add in the egg, making sure to scrape down the sides of the bowl well.

In a separate bowl, sift together the flour, baking powder and salt.

Add the lemon zest to the dry ingredients.

Alternating between the milk and dry, add to the mixer, while on low speed.

When you have finished, add in the lemon juice.

Scrape down the bowl one final time to make sure that everything is combined.

Spray 4-4” can pans, I used our Le Creuset mini cocottes for this, with nonstick spray.

*Note: if you would rather use a larger 6” or 8” cake pan and just make one big cake, that would be equally as delicious! Make sure to bump up bake time.*

Fill each one up halfway.

Bake in your preheated oven for 30 minutes, until the top springs back when touched and the cake is a light golden color.

Allow to cool completely before adding in the Lavender Cream!


lavender cream ingredients

Whole Milk—4 oz, or ½ C

Dried Lavender Buds—2 TBL


process

In a small saucepot, combine the milk and lavender; bring to a boil.

Once at a full boil, turn off the heat and cover the pot.

Allow to steep for 10-15 minutes.

Strain the lavender buds, keeping the milk.

When you are ready to use for your cakes, poke little holes all over the cake for the cream to soak into.

Pour a few spoonfuls all over your holey cake and let sit about 1 minute.

Top with fresh fruit (Strawberries work wonders!), whipped cream, or nice and simple by itself, and enjoy!


Bon Appétit!