Graham Cracker Donut Ice Cream Sandwiches

Hello, my friends! I am back, and I am sorry! I haven’t posted for weeks, and I promise I have a sort of excuse, and I am giving you an insane recipe that may trump all ice cream sandwiches…ever…

So. Let’s see. Since I last posted, my brother visited me in WV, my fiancé came back from two too-long months away for work, we went to Germany for a week for a birthday party of a dear friend, and now I am back—about to head home to Maine for a week for even more fun festivities! Basically, the month of July is all about traveling and not staying in one place for too long, which I am loving because it’s just been amazing.

First off, Germany. Need I say more? We were in Munich and then a small town outside of the city for many celebrations. Oh, and guess what? My best friend is living in Munich for a couple of years, so hello to Luci-Katie time!!

Secondly, we are headed to Connecticut to see two of my incredible friends (who I met in WV, go figure!) tie the knot! I am so excited, like can’t contain my excitement, can’t wait to see my friend in a gold sequined dress, can’t wait to dance the night away with the two brides, kind of pumped. I’ve been counting down the days to this weekend in forever. Ugh. SO MUCH LOVE!

And last, but not least, I am then headed to beautiful little Maine for a week. This includes dress alteration #1, my bachelorette party, bridal shower, so much dog snuggles and friend cuddles…tell me how could this be any better?! Oh shoot, and beach time. Lots and lots of beach time—heart eye emoji here, please.

By the time I am back, it’ll be almost August and summer will have slipped away…ugh why did I have to make that so sad so quickly?!

Back to the happiness and sugar-high!

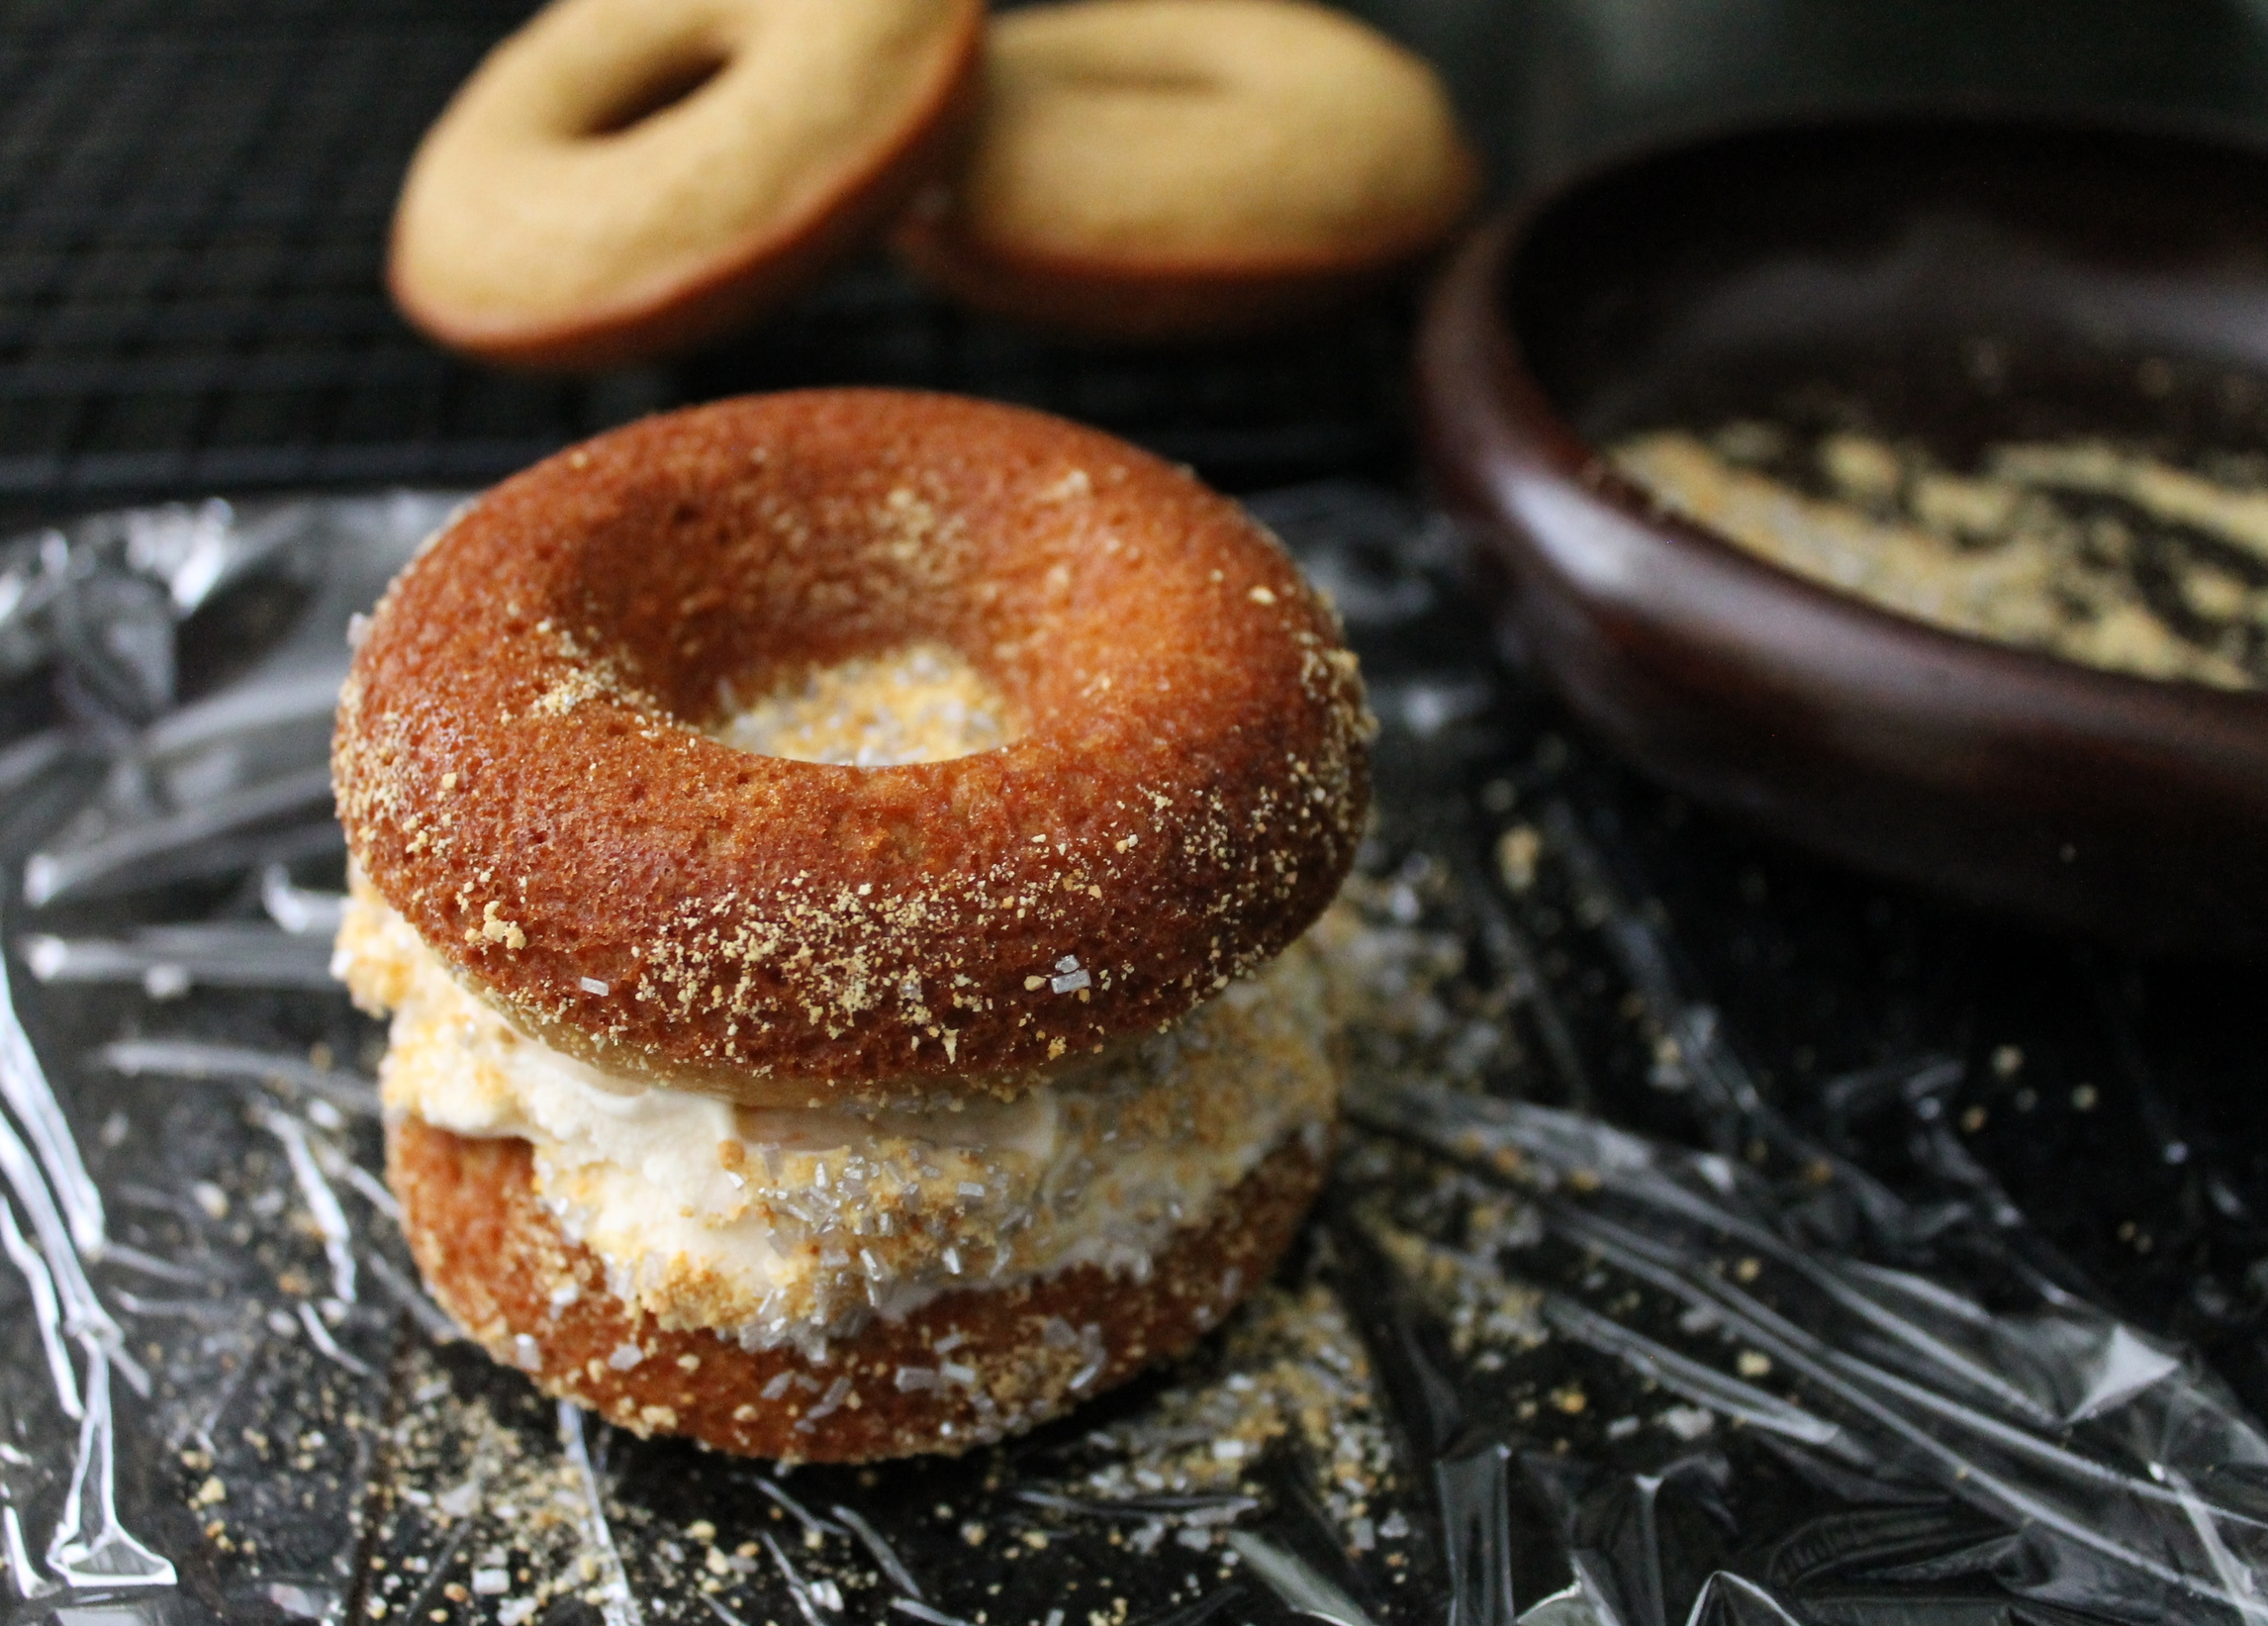
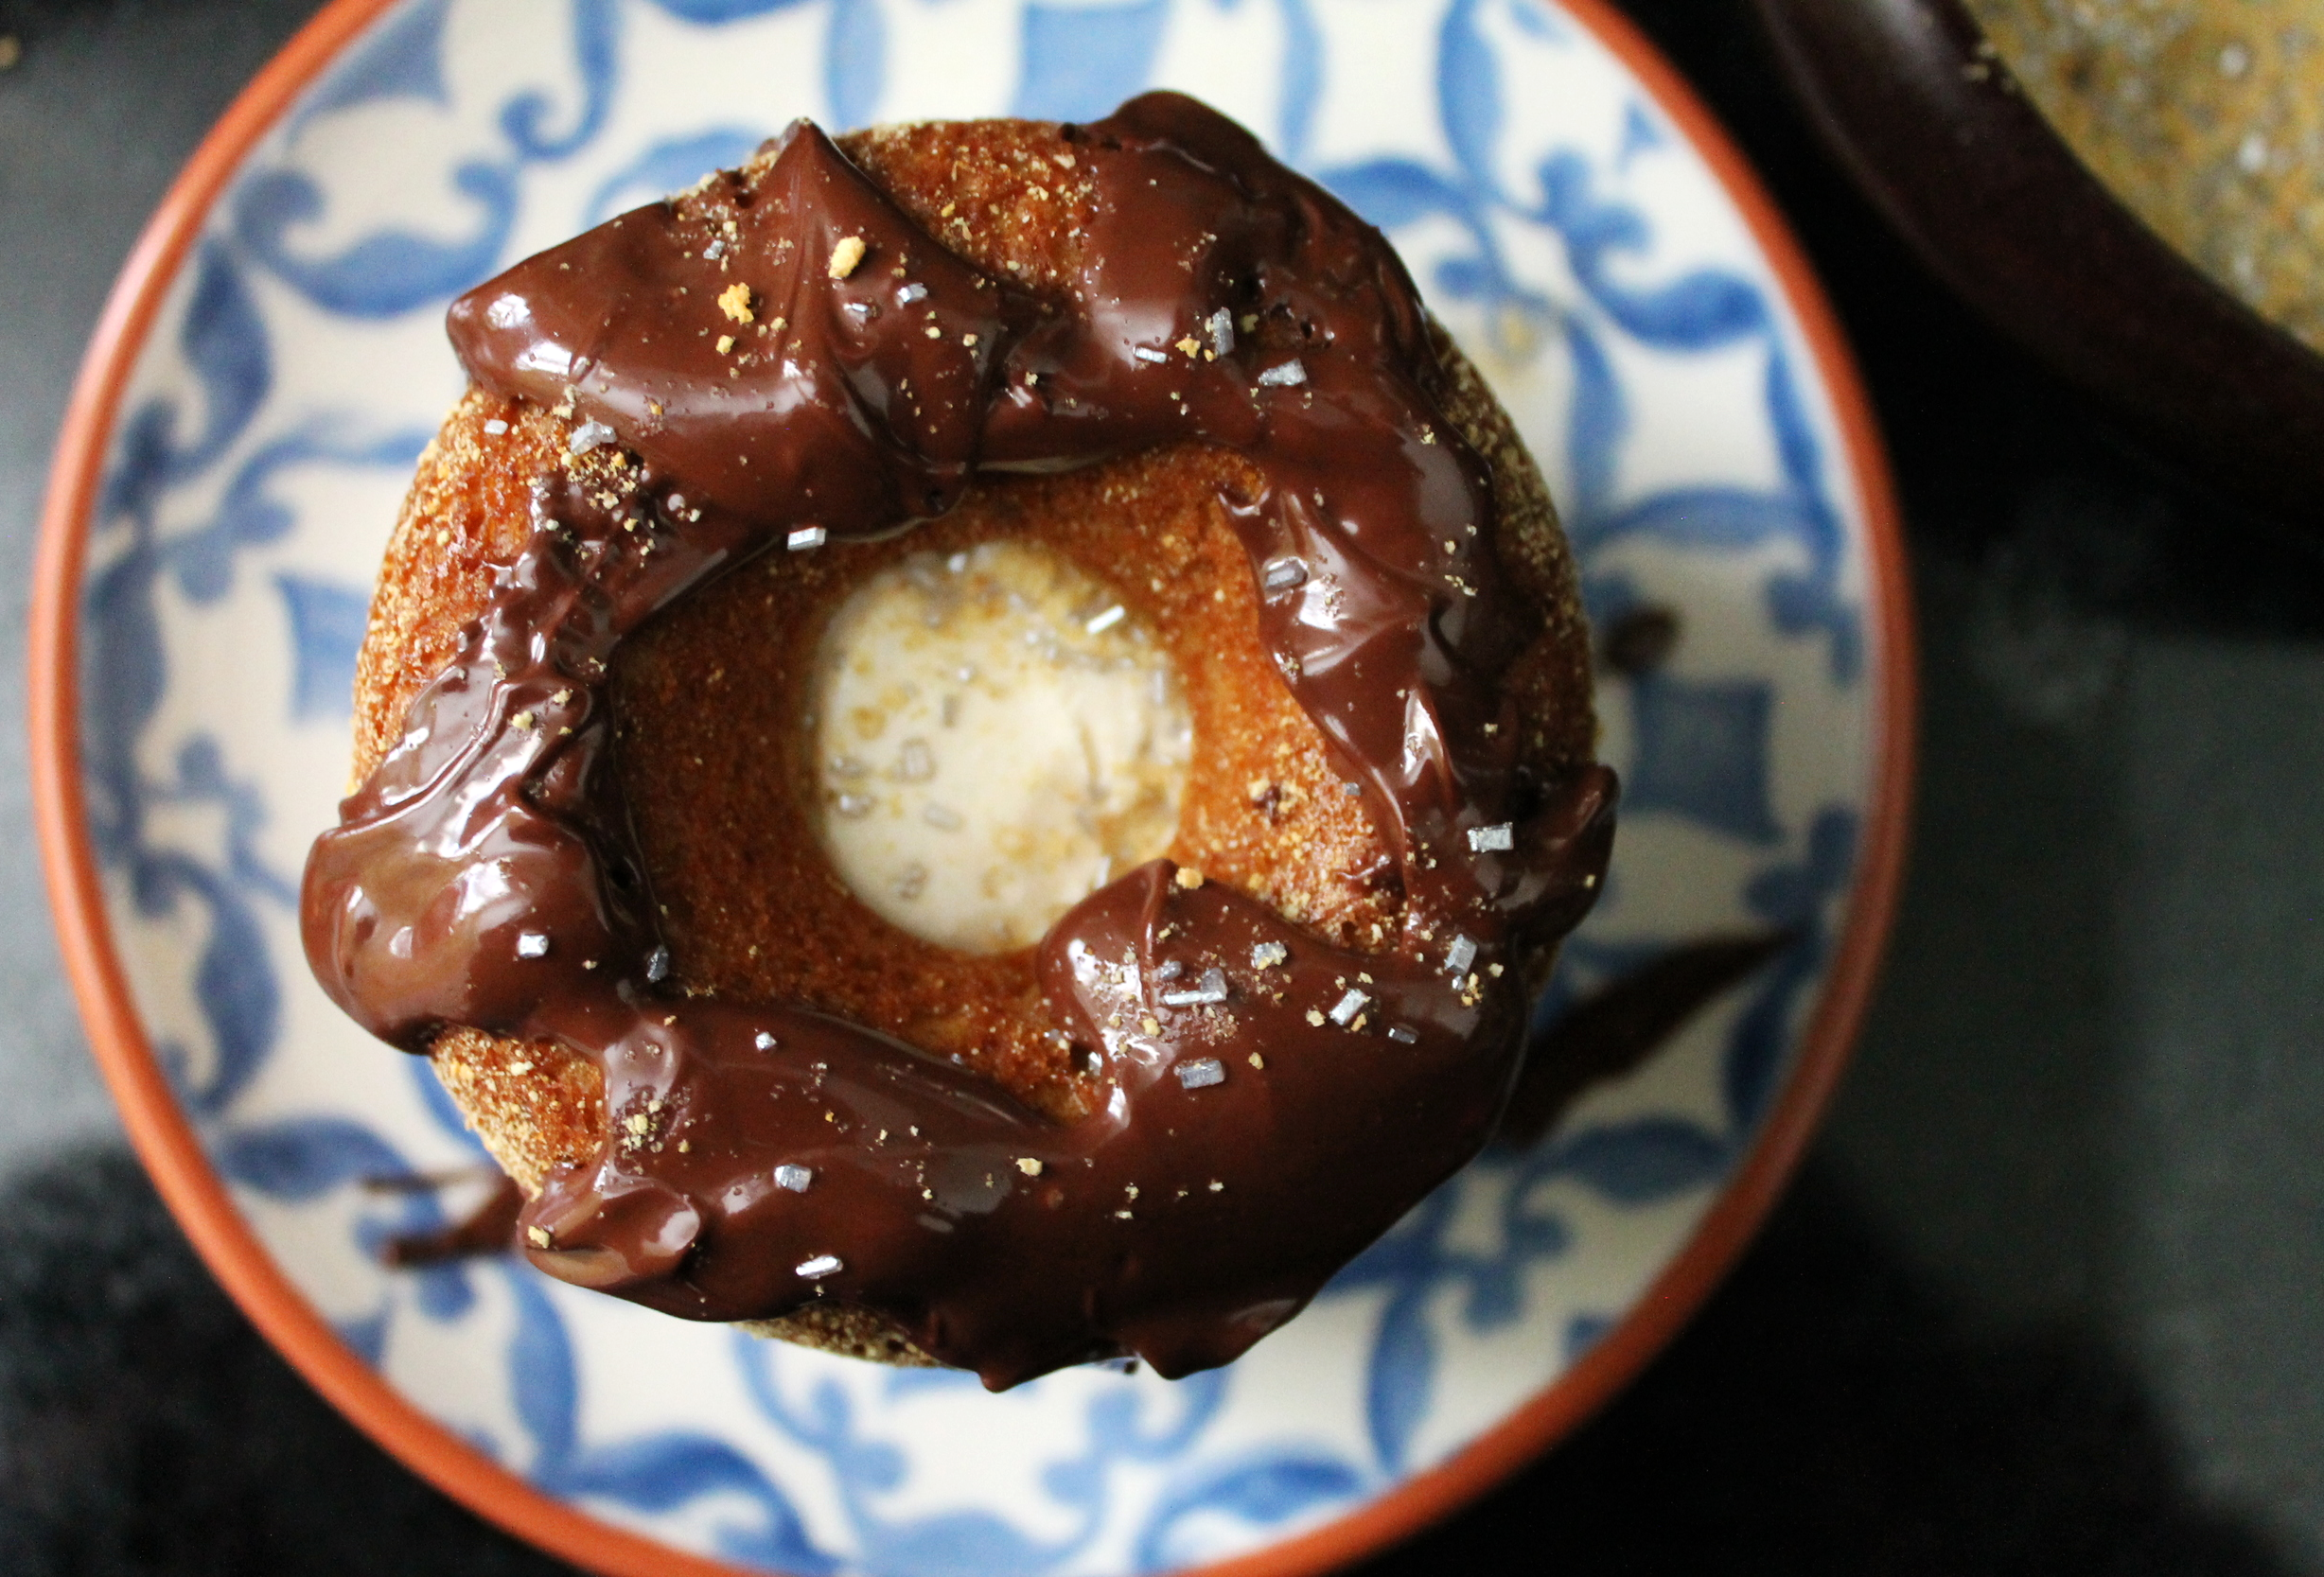
Okay, okay…so I made these ice cream sandwiches, right? But what is so mind-blowing about them to me is that they use graham cracker donuts. Like, this is basically a s’more, but with an ice cream center and two fluffy donuts to hold it altogether. Yeah, this girl is ALL about the campfires, bonfires, s’more fires…but with the heat clouding my thoughts, I needed something to cool me down some.

And boom—donuts + ice-cream = new obsession!

Yes, you can use whatever flavor ice cream you want, I chose peach because we just made it at work, and it just screams summertime in my opinion! Final touch? Drizzle on melted chocolate for an even messier, even tastier treat.

Yep…mouth salivating, going to walk to the freezer to get one right now...

So, while I may have been MIA for a couple of weeks, and will be going up and down the east coast quite a bit over the remainder of the month, I hope that you all can forgive me and make these ASAP! Trust me, this drippy mess is worth every sticky little bite!

ingredients

Flour—5.5 oz, or 1 C + 1TBL

Graham Cracker Crumbs—1.75 oz, or 1/3 C

Brown Sugar—4 oz, or ½ C

Baking Soda—¾ tsp

Salt—½ tsp

Eggs—1

Milk—4 oz, or ½ C

Vanilla Extract—1 tsp

Butter, melted—2 oz, or 4 TBL


process

Preheat your oven to 375˚ F.

In a bowl, combine the flour, crumbs, brown sugar, baking soda and salt.

In another bowl, mix together the egg, milk and vanilla.

Add the wet ingredients into the dry. Mix until almost combined.

Add in the melted butter.

Mix.

Pour your donut batter into either a piping bag or a large sealable baggie.

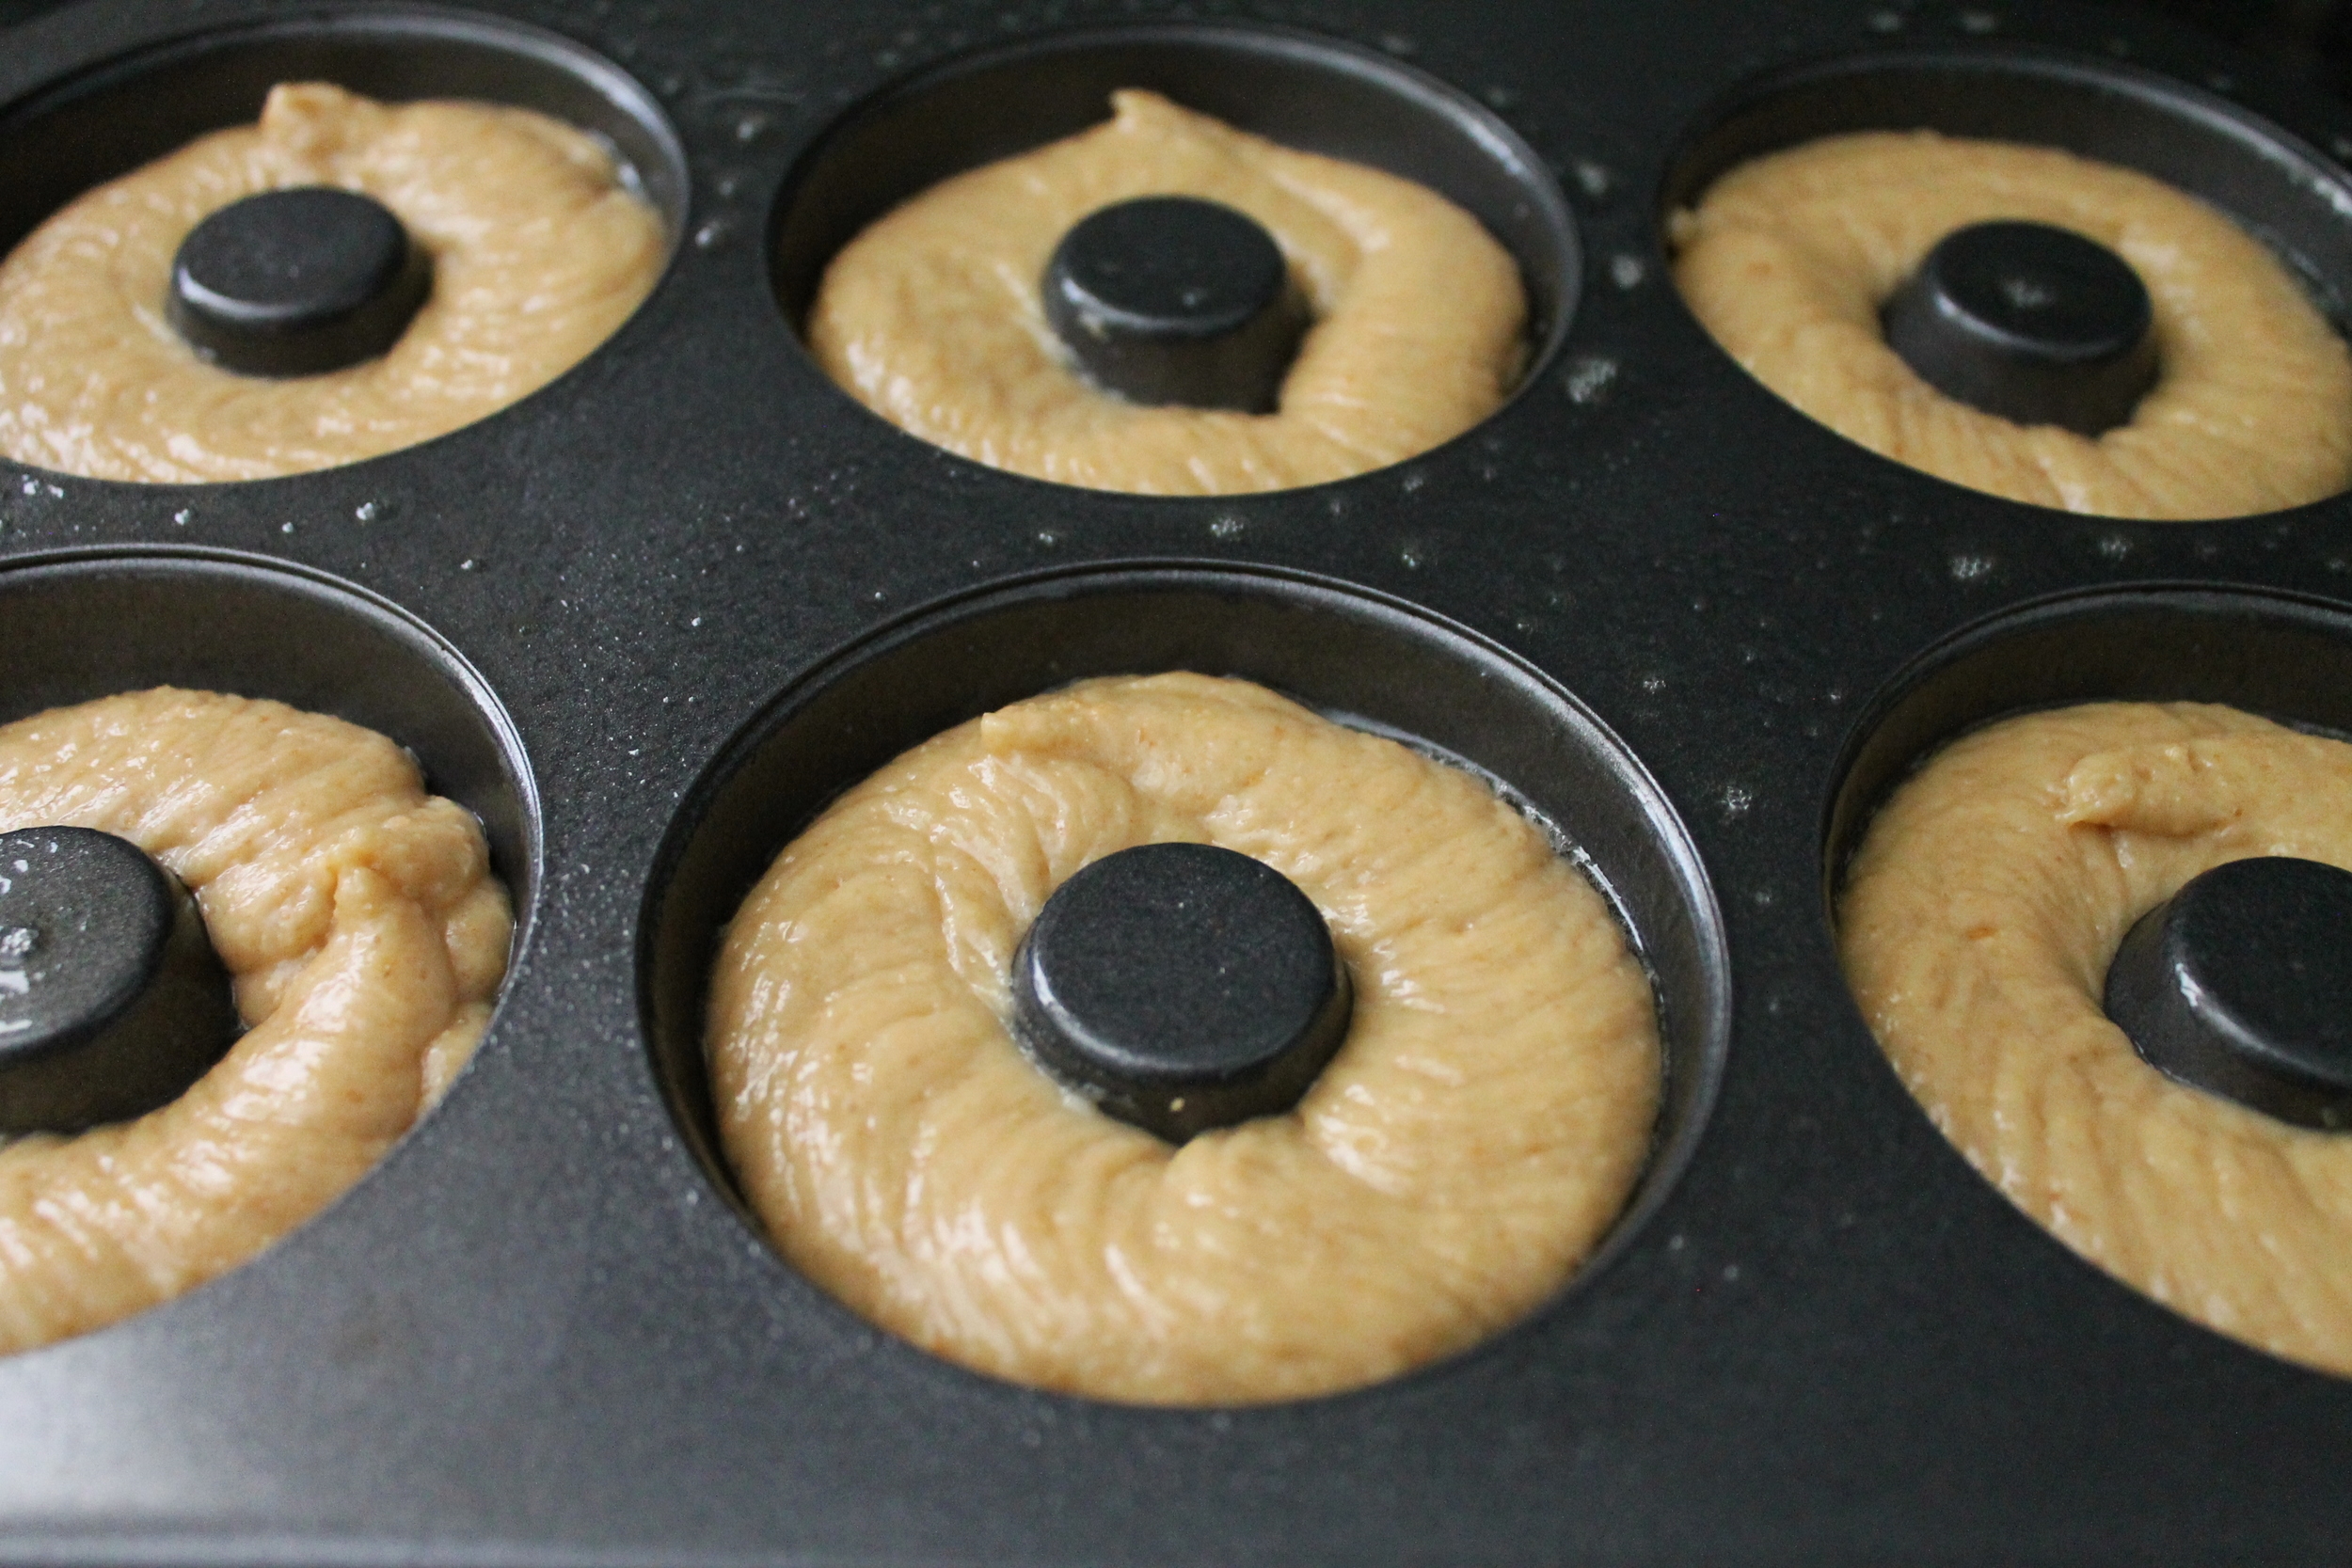
Spray your donut pan with nonstick spray.

Fill each section about ½ - ¾ full of batter.

Bake in your preheated oven for 8 minutes, until the donut springs back when touched.

Allow to cool before assembling ice cream sandwiches.


assembly

Once your donuts have cooled, it’s time to fill them!

For this recipe, I used homemade peach ice cream that I had made at work, but any and all flavors will work!

Take one generous scoop of ice cream and put it in the center of your donut.

Gently press down with either a spoon or an offset spatula.

Place another donut on top, press firmly to hold in place.

Now you may either wrap in plastic wrap and put in the freezer, or cover the ouside with more graham cracker crumbs and sprinkles, and then freeze!—clearly the second option is the route I took.

While the ice cream sandwiches are firming up, melt some chocolate over a double boiler.

Drizzle over the ice cream sandwiches, and now it’s time to eat!


Bon Appétit!

Rhubarb Plum Mini Pies

Raise your hand if you’re not entirely ready for the month of June to be here…

Raises hand.

Wasn’t it just my birthday? Didn’t Roberto just leave for a 2-month work trip? When did wearing dresses even become too hot? I’m just all sorts of behind on the times here. I love summer, just as I love all seasons, but the salty sea air, the fresh fruits and veggies from the garden, the no-makeuped face because a sunkissed face looks simply perfect—these things simply give me life!

As the next 4 months of my life consist of weddings, moving, trips, showers, our wedding…I’m truly trying to chill any chance I get, to really enjoy my last few months in West Virginia and to not let the stress of planning the upcoming “I dos” AND moving to another state overwhelm me. Little by little I have been exploring this incredible state, been staying up slightly later than my normal 9pm bedtime, and just all around seizing each and every day.

As I am trying to live in the moment as much as possible, something that has been on my mind lately is when can I have a huge garden, 3 dogs, 5 chickens and maybe a pig?! We are moving to beautiful Vermont after the wedding and looking into house buying—yes, insert a freaked out yet excited face—and all I want is a big enough yard to be able to 1. Have the mowed lawn smell all around me, and 2. Learn how to really garden like my mom always has. Some of my favorite memories growing up would be when my mom was like Oh, Kate, can you go pick a few containers full of blueberries before dinner? Always yes, always, always, always.

So yes, I have been craving that lifestyle for a while now—and then I got it into my head that I had to bake with rhubarb. While strawberry rhubarb is always a yes, how about plums in place of the strawberries?! Slightly sweet, a very different texture, just needed to spice it up a little bit. I used my go-to piecrust (always a dash of cinnamon), stuffed it with a fruity, citrusy filling, and baked them into tiny, adorable little things!

While baking a normal sized pie is, of course, always welcome, I wanted to make little individual sized pies—this was much more cutesy to gift to some of my friends! They fit perfectly into itty-bitty boxes that I had, tied them up with some string, I guess you could say it is one of my favorite things!

…I will always quote The Sound of Music…

Whether you’re itching to have a garden, like me, fully embracing summer, like me, craving a flaky pie crust, like me, or just loving life and all its beauty, like me, then these Rhubarb Plum Mini Pies will make your hot and hazy June days all the more sweeter!

crust ingredients

Flour—7.5 oz, or 1 ¼ C

Brown Sugar—1 TBL

Salt—½ tsp

Cinnamon—1 ½ tsp

Butter, cold—4 oz, or 8 TBL

Milk, cold—4 oz, or ½ C


process

In a bowl, combine the flour, brown sugar, salt and cinnamon.

Cut the butter into cubes, making sure that it keeps as cold as possible.

Add it to the flour mixture.

Using your hands or a pastry blender, rub the butter into the flour, breaking the butter up into tiny, pea or hazelnut sized pieces.

Once all of the butter has been coated in flour (basically smooshed!), slowly add in the milk, mixing as you go.

When all of the milk has been added, your dough should be slightly sticky.

Wrap in plastic and chill until you are ready to use!


filling ingredients

Rhubarb, diced—9 oz, or 2 C

Plum, diced—6 oz, or 1 C/1 medium

Sugar—4 oz, or ½ C

Brown Sugar—4 oz, or ½ C

Cornstarch—0.75 oz, or 2 TBL

Orange Juice—2 ½ TBL

Cinnamon—1 tsp

Butter, small cubes—1 oz, or 2 TBL

Eggs—1, for eggwash


process

In a large bowl, mix together the diced rhubarb, diced plum, sugars, cornstarch, OJ and cinnamon.

Reserve filling until you are ready to use.

Cut the butter into tiny cubes and set aside.


To make the pies—remove the dough from the refrigerator, and place on a floured work surface.

Roll out the dough to about ¼“ thick.

If you are using mini pie pans, use a cutter that is about ½-1“ bigger than the pan, and cut out 16 circles; you may reroll out the dough when needed.

Spray the bottom of your pie pan(s) and press the rolled out bottom crust gently, but firmly, into ever edge.

Fill the pies with enough of the filling to make a nice mound.

Eggwash the edges of the crust and place the top crust, making sure to press into the wash so that it will stick.

Crimp the edges with a fork, cut a vent in the middle of the pie with scissors or a knife, and refrigerate while you preheat the oven.

Once you have finished with all of your mini pies and they are in the fridge, preheat the oven to 425˚ F.

Brush the tops of each pie with the eggwash and sprinkle with sugar—I like to use turbinado sugar because they are bigger!

Bake in the oven for 12 minutes.

Turn the oven down to 375˚ F.

Bake for 7-10 minutes, until they are golden brown on top.

Remove from the oven and allow to cool just slightly.

Enjoy by themselves or with a yummy scoop of icecream on top!


Bon Appétit!

Raspberry Rosé Cake

You know how they say that you shouldn’t go to the grocery store hungry, because then you’re just going to buy all of the bad food? WELL! That’s sorta, kinda how this recipe stumbled into my head…

I was, as always, craving cake, but then also the day was pretty spectacular—the warmth of the summer sun was upon my skin, the sound of birds chirping was all over, the flowers were blooming gorgeously, and people were just happy. It’s days like these that no matter what, I can’t be brought down—and then I thought why not add a little rosé wine into the mix?!

And so I did.

I went to the store and bought too many bottles for a little taste-testing afternoon. No regrets!

…Except maybe the fact that I have been missing out for a whiiilllle. Like, can someone please tell me why I’ve never been a rosé drinker? Because I sure can’t! I’m a true Riesling gal in the warm months, I can’t get enough of it—but this cake has led me rethink my summer beverage choices. The crispness, slight sweetness, with just the hint of a red wine, there are no bad qualities to this wine!! Well, maybe the fact that I drank an entire bottle while perfecting the recipe—hey, what can you do!?

So, along with the glorious addition of wine to this recipe, fresh fruit also shows its face. Like, hellooooo juicy and luscious raspberries. Gosh, I am so obsessed with this season and all of the beauty it produces, fruit will be making many, many appearances over the next few months for sure! Et voila my friends, a masterpiece was created, and just in time for the true start of the summer—Memorial Day Weekend!

Yes, a barbeque, a big fruit salad, some cold beers, that may be your go to, but I promise that this cake will 1. Be a huge hit, 2. Fill up those alcohol filled tummies and 3. Get people to switch to an ice-cold glass of rosé…quite a classy BBQ if I do say so myself!

Oh, and did I mention that I soak the raspberries in the wine as well?! You’re welcome.

…And now we are at the end of this nice long rant about my newfound love for pretty pink wine. So see, my hunger made me want cake, which made me step out into the beautiful sunshine to pick up some fresh fruit, then some rosé, and then I made a beautiful, Welcome Summer cake. Not all cravings are bad, and I sure hope that this one satisfies yours!

cake ingredients

Butter, room temperature—4 oz, or 8 TBL

Sugar—8 oz, or 1 C

Eggs—2

Vanilla—2 tsp

Flour—12 oz, or 2 C

Baking Powder—2 ½ tsp

Salt—½ tsp

Milk—4oz, or ½ C

Lemon Juice—3.5 oz, or ½ C

Lemon Zest—2 medium


process

Preheat your oven to 350˚ F.

In the bowl of your mixer, cream the butter and sugar.

Once light and fluffy, add in the eggs and vanilla. Scrape.

In a separate bowl, sift together the flour, baking powder and salt.

Alternating between the sifted ingredients and the milk/lemon juice, slowly add to the mixer in 4-5 increments.

Add in the zest.

Once you have all of the ingredients combined and mixed together, pour into 2-6” cake pans that have been sprayed with nonstick spray and lined with parchment or a light dusting of flour.

Bake the cakes for 35-40 minutes, until the top springs back slightly when touched.

*Note: if you do not have 2-6” cake pans, cut the recipe in half and just make in two separate batches!*

Allow to cool completely before building your cake


buttercream ingredients

Butter, room temperature—12 oz, or 1 ½ C/3 sticks

Confectioner’s Sugar—18 oz, or 4 C

Vanilla—1 tsp

Rosé Wine—2 oz, or 4 TBL


process

In the bowl of your mixer, cream the butter until very, very smooth.

In a separate bowl, sift the confectioner’s sugar, and then slowly add to the creamed butter.

When all smooth and incorporated, add in the vanilla, and then slowly stream in the rosé.

Optional—if you want a light pink color, add in just the smallest drop of red food coloring!

Turn the mixer up to high and whip the buttercream for about a minute, this will make it light, fluffy, and easy to apply to the cake!


filling ingredients

Raspberries—6 oz, or ~1C

Rosé—2 oz, or 4 TBL


process

In a small bowl, combine the berries and the wine.

Smash a little bit with the back of a spoon, and allow to marinate just slightly before putting them in between your two cake layers.


assembly

Once both of your cake layers have cooled completely, trim off the tops of each of the cakes so that they are flat in both sides.

Place one cake layer on either a plate or a turntable, whatever you are going to decorate on.

Fill either a piping bag, or a plastic baggie that seals shut, with the buttercream; make a moat around the outside edge of your cake, about ½” thick—this will help make sure that your cake is level, and the filling will not ooze out of the cake.

Take a dollop of buttercream and spread evenly inside of the moat you just made.

Slightly strain the wine soaked raspberries, and add on top of the buttercream.

Place your second layer of cake on top of the first, making sure to press just slightly.

Take another big spatula-full of buttercream and place on the top of your cake, smoothing it out.

Now, some of that will go over the sides, which is great, and you can just use it to cover the sides of your cake as well.

Once you have finished and are satisfied, you make decorate however you would like—naturally I went for the star sprinkles—and take a nice big piece to enjoy.


Bon Appétit!