Dairy-Free Choco Chunk Cookies

Your job, throughout your entire life, is to disappoint as many people as it takes to avoid disappointing yourself.
— Glennon Doyle
IMG_0733.jpg

Of all of the things that I was excited for about my little babe turning ONE (!!) at the beginning of the month, introducing him to my world of baked goods was among the top few! No, I didn’t just let him run wild with chocolate and cookies and cakes, but giving him tiny bits of cookies or bars has been the most fun to see him reaction!

For his birthday, we did it true pandemic style and had a big zoom party with the family, including singing, balloons, streamers, and, of course, CAKE! I made him a (basically) no sugar added carrot cake with a peanut butter frosting. I have loved this recipe forever, and just wanted him to have SOME health to it! Let me tell you - it was not a love at first bite kind of moment. Oliver was so delicate with the cake, taking a tiny lick from his finger, but once my husband gave him a spoonful, it was ON! Oliver kept wanting more and more, then became ultra silly, giggling, screaming, it was a blast! Of course, we took a mid-cake break with some actual lunch for him, but he couldn’t get enough! The small 6” cake that I made for him was probably about a quarter of the way eaten when we realized that we should probably take it away from him! All in all, a huge success in my book!

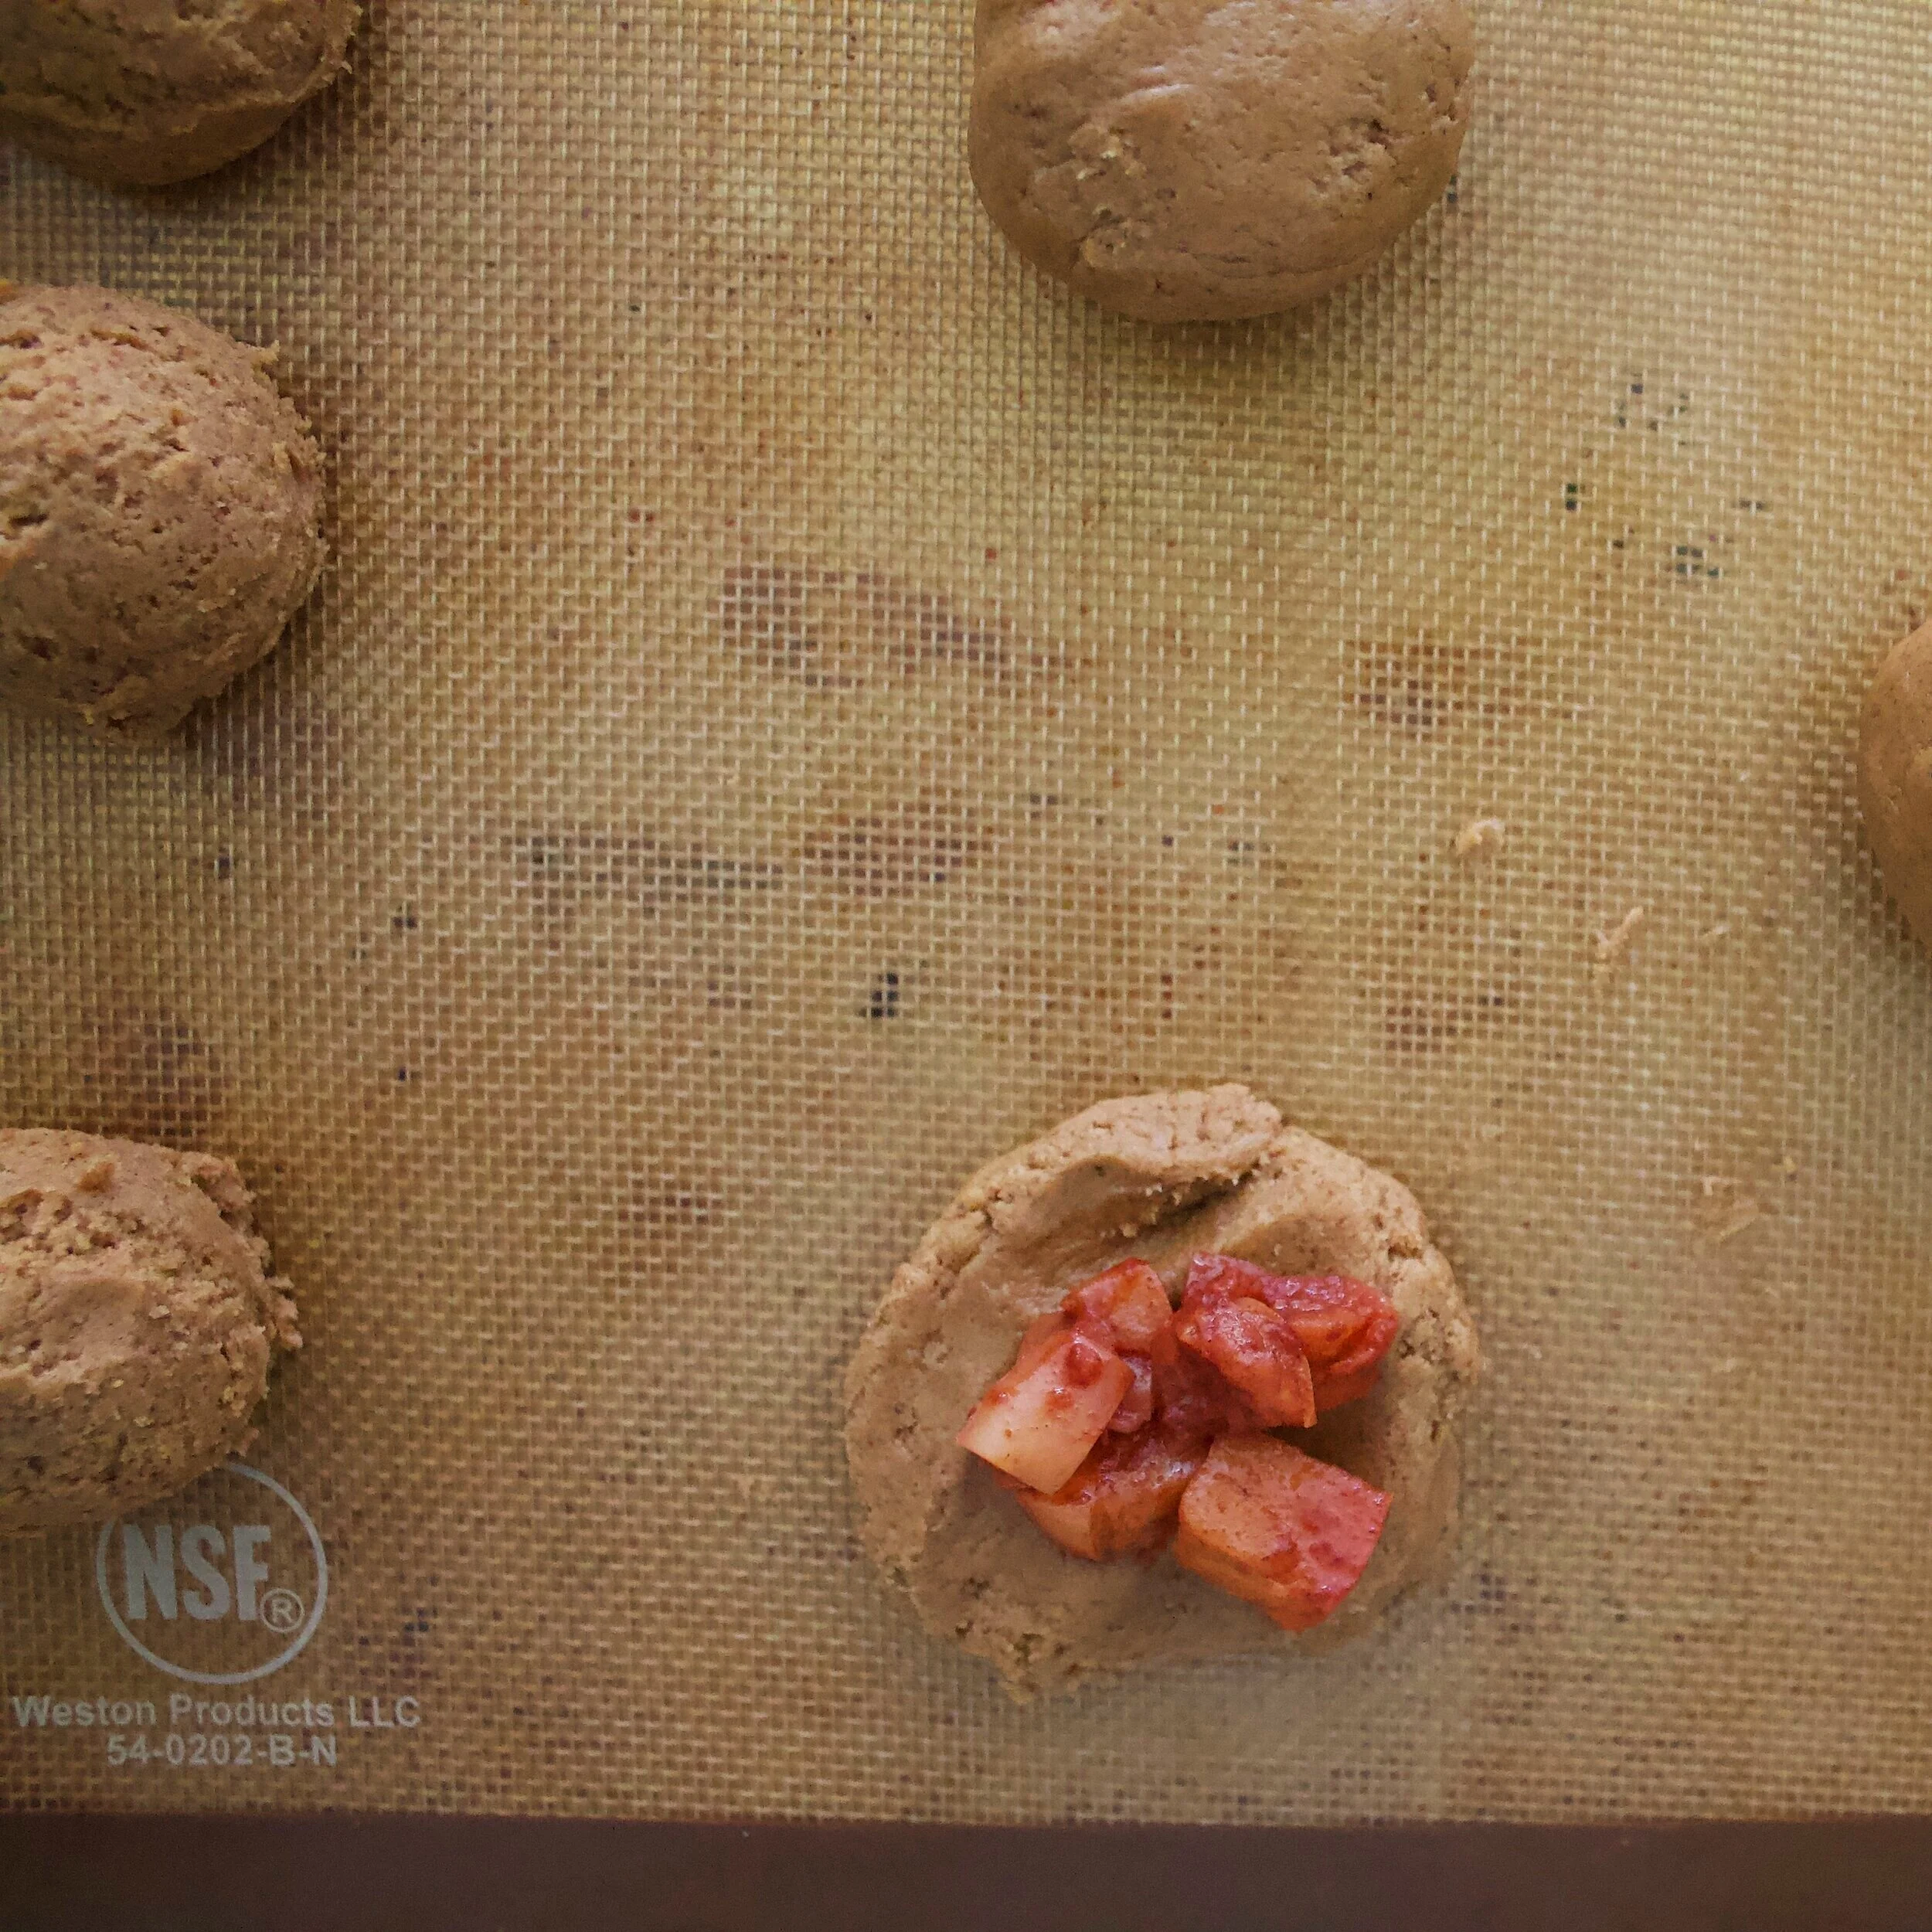
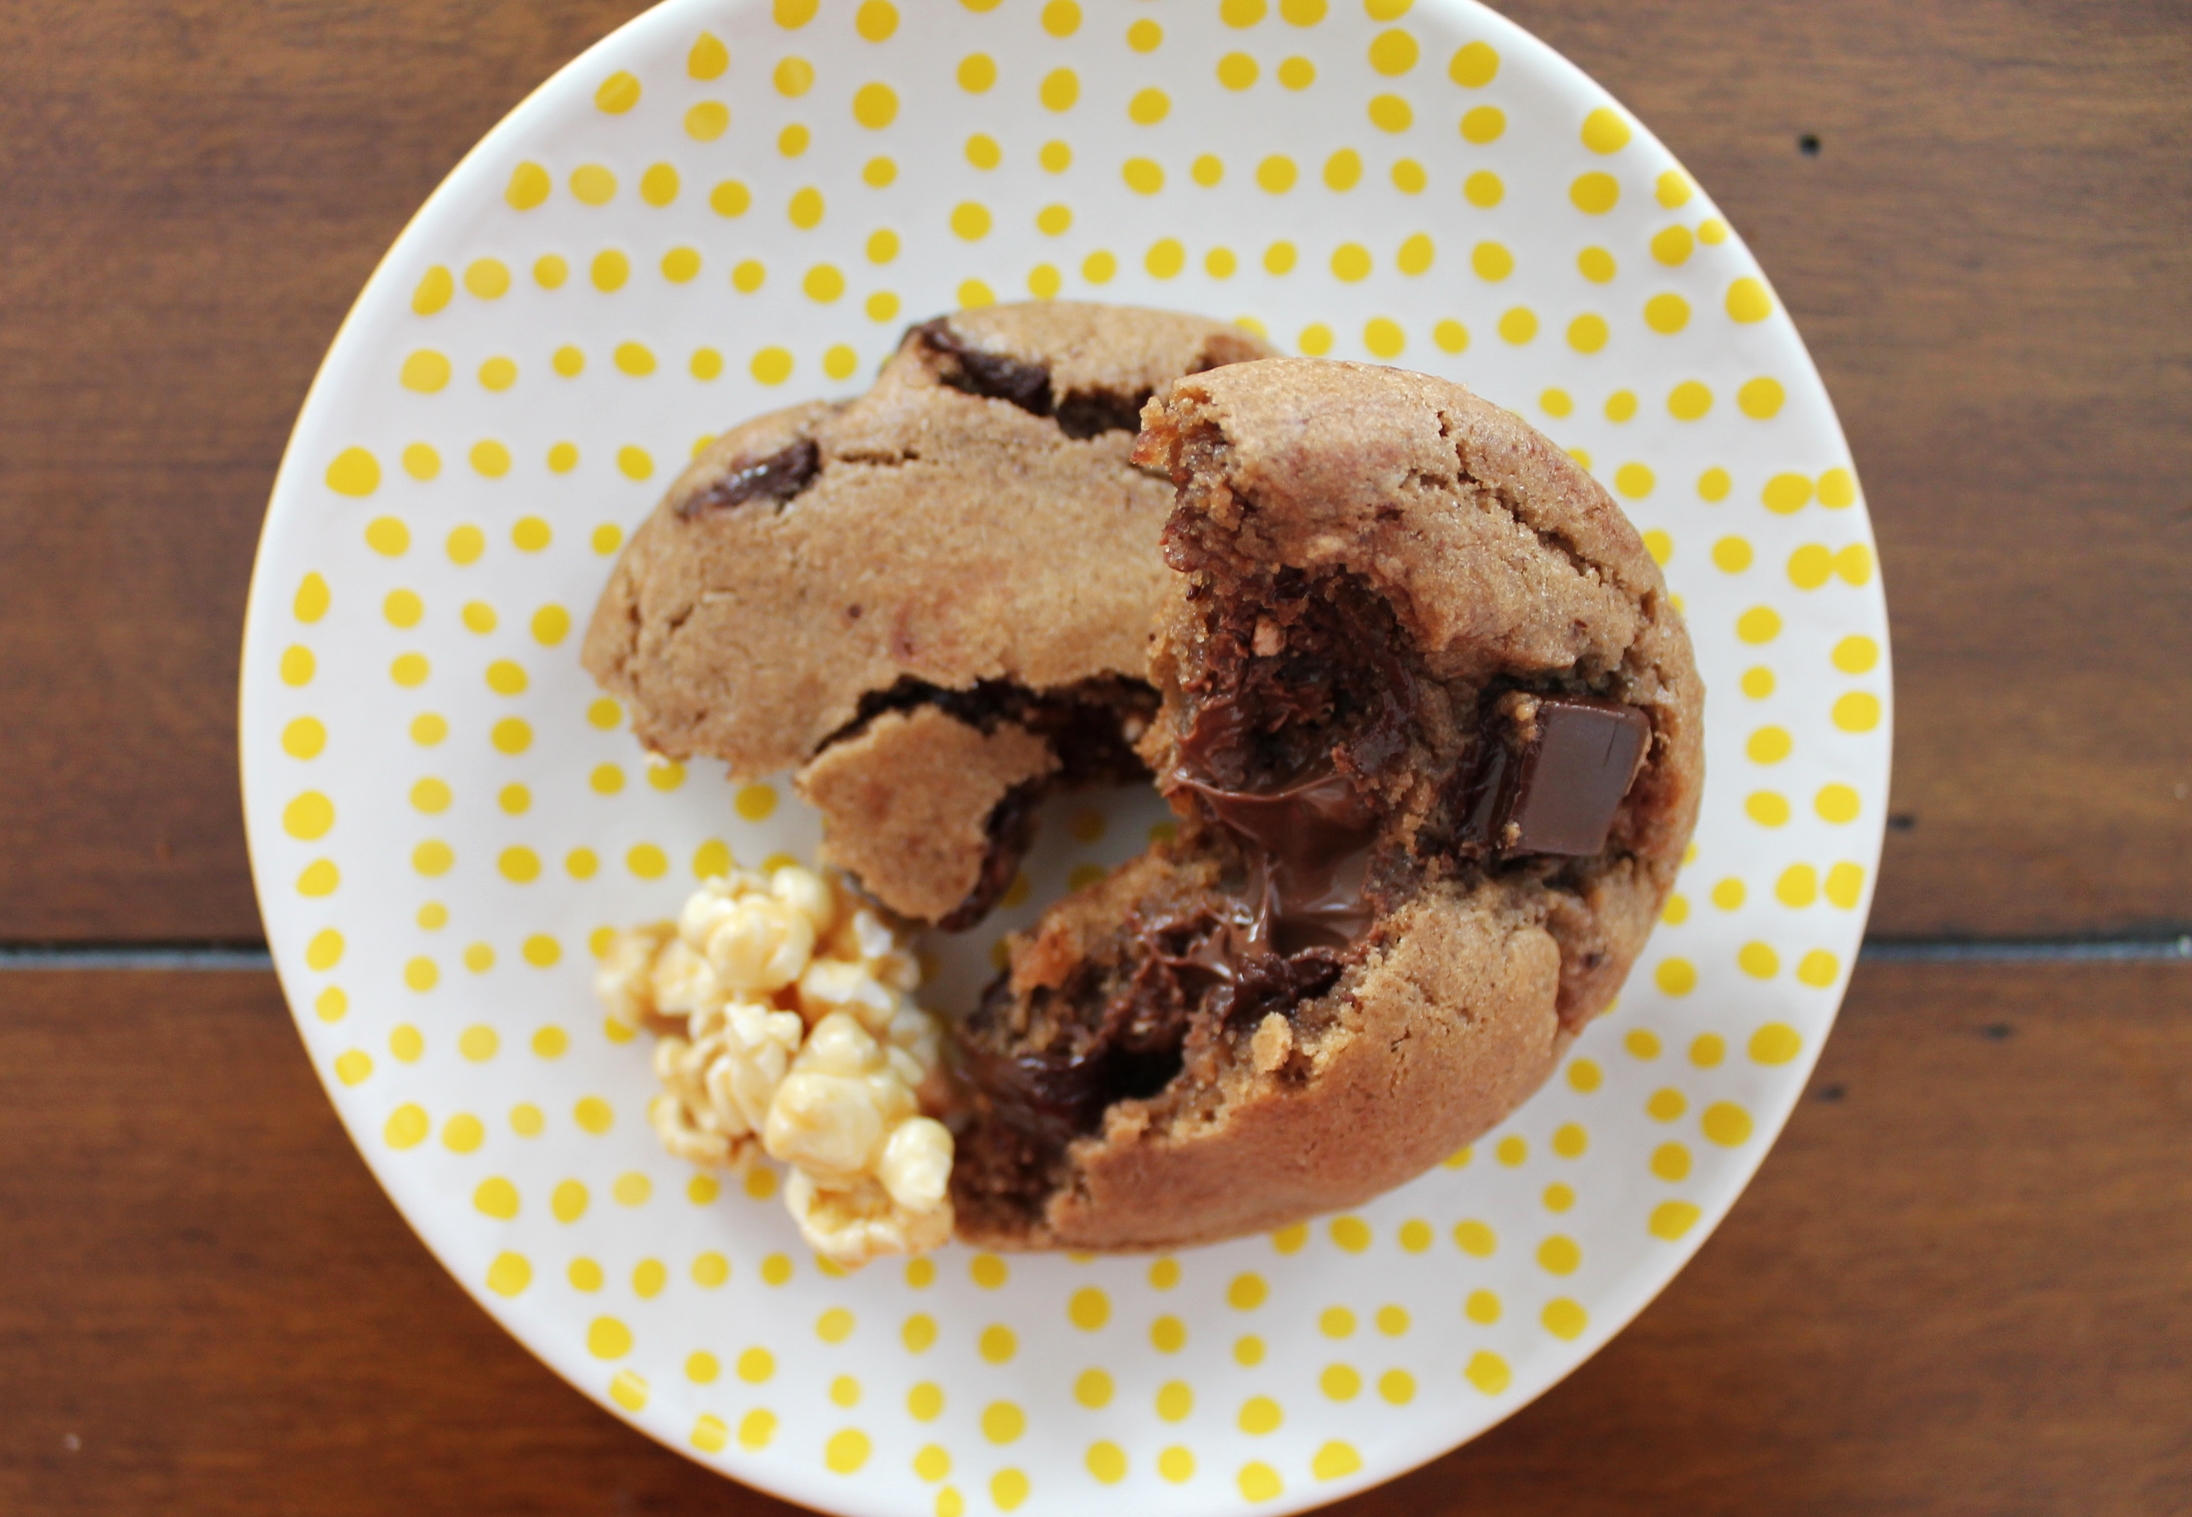
Moving on to these cookies. I was graciously gifted these Honey Mamas bars, which are UNREAL! They seriously taste like a chocolate bar, yet there’s no processed ingredients in them at all. Like, go get yourself some! I shared a lot with a friend who hikes almost every other day and she was OBSESSED! Anyways, now that Oliver can safely eat honey, I figured I would chop up a bunch of them and throw them into these cookies! Incredible idea, Katie! These cookies aren’t overly sweet, are full of some good fats, some great fiber, just all around wonderful! I want Oliver to love food yet also benefit from everything he is eating. So, if I can make him some chocolate chunk cookies that just happen to be slightly more healthy and wholesome than your average cookie, I’m taking this as a win!

Do you need these Honey Mamas bars to make these babies delish?! Not at all - any chocolate chunk works! I just love the added richness, so I highly recommend!

IMG_0737.jpg
IMG_0740.jpg

ingredients

Coconut Oil—6 oz, or ¾ C

Peanut Butter—7.5 oz, or ¾ C

Brown Sugar—8 oz, or 1 C

Eggs—3

Vanilla Extract—1tsp

Baking Soda—1 tsp

Salt—1 tsp

Flour—20 oz, or 4 C

Cinnamon—2 tsp

Oats—3 oz, or 1 C

Chocolate Chunks—11 oz, or 2 (heaped) C

(DF) Milk—2 oz, or ¼ C


process

In the bowl of your mixer, cream together the coconut oil and peanut butter until smooth, scraping down the sides every few minutes.

Add in the brown sugar, mix until smooth.

Add in the eggs and vanilla extract, mix and scrape.

In a separate bowl, sift together the flour, baking soda, salt and cinnamon.

Slowly add this to the creamed mixture and mix until just combined.

Add in the oats and chocolate chunks, mix until just combined.

Slowly add in the milk, 1 Tablespoon at a time.

Once everything has been incorporated and your dough has come together, slightly sticky, remove from the mixer, place in a bowl, covered, and into the fridge for at least 30 minutes.

When you are ready to bake, preheat your oven to 350˚F.

Using a scoop or your hands, form cookie balls that are roughly 2 Tablespoons in size.

Place on a baking sheet that has either been sprayed with non-stick spray or use parchment/Silpat.

Bake for 10 minutes, rotate the pan, 8 minutes.

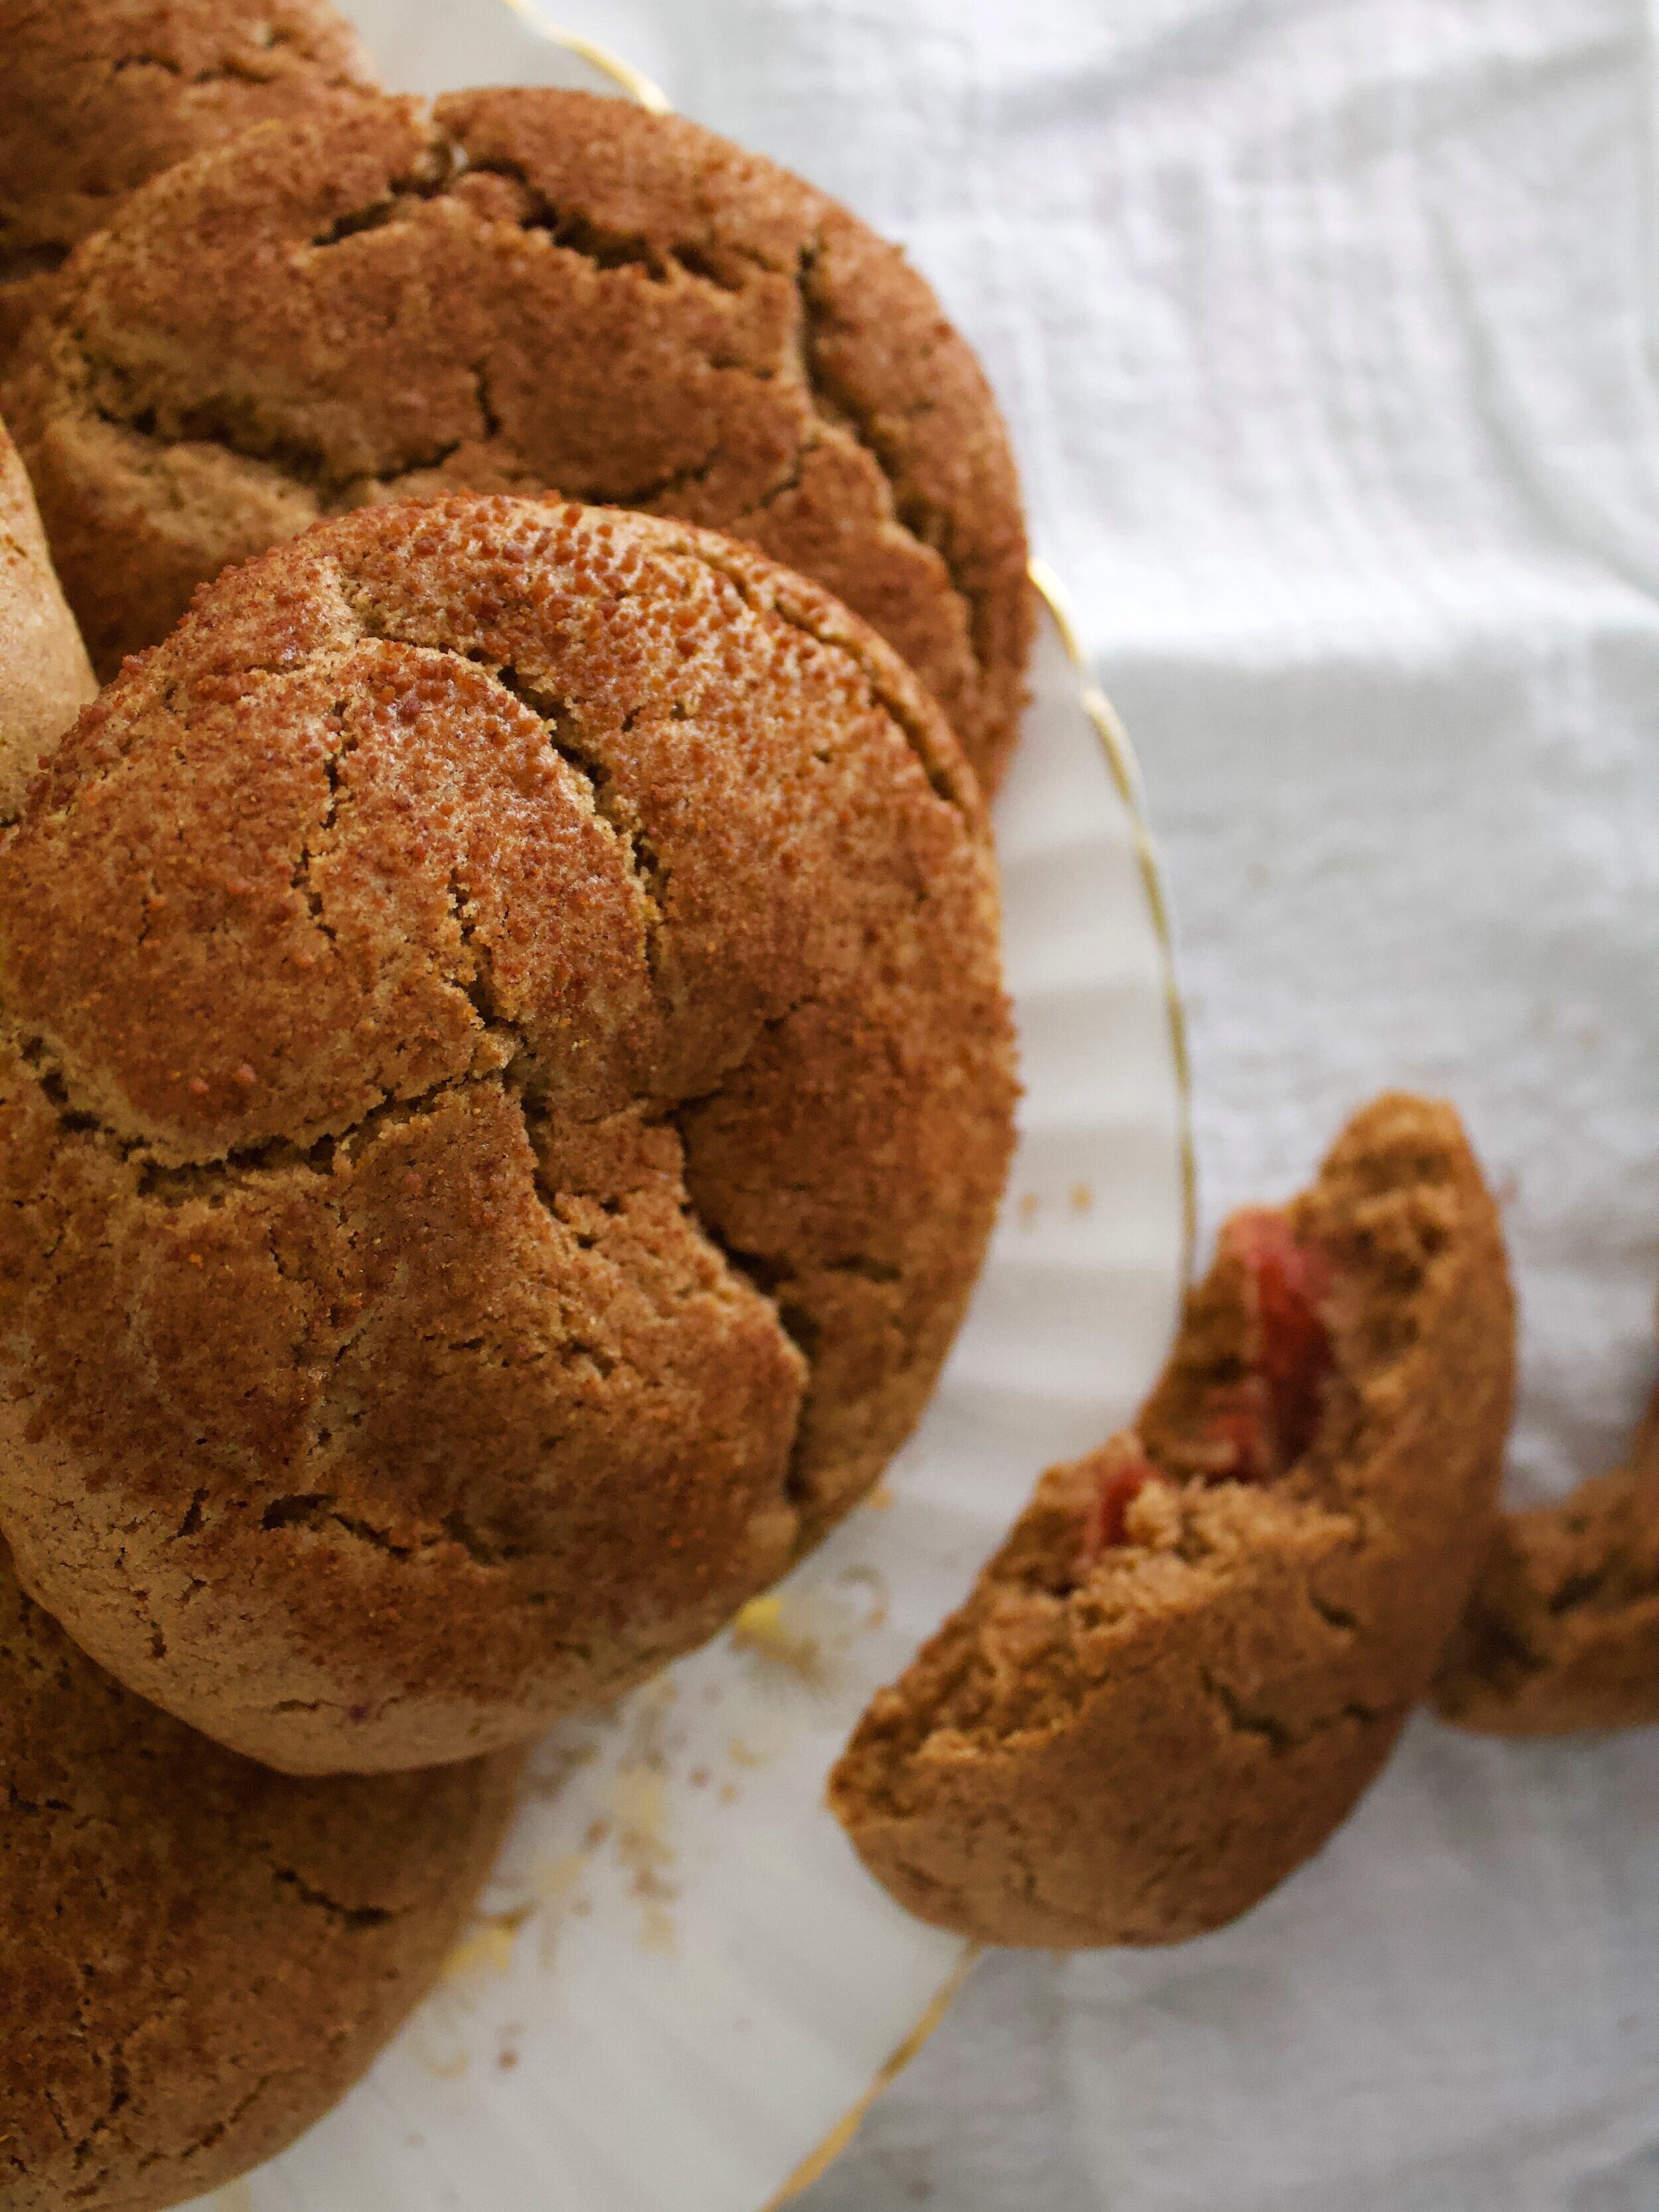
Remove from the oven and allow to cool slightly on a cooling rack before enjoying!

Store in an airtight container.


Bon Appétit!

Kid Friendly Gingerbread Cookies

I hope your days are filled with countless tiny miracles unfolding continuously, sewn together in the mess you call life.
— Sjana
IMG_9346.jpg

CHRISTMAS IS THIS WEEK!!

Am I the most excited person in our house?! Absolutely! Am I hoping that in the coming years, Oliver will join me on the excitement train?! DUH! This has always been my favorite time of the year, there’s just no way around it. We have been binging all of the Christmas classics: Elf, The Santa Clauses, A Christmas Carol, terrible Lifetime and Hallmark movies, you name it! Oliver could care less, yet he has been becoming more and more attracted to the gifts under the tree, but he is still in his “I love dog toys” phase and “let me open drawers” phase.

While he may not be as keen about the holidays as I am (yet!), one thing that he does love is food! If we sit down for a snack, he needs a bite; if we have water, he needs a sip; if he sees something on our dinner plates that isn’t on his, he must have it—you get the picture! That being said, I have been waiting for this day, when I could bake with my little one, and it honestly was SO much fun! Oliver mainly just wanted to play with the dough and eat as many cookies as he could before I could stop him, but I rolled with it!

Growing up, making Christmas cookies and bread was quite an event! My mom would bake dozens of Challah and cinnamon swirl loaves to give to friends, tins and tins of spritz cookies, gingerbread, PB balls, galore! We would also always do a gingerbread house decorating contest (cannot wait for this in the years to come!), and I wanted to start some traditions with our little guy! That being said, I wanted to make a KID FRIENDLY recipe for Oliver. That means low on the sugar pole but stuffed with spices! We aren’t giving him chocolate just yet, he doesn’t consume that much dairy, and he seems to be ultra-sensitive to sugar, like he gets very hyper! Honestly, what would you expect with an (almost) 11-month-old?! So, I wanted to make these as low in sugar as I could, cutting the amount of molasses in half and using less brown sugar than normal. To me, I am all about the spices in a gingerbread cookie, so that is definitely not lacking whatsoever here! Due to cutting out some molasses, I added in some dairy-free milk to make sure these cookies are nice and moist! Overall, Oliver LOVED these (see below!), and I cannot wait until we decorate them next year with candies and icing and who knows what else! For now, I’m going to enjoy my sweet little bub and all of his craziness, hopefully we don’t eat all of them before Santa comes!

IMG_9350.jpg
IMG_9354.jpg
IMG_9363.jpg


ingredients

Butter—4 oz, or 8 TBL

Brown Sugar—3.5 oz, or ½ C

Molasses—3.75 oz, or 1/3 C

Vanilla Extract—1 tsp

Egg—1

Flour—18 oz, or 3 C

Baking Soda—1 tsp

Salt—1 tsp

Cinnamon—1 ¼ TBL

Ginger—1 ¼ TBL

Cloves—½ tsp

Allspice—½ tsp

Dairy-free milk—2.5 oz, or 5 TBL


process

In the bowl of your mixer, cream the butter and sugar until light and fluffy, about 5-10 minutes.

Add in the egg, vanilla and molasses to the mixer, making sure to scrape down the sides of the bowl every few minutes. It will begin to look slightly curdled—that’s okay!

In a separate bowl, sift together the flour, baking soda, salt, and all of the spices.

With your mixer on low, add this to your creamed mixture, mix until just combined.

Slowly stream in your milk, mix for about 30 seconds so that a homogenous dough forms.

Wrap dough tightly in plastic wrap and put in the fridge to firm up, either a couple of hours or overnight.

When you are ready to bake your cookies, preheat the oven to 350˚F.

Knead the dough with your hands a bit so that it warms up and is easier to roll out.

On a floured surface, roll out the dough until it is about ¼” thick.

Using whatever cutters you would like, stamp out cookies and place on a baking sheet that is lined with either parchment, a Silpat or nonstick spray.

Continue to reroll the dough until you have used it all, making sure to keep the cut-out cookies in the fridge until you are ready to bake them.

Bake in your preheated oven for 10 minutes, rotate the pan, 4 minutes.

Allow to cool on a rack prior to either decorating or eating!


Bon Appétit!

Tahini Chocolate Chunk Cookies

The present is the only thing that has no end.
— Erwin Schrödinger
IMG_9118.jpg

This may be a little crazy to say, but these cookies deserve an award! They honestly taste like fudgy brownie cookies, and I am shook.

When I made them for the first time, I immediately texted my old roommate, apologizing for turning down tahini all of those times that we lived together. She tried to get me to try it in every form, even the wonderful chocolate halva bars—I always turned it down. But now, many years later, I’m in LOVE! The flavor is never too strong for me, but it adds this richness that I simply cannot explain, taking anything from good to outright insane and necessary and mouthwatering.

The wonderful thing about these little bites of deliciousness is that they do not need a mixer, there are no fancy baking steps involved, just mixing the wet ingredients together, the dry together and combining the two for a rich and decadent batter, which makes an unreal cookie. As we know, I’m all about the speedy yet worth it desserts or treats these days, as my little one is on the go when he’s awake! He’s also still not eating chocolate or sugar or any of my specialties yet as he is still only 8-months-old, SO it’s not like he can take part in all of this fun because he also puts everything into his mouth!

Anyways, these cookies are worth going to the store to get a HUGE jar of tahini if you don’t keep some in your fridge or pantry at all times! It’s hard to believe that these taste like brownie batter but in cookie form, but they do—trust me. Hell, you can even make them vegan if you want to sub in a banana for the egg, make them GF if you swap out the flour, these are quite friendly to any changes that you feel necessary to make. Just know, these won’t last long, and if you think that the 1 dozen that this recipe makes is enough for the week, HAH (!), think again, my friends!

IMG_9096.jpg
IMG_9099.jpg
IMG_9118.jpg


ingredients

Tahini—5 oz, or ½ C + 2 TBL

Eggs—1

Vanilla Extract—1 tsp

Honey—1.75 oz, or 3 TBL

Coconut Oil, melted—1.75 oz, or 3 TBL

Cocoa Powder—2 oz, or ½ C

Flour—1.5 oz, or ¼ C

Salt—1 ½ tsp

Maca Powder—2 tsp

Baking Powder—½ tsp

Dark Chocolate—3 oz bar, or ½ C


process

In a large bowl, sift together the flour, salt, maca, and baking powder

In another bowl, whisk the tahini, egg, vanilla and honey

Add in the coconut oil once it has been cooler slightly so that it doesn’t cook the egg

Combine the wet and dry ingredients, folding together with a spatula

Fold in the chocolate, this can either be chips or a chopped up dark chocolate bar

Scoop into about 2 TBL sized balls either onto your baking tray or into a container to allow to firm up in the refrigerator for at least an hour

When you are ready to bake them, preheat the oven to 350˚F

Place on your baking pan that has either been sprayed with nonstick spray or is lined with parchment or a Silpat

Bake for 10 minutes

Remove from the oven, allow to cool for a few minutes on the tray before transferring them onto a cooling rack

Store in a sealed container in the fridge


Bon Appétit!

Apple Pie Stuffed Snickerdoodles

I choose to slow down to connect with the gift I’m given in this moment.
IMG_8938.jpg

HELLO FALL!

Something about this season really just gets me every dang time! I don’t know if it’s the beauty that fall brings in New England (yes, I know I live in the south now!), the fact that I was married in the fall, the smells and flavors, the coziness… the list truly could go on FOREVER! There are just so many amazing foods that make me think of fall, apples and apple pie being at the top of the list!

I’ve done my fair share of apple desserts, and it helps that my husband and son love all things apple—I mean my husband buys apples specifically for himself… and that being said, I just wanted to add another good one to the books! This all started with me really wanting to make snickerdoodles, but that just doesn’t sound exciting enough for me, which is where the apples came in. As my 4-year wedding anniversary is coming up in just a few weeks, I will most likely spend every day until then reminiscing about what a beautiful, crazy, exhausting, perfect day that was, and there were SO many apples included in it. Like so many. One of the tiers of our cake was apple pie, we had baskets of apples all over the venue (a family tradition, oddly enough!), my father-in-law brings up said baskets every time we are together, part of my gifts to my bridesmaids were fall scented (mainly apple) candles, the list goes on and on.

Anyways, stuffing these spiced up cookies with some delicious apple pie filling only made sense! I’ve stuffed cookies before, like these caramel stuffed gingerbread cookies or maybe these caramel corn Nutella cookies helllooooo (!!), and I just love it! It’s a fun little surprise and adds so much more flavor. These cookies are soft and chewy all on their own but adding extra moisture to the middle only ups their game! I’ve also increased the spice level as well. Cinnamon is great and all, but freshly grated nutmeg and some cloves really intensify the fallness in this cookie!

While our fall here in Atlanta is still in the 80’s, there is definitely some foliage going on in our backyard and I’ve added some candles to the mix, so we are getting to the coziness level that I love! Our son may not remember his first fall except through all of the hundreds of photos we take per day, but I hope that when he starts to love all of the seasons like I do, it’s the smells and colors and flavors that bring him joy, just like they do me!

IMG_8910.jpg
IMG_8916.jpg
IMG_8920.jpg
IMG_8926.jpg
IMG_8931.jpg
IMG_8932.jpg
IMG_8942.jpg
IMG_8955.jpg
IMG_8957.jpg


apple filling ingredients

Apples—2 large, I love Gala or Honeycrisp

Cinnamon—1 TBL

Lemon Juice—½ lemon

Water—2 TBL


process

Cut up your apple into small, bite-sized pieces. Peeling is optional, I prefer to keep the peel on!

In a small saucepot, combine apples, cinnamon, lemon juice and water over low heat

Continue to stir every minute or two to make sure that all of the apples are getting cooked evenly

Cook until the apples become soft, this should take about 10-15 minutes depending on how small you have cut the apples

Remove from the heat and allow to cool while you’re making the cookie dough


cookie ingredients

Butter, room temperature—8 oz, or 1 C

Brown Sugar—6 oz, or ¾ C

Coconut Sugar—4.5 oz, or ¾ C

Eggs—2

Vanilla Extract—2 tsp

Flour—18 oz, or 3 C

Salt—1 tsp

Baking Soda—1 tsp

Cream of Tartar—2 tsp

Cinnamon—2 TBL

Nutmeg—1 ½ tsp

Cloves—1 tsp


process

In the bowl of your mixer, combine the softened butter and both of the sugars

Cream on medium speed for about 10 minutes, making sure to scrape down the bowl often

Once fluffy, turn mixer to low speed and add in the vanilla and then the eggs, one at a time

Beat until combined, again, making sure to scrape down the bowl often

In a large bowl, sift together the flour, salt, baking soda, cream of tartar, cinnamon, nutmeg and cloves

Slowly add this to the mixing bowl, while on low

Scrape down the sides of the bowl

Once all combined, turn the mixer off and prepare 2 cookie sheets with either a Silpat, nonstick spray or parchment

Scoop out all of the cookie dough using either a small-sized ice cream scoop, or about 2 TBL of dough.

Take one ball of scooped dough and flatten it

Add in about 2 tsp of the cooked apple pie filling

Take another ball of dough, flatten, and cover the apples

Pinch the sides together, roll the large cookie dough ball in your hands to make sure that no filling will leak out, and place on the baking sheet

Do this with the rest of your cookies

You may have some left-over apple-pie filling! This is amazing for a snack, my 7-month-old loves it, as it is just soft enough for him to eat!

Put your cookies in the fridge while you preheat the oven—this is the only chilling that is necessary!!

Preheat your oven to 350˚F

Once your oven is preheated, you now have two options: you may either bake just like this, or you can mix ½ C of sugar with 1 TBL of cinnamon and dip the tops of the cookies in this for extra flavor and crunch! They are so good both ways, but I love the added spice!

Bake for 12 minutes, rotate the pan, then bake for another 8 minutes

Remove from the oven and allow to cool on a cooling rack

These are best enjoyed warm, so if you are reheating, a good 20-30 seconds in the microwave does the trick!


Bon Appétit!

Homemade Caramel Corn + Nutella Stuffed Cookies

This recipe was brought to you by my weird urge to eat Nutella from a jar…which then turned into me needing something to dip into it, and then I made caramel corn…

So I have been having these strange I want to go to an amusement park feelings lately, which is out of the ordinary because I really dislike them. Growing up, it was always what we would do on our last day of school, the true start to summer, and I went along because why would I want to be the one girl who chickens out?! But honestly, they are everything I can’t stand—the dirtiness, the scary rollercoasters, the huge groups of people, being forced to go on the Tilt-A-Whirl about 10 times even though it makes you sick—you get the picture. Just lately, the thing I have been craving is the smell.

Yes. The smell of an amusement park to me is lots and lots of fried dough, French fries that have been doused in vinegar and then huge bags of kettle corn. There is this one not so great place on the ocean called Palace Playland in Old Orchard Beach, but you always went when you’re in that area, even if you did just come from Funtown/Splashtown (yes, what on point names!). Their pier fries have to be THE best things I have ever had—they come in one of those big paper cones and you just drown them in ketchup and vinegar…gosh I can’t wait to go back to Maine for some of those…

Anyways, let’s get my mind away from fries and onto these cookies. It’s been in the 90’s here in Charleston and all I can think about is how badly I want to stuff my face with some too-greasy fried dough covered in powdered sugar, play a game of skee ball and then lay out on the beach. Sadly, eating fried food is all I can do here—which is kind of the same thing as homemade caramel corn, right?!

The caramel corn is so simple to make, it’s probably the easiest and most straightforward recipe out there. No thermometers to mess with, just simply boiling the ingredients until they are the caramel color you desire, pouring it all over your popcorn and letting the oven do the magic.

Note: you do not have to stuff these cookies with anything, I just think that they make it THAT much more exciting! Also, this caramel corn is insanely yummy as a snack all on its own as well.

Next is the sweetest Nutella cookie you ever did taste. To “tame” it, I used very dark chocolate chunks, upped the salt a bit, and then gave it even more depth by stuffing the cookies with basically caramel-Nutella wrapped sweet+salty popcorn!

It’s a mouthful. Honestly…

The cookie on its own is divine, but adding the filling elements brings it to the next level. Does it help that it is half the size of my face? Absolutely! But really it’s just a fun cookie to have. You all know I am obsessed with everything fruit, especially during the summer when every variety seems to flourish, but I just couldn’t resist giving you all something a little on the bad side!

You all can stuff your faces with watermelon, strawberries, grilled corn on the cob—but I know when you’re craving some of the amusement park/pier food, you’ll be thanking me with this one!

caramel corn ingredients

Natural Popcorn, popped—1.5 oz, or 5 C

Butter—3 oz, or 6 TBL

Brown Sugar—6 oz, or ¾ C

Corn Syrup—2 oz, or 3 TBL

Cream of Tartar—¼ tsp

Salt—1 tsp


process

Pop your popcorn and spread the 5 cups on a sheetpan lined with parchment or a Silpat.

Preheat your oven to 200˚ F.

In a medium sized saucepot, combine the butter, sugar, corn syrup, cream of tartar and salt.

Cook the caramel on medium heat, bring to a boil and allow to boil for about 5 minutes.

Drizzle over the popcorn that is spread out on the pan.

With a spatula or wooden spoon, gently “toss” the popcorn and caramel together, making sure to coat each piece.

Place in your preheated oven for 1 hour, stirring every 20 minutes to insure that the popcorn is all covered with the caramel.

Allow to cool completely until you are ready to stuff the cookies—you will need to chop up the popcorn to do so!


cookie ingredients

Butter, room temperature—8 oz, or 2 sticks

Nutella—5.5 oz, or ½ C

Sugar—8 oz, or 1 C

Brown Sugar—8 oz, or 1 C + 2 TBL

Eggs—3

Vanilla—1 tsp

Flour—24 oz, or 5 ½ C

Salt—1 ½ tsp

Baking Soda—1 tsp

Dark Chocolate Chunks—9 oz, or 1 ½ C


process

In the bowl of your mixer, cream together the butter, Nutella, and both sugars.

Once smooth and fluffy, add in the eggs, one at a time. Add in the vanilla.

In a separate bowl, sift together the flour, salt and baking soda.

With the mixer on low, slowly add this dry mixture to the dough.

Add in the chocolate chunks.

Transfer to another bowl and allow to chill for about 30 minutes.


When you are ready to bake, preheat your oven to 350˚ F.

Take about 2 TBL of cookie dough, roll it into a ball and then flatten into a bowl shape so that you can stuff it.

Put about a ½ tsp of Nutella in the bottom of each little cookie bowl, and then the same amount of chopped caramel corn on top.

Cover with enough cookie dough to completely enclose the Nutella/popcorn filling.

About 8 of these cookies fit comfortably on a sheet tray, as they are very large!

Bake for 15-17 minutes.

Remove from the oven, allow to cool and enjoy!


Bon Appétit!