Overnight Brown Sugar Bacon Cinnamon Rolls

IMG_6130.JPG

As Christmas approaches, my need for buttery, gooey breakfast pastries skyrockets. Between croissants, morning buns, pain au chocolate, cinnamon rolls, an unhealthy amount is consumed. Maybe it’s because while I am home for a few days, I need to get my Standard Baking Company fix, or that because I make sticky buns each year for Christmas morning, I just feel the need to carbo-load for weeks in advance. Whatever the reason, I had the urge to welcome a new cinnamon roll into our family!

The other night while Roberto and I were enjoying our bi-weekly pizza Friday, I started daydreaming about cinnamon rolls. Like, they literally took over every thought of mine. Gingerbread rolls? Toasted oat rolls? Apple butter filling? Brown sugar bacon rolls?! We have a winner!

How had I never thought of this before? The smell of bacon just screams breakfast, plus it’s extra yummy when coated in cinnamon sugar and wrapped in a cozy, buttery dough. Besides, I figure if you’re going to go all out with breakfast, especially on Christmas morning, a little bacon never hurt anyone—even throw in a few mimosas and possibly a gingerbread cookie while you’re at it!

This recipe starts with a very simple yeast dough—flour, milk, yeast, some sugar. Plus you will, most likely, have all of the ingredients in your pantry already! What else is so great? This should be started the night before you want to serve them, so take a couple of hours out of your day, prep the rolls, stick them in the fridge, and violà! The next morning you just have to pull them out of the refrigerator, let them come to room temperature and bake away!

So, while sticky buns may have been the tradition for the past few years on Christmas morning, I think that these cinnamon rolls may be taking the lead this year. A little less butter, a little more bacon, and a lot more love to surround you and yours on Christmas day!

Luckily, my first wedding dress fitting is the day after Christmas; I hope they can wiggle me into it!

dough ingredients

Milk (110-115˚F)—4 oz, or ½ C

Molasses—1.5 oz, or 2 TBL

Sugar—4 oz, or ½ C

Yeast—0.25 oz, or 1 TBL

Butter, softened—4 oz, or ½ C

Eggs, beaten—2

Milk—4 oz, or ½ C

Flour—17.5 oz-20 oz, or 3 ½-4 C


dough process

In the bowl of your stand mixer, combine the warm milk, sugar, molasses and yeast.

Mix just to combine, and allow this to sit for about 10 minutes.

The yeast will begin to activate and become foamy—if not, then you have either not made the milk warm enough, so the yeast will take slightly longer, or you have overheated your milk, killing the yeast and you will have to start again!

After the 10 minutes, attach the dough hook to your mixer, and add in the eggs, butter and second milk. Mix.

With your mixer on low, slowly add in the flour.

Mix for 10 minutes on medium speed. This will really knead your dough and give it the wonderfully soft texture that you will soon taste!

After the 10 minutes, if your dough is too sticky to handle, add in a Tablespoon at a time more flour.

It is okay if this dough is slightly stickier than most yeast dough that you make, but if it’s really stuck to the sides of the bowl, more flour will be needed!

Transfer your dough to a well-oiled bowl.

Cover with plastic wrap and place in a warm room so that it can double in size—about 2 hours.

While this is happening, you may prep your filling below!


filling ingredients

Bacon, cooked—½#

Brown Sugar—6 oz, or 1 C

Butter, softened—5.5 oz, or 2/3 C

Cinnamon—1 oz, or 2 ½ TBL

Nutmeg—½ tsp

Allspice—½ tsp


filling process

In the bowl of your mixer, combine the butter and brown sugar.

Once smooth, add in the spices.


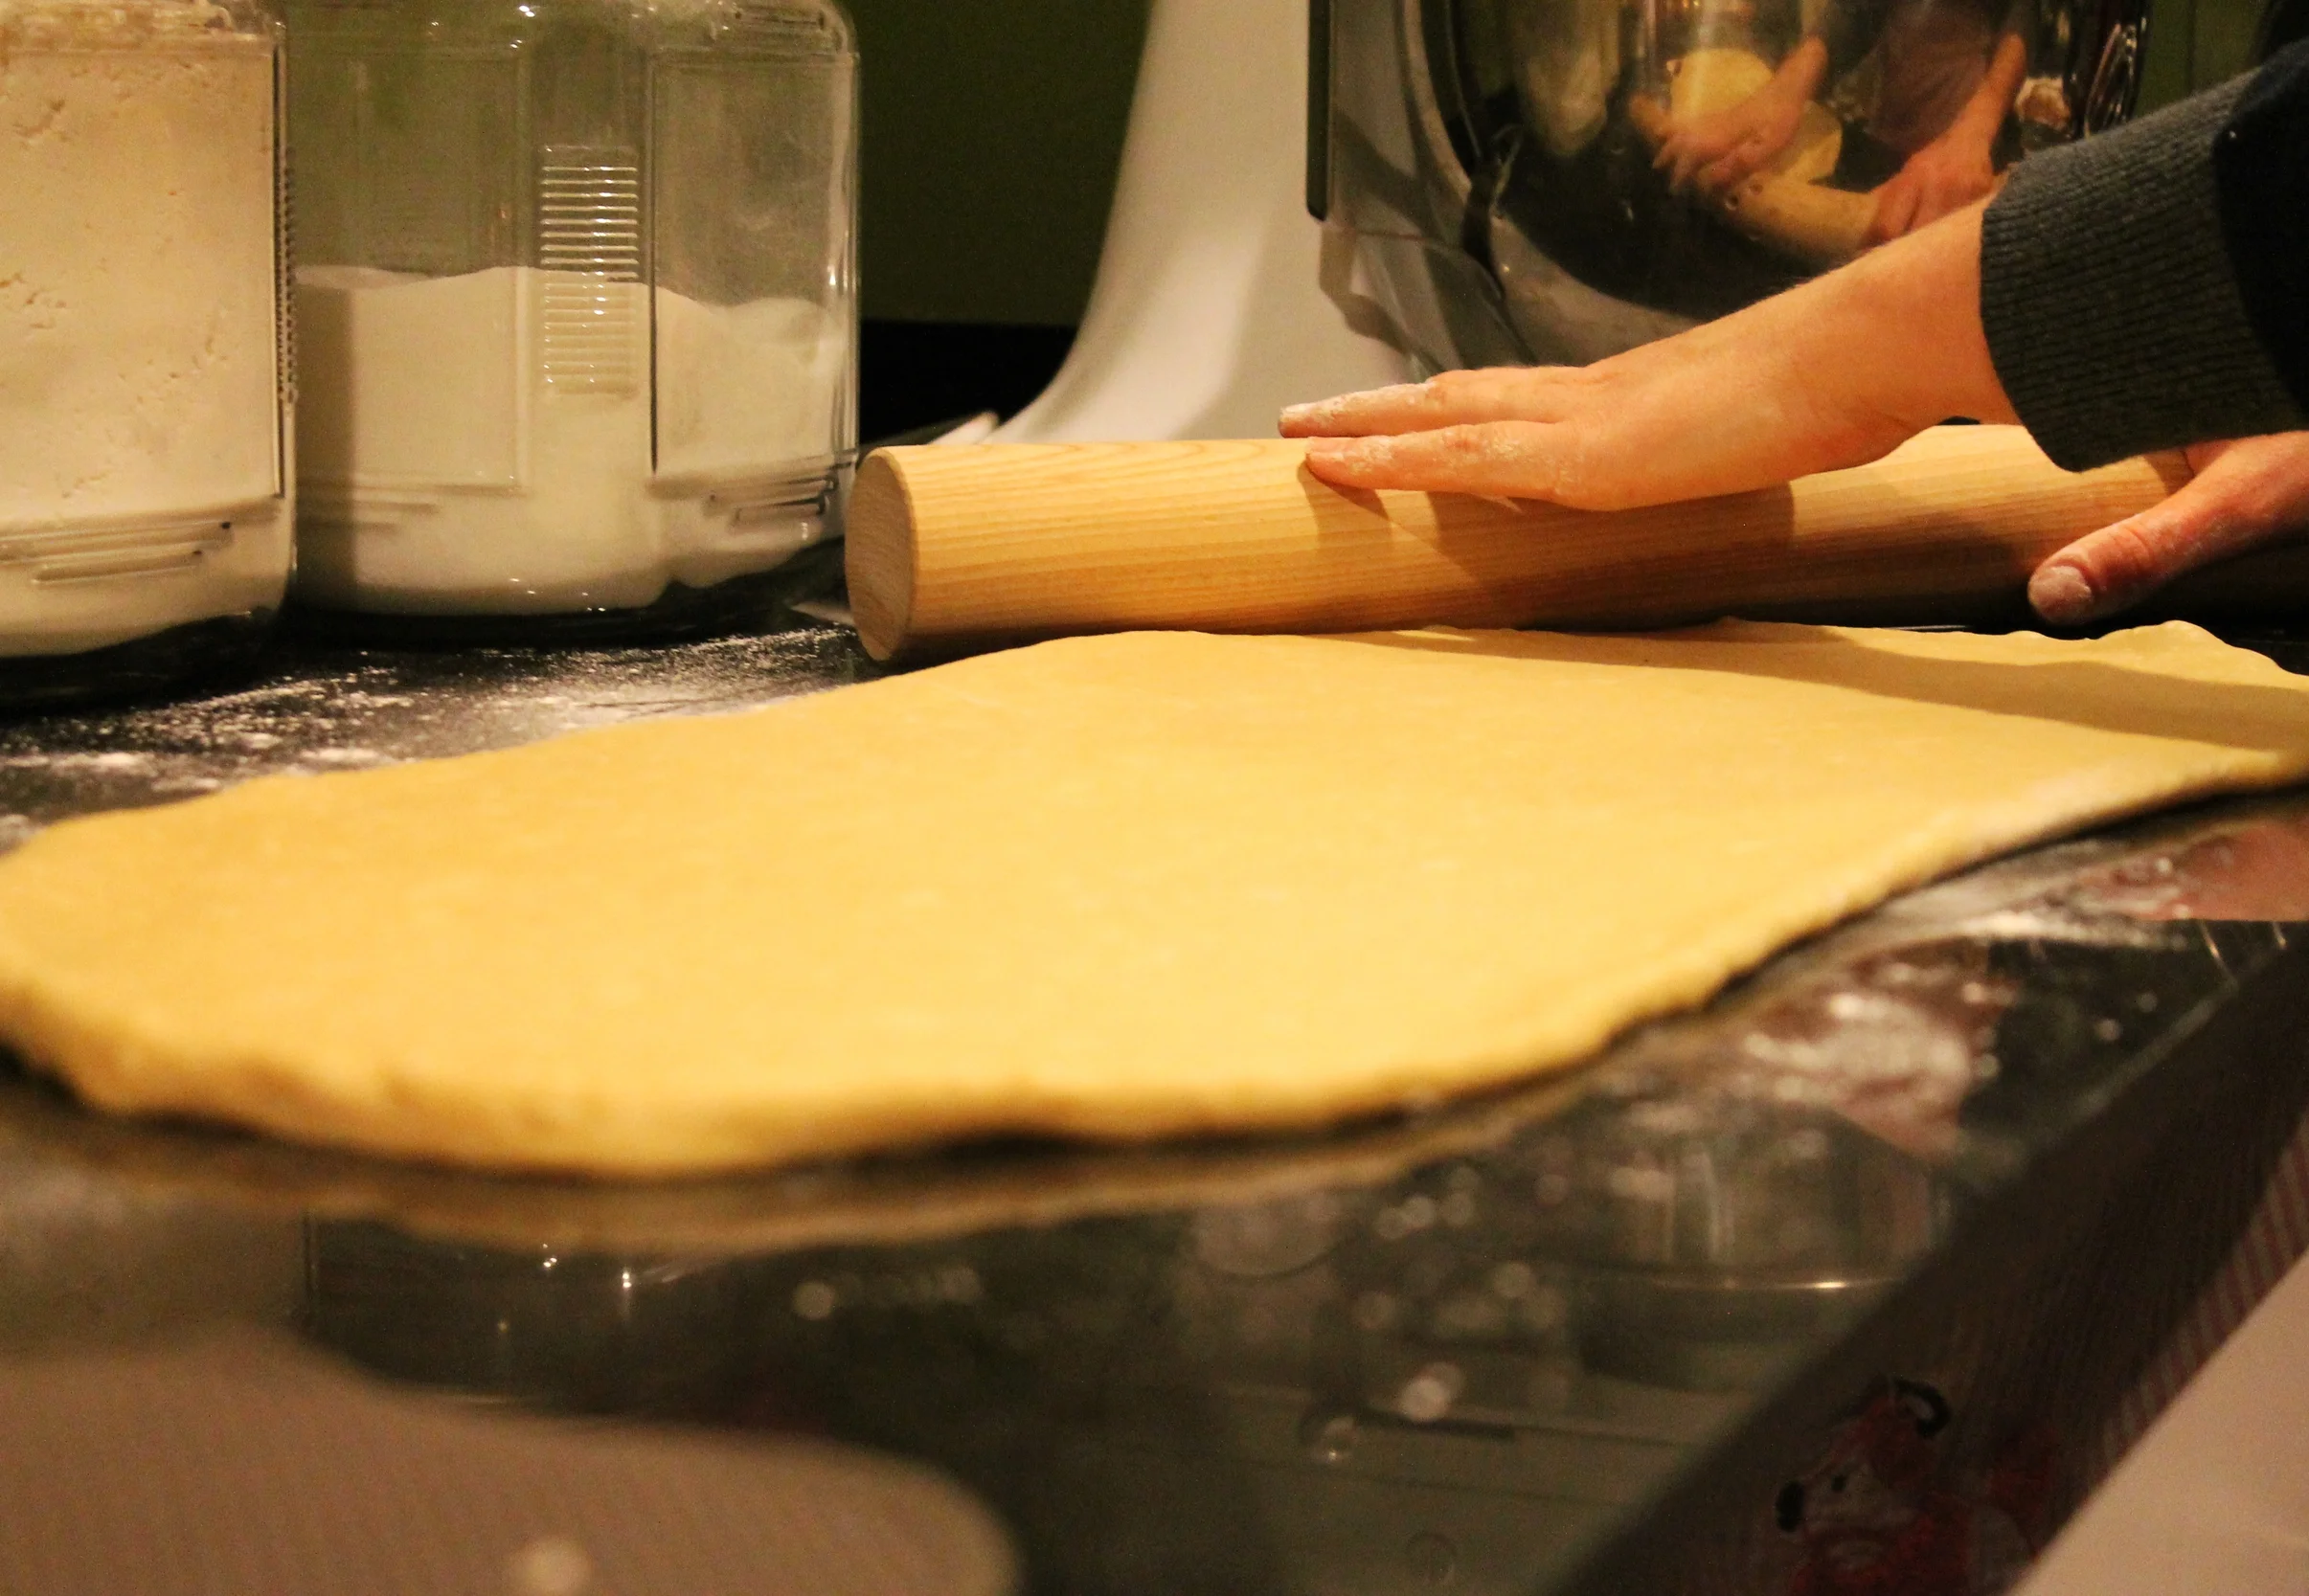
When you are ready to make the rolls, take your risen dough and put on a well floured surface.

Knead just slightly with your hands.

Roll into a large, 10” x 24” rectangle.

Spread the filling all over the rolled dough.

Sprinkle the bacon evenly on top.

Starting from the bottom, roll upwards, very tightly.

Cut into about 2” thick slices.

Place into a well-buttered baking dish.

Cover tightly with plastic wrap and stick in the refrigerator overnight to rise again.

If you are looking to make these the same day, you can let them rise out of the fridge.

The next morning, when you are ready to bake these for breakfast, take out of the refrigerator, and bring to room temperature.

If you preheat your oven to 250˚ F and let your rolls sit on top of the oven, they will warm up faster before you bake them!

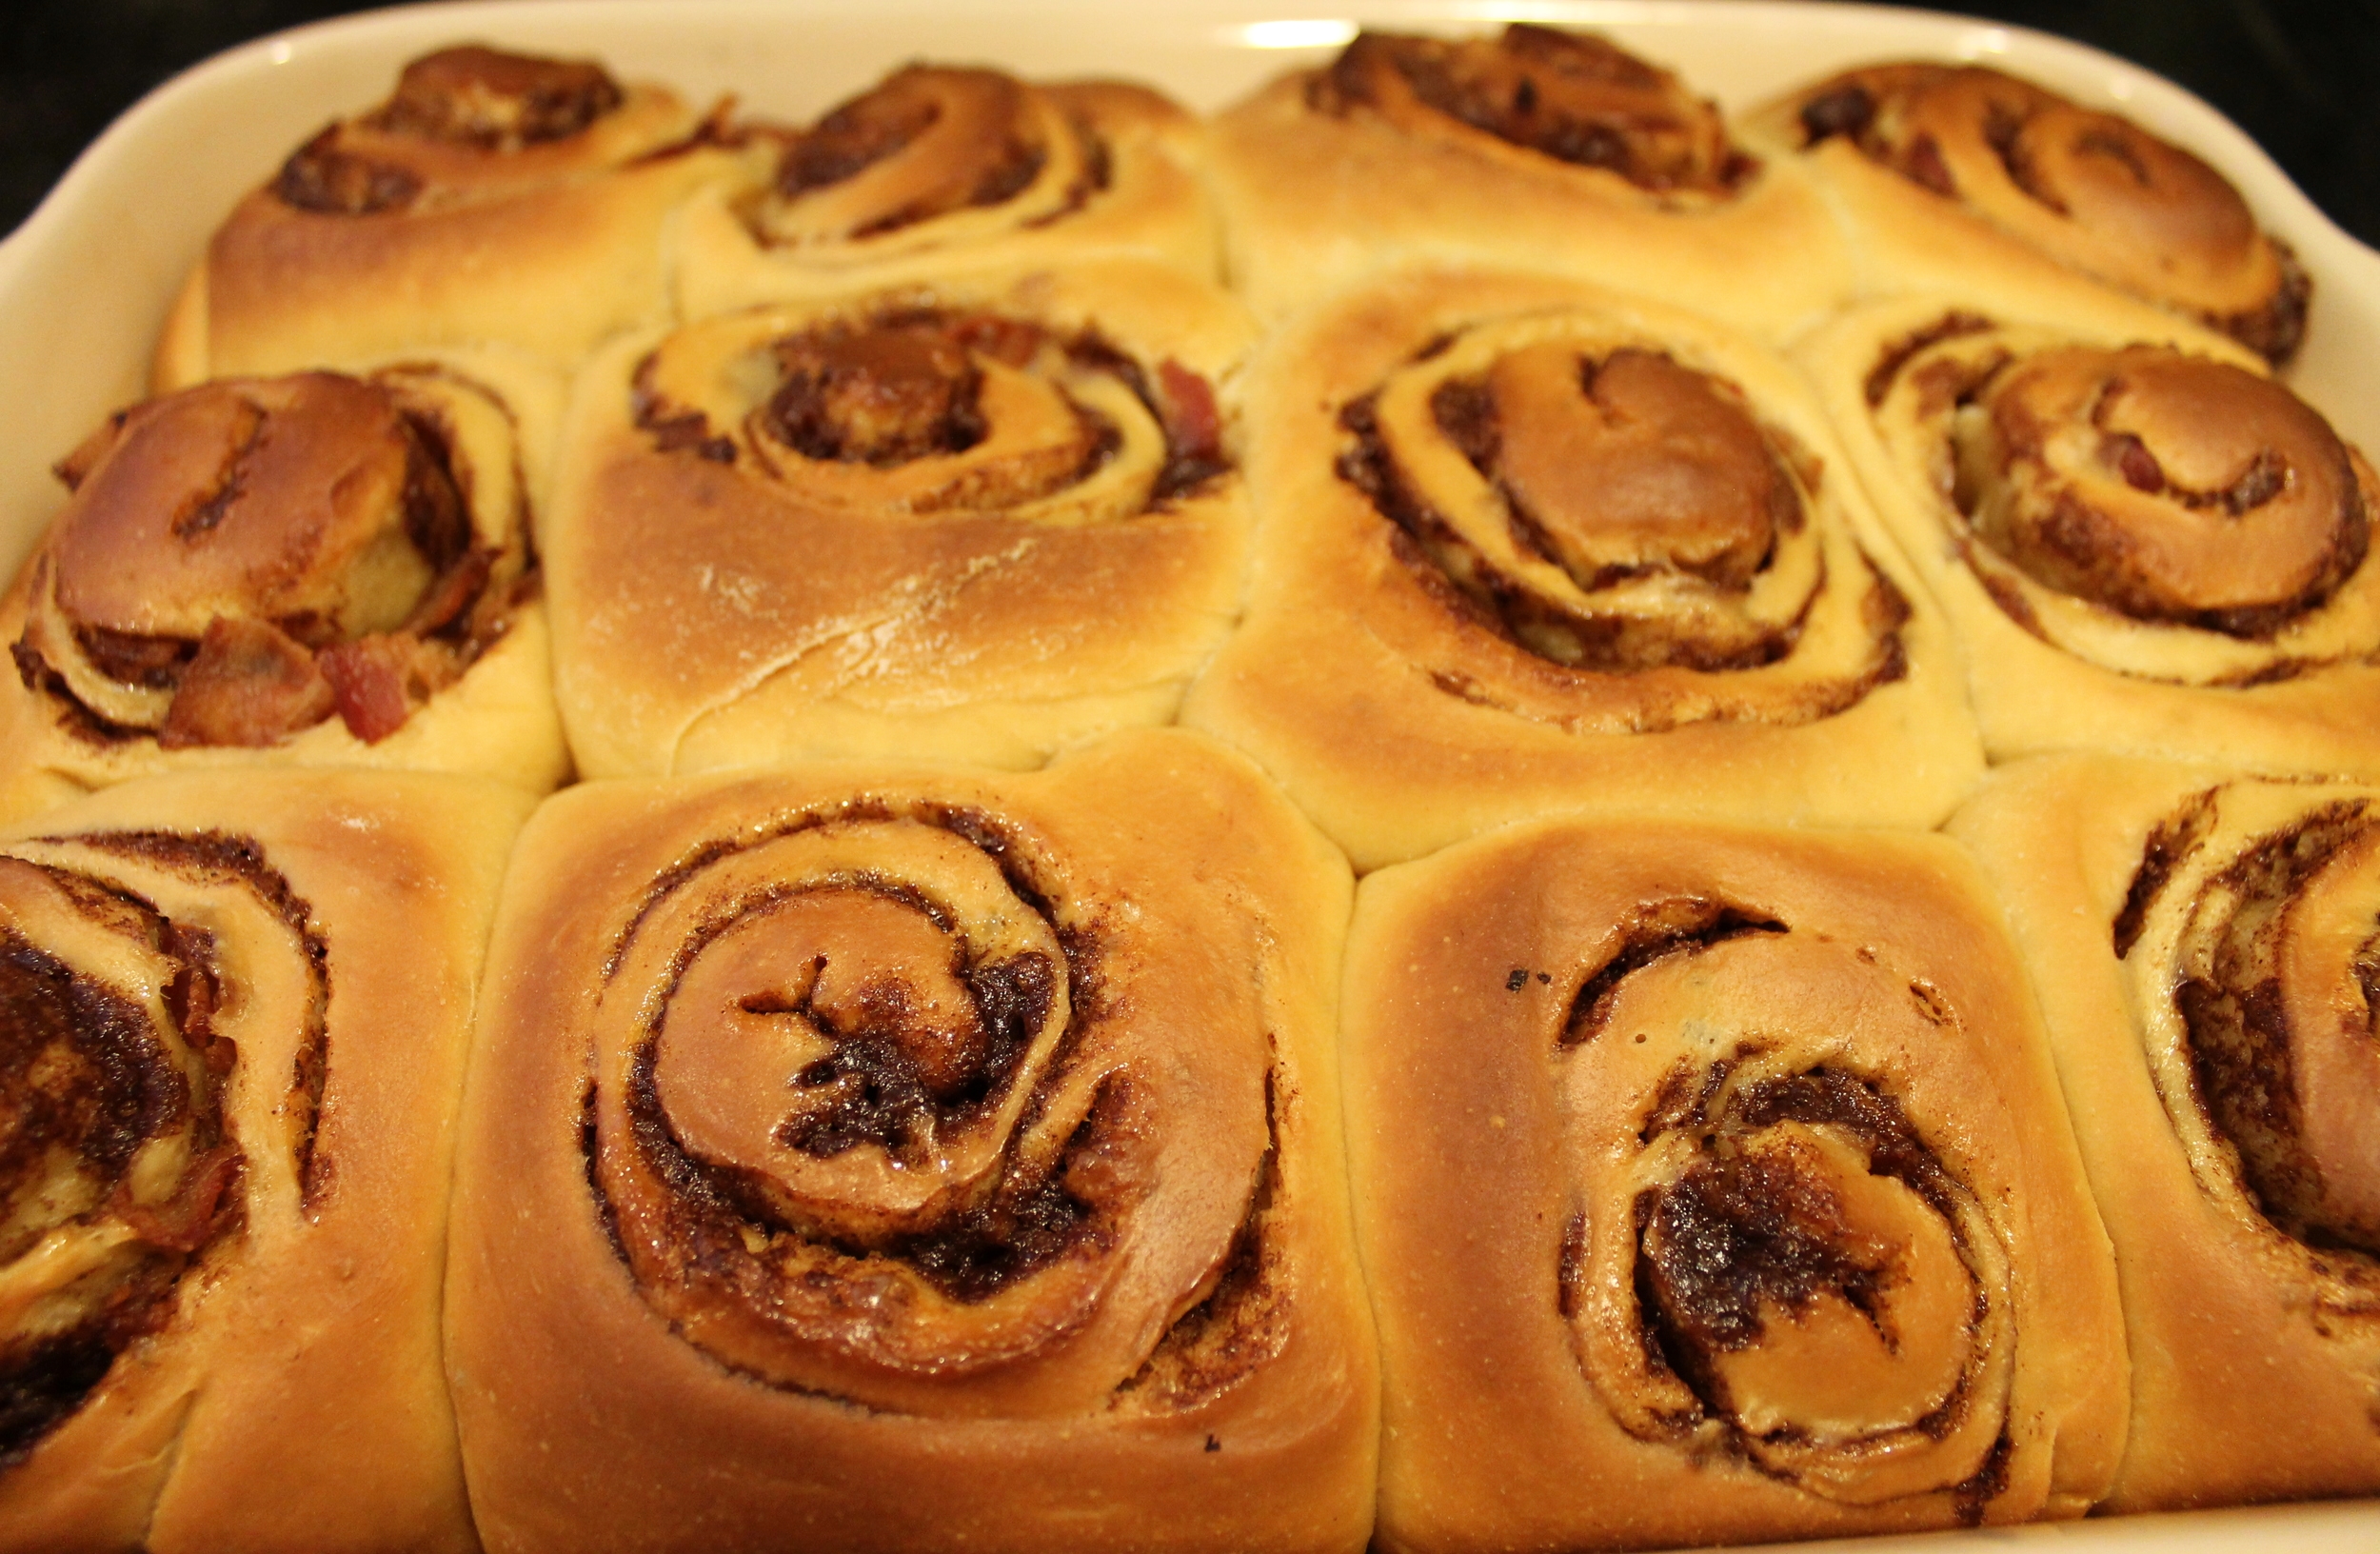
When they are ready to be baked, bump your oven up to 375˚ F and bake for 25-30 minutes, until golden brown.

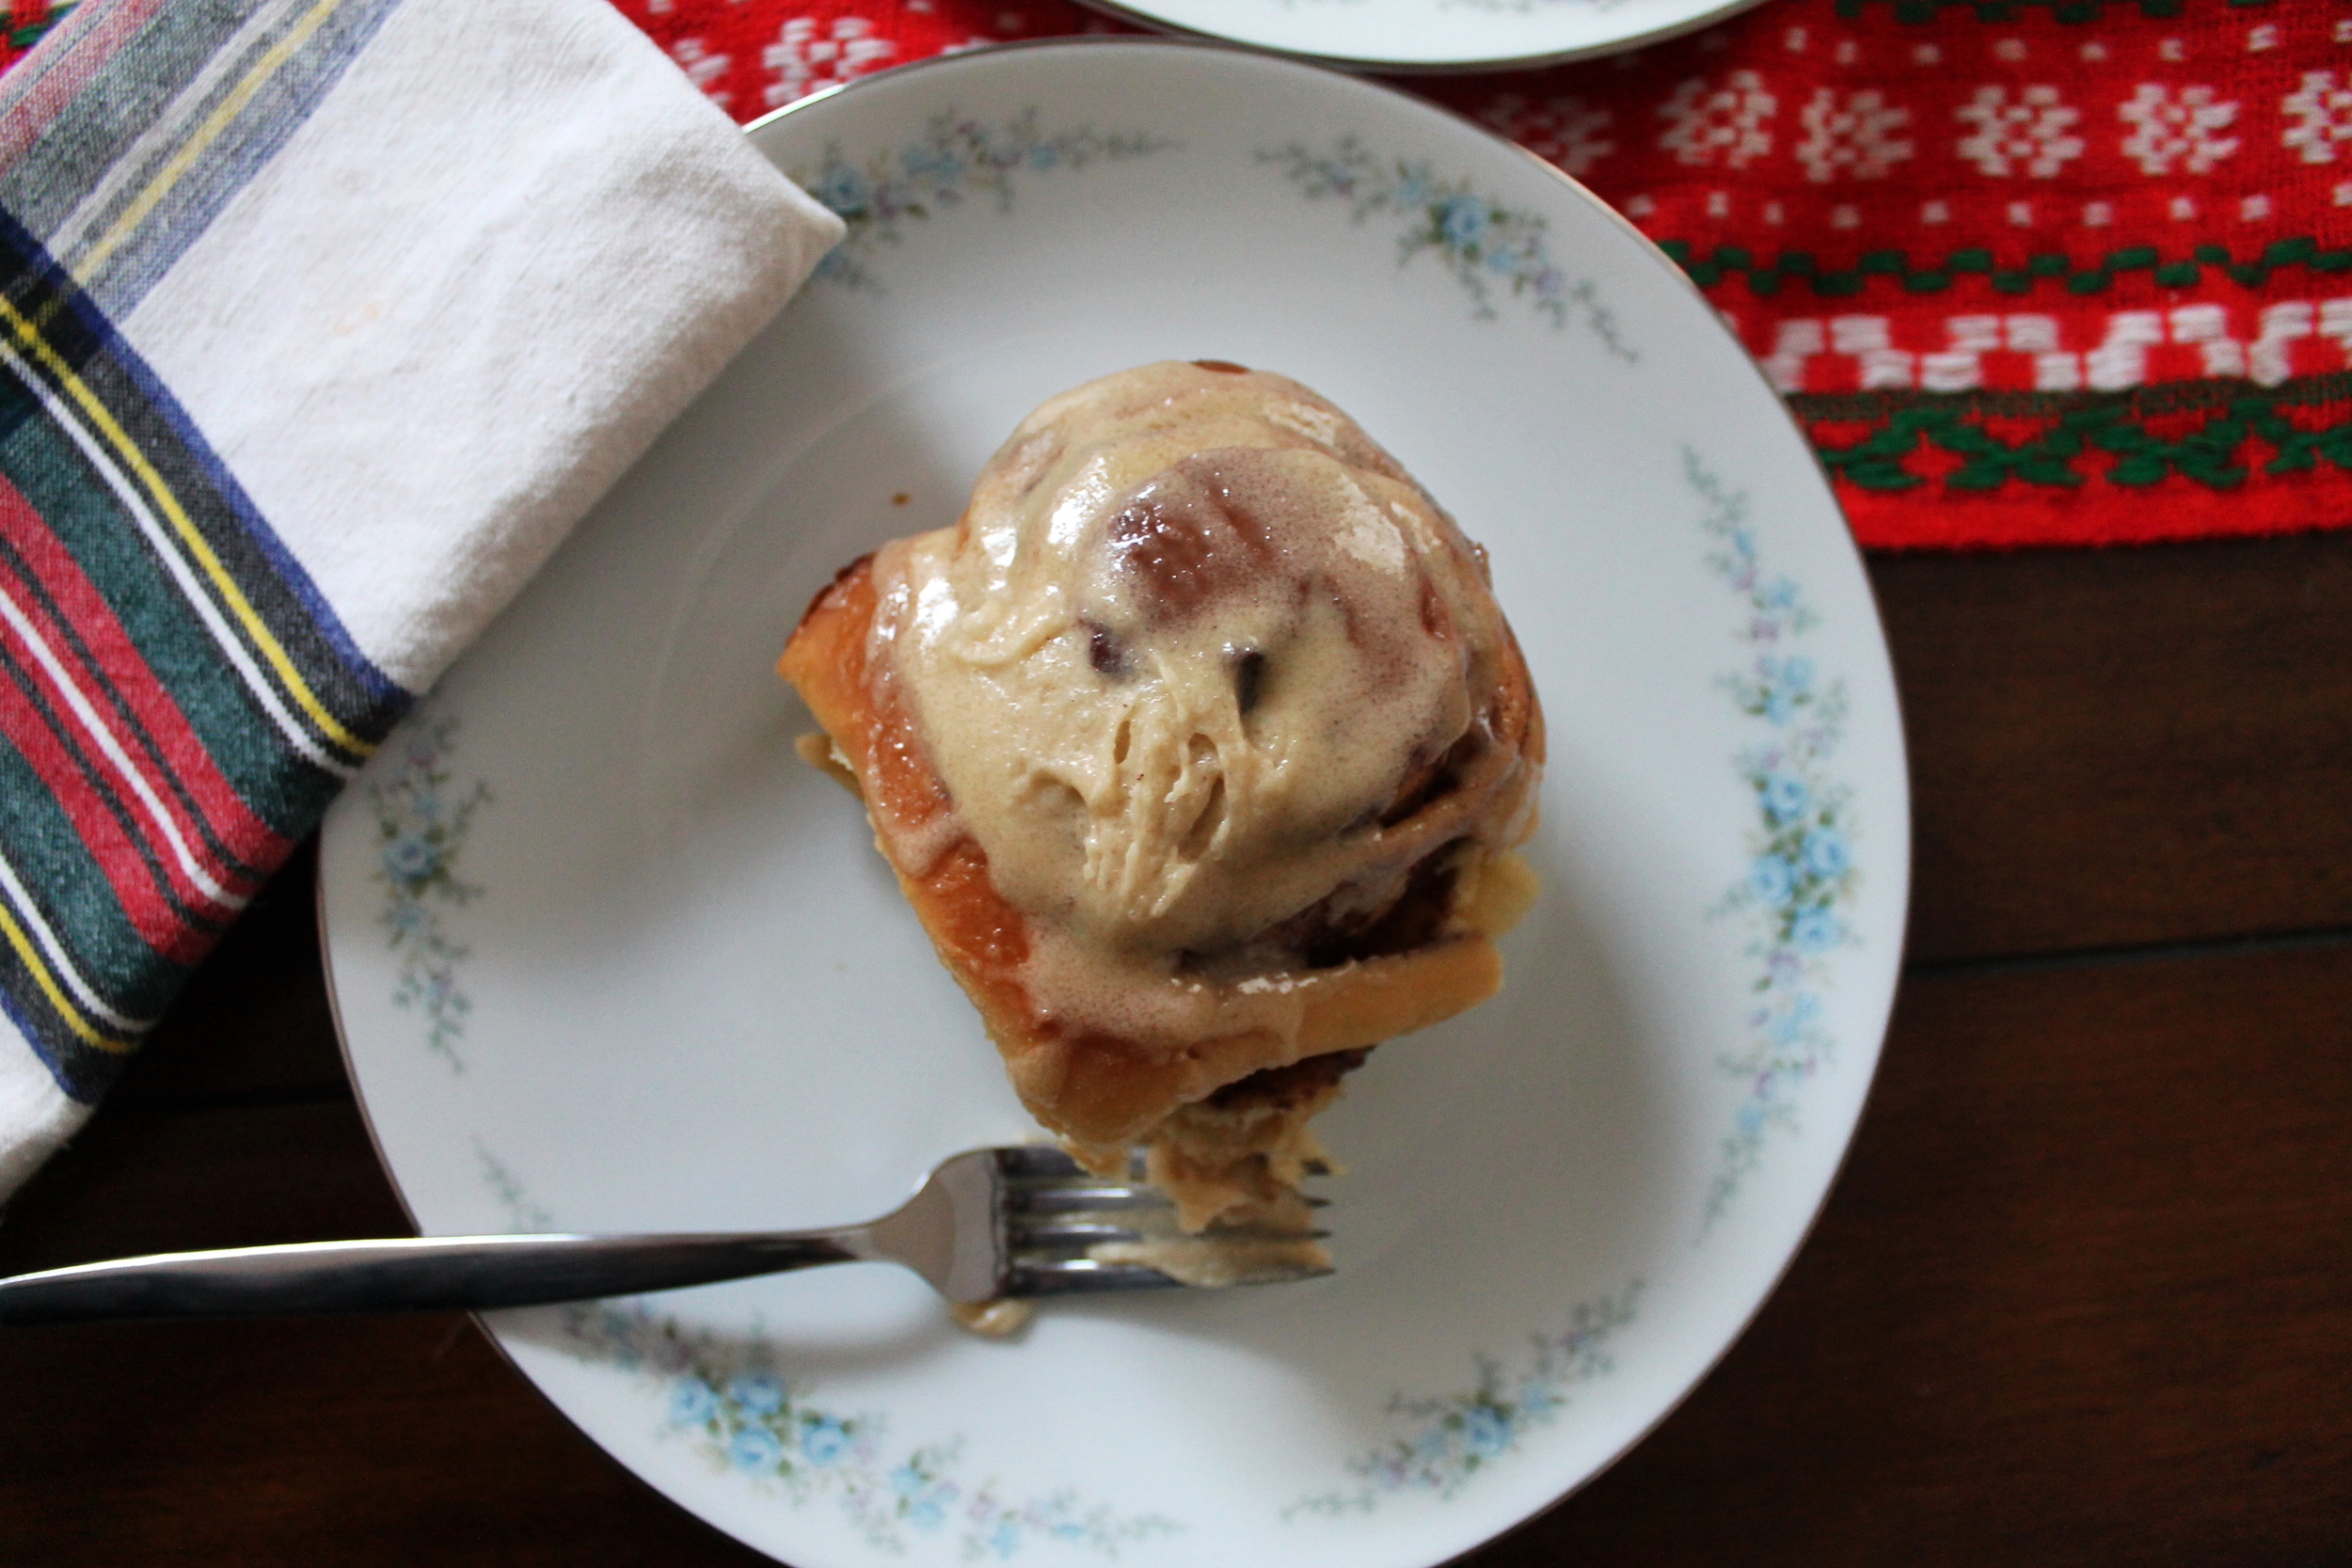
Remove from the oven, allow the cinnamon rolls to cool for just a few minutes, and then either top them all with the frosting recipe below, or serve and allow people to frost their own buns!


frosting ingredients

Butter, softened—2 oz, or ¼ C

Confectioner’s Sugar—4 oz, or ¾ C

Brown Sugar—2 oz, or ¼ C

Vanilla—1 tsp

Milk—0.5 oz, or 1 TBL


frosting process

Cream together the butter and sugars.

Once combined, add the vanilla and milk.

Frost the entire tray of cinnamon rolls, or serve on the side for everyone to take as much or as little frosting for their own roll!


Bon Appétit!

Caramel Stuffed Gingerbread Cookies

Happy Week Before Christmas!!

Now I know that everyone is making gingerbread houses, gingerbread men, ladies and dogs, but how about some stuffed gingerbread cookies?!

Yes. Stuffed I say, and it gets better. How about filling your cookies with lots and lots of caramel? How about some homemade dulce de leche?

Step aside my gingerbread people; you’ve got a new boss in town!

Ever since I was little, my mom would always make absolutely fabulous gingerbread houses, that we would then decorate incredbily hideous—covering them with every color gum drop, candy cane and chocolate—and then eventually give them to the animals a couple of weeks later so that they could, also, get a nice sugar rush. While the stress of building so many houses (now I believe we are at 10 each year!) is rather overwhelming the day before, come Christmas day when it’s time for the, now, Gingerbread House Contest, we all go crazy! One year my brother decorated it completely in cereal squares; my nieces and nephews usually make theirs the most functional; I like to just coat it in spicy cinnamon candy that I’ll later pick at all night as a snack.

The entire thing is a rather fabulous ordeal, and I would never want to give this tradition up for anything! The endless bowls of candy options and both my mom and I hysterical the day before when the roofs keep falling off lead me to keeping these cookies simple—yet packed with a cooked, sugary goodness!

I like to start with a very simple gingerbread cookie dough recipe. There is just the right amount of spiciness in this cookie, not anything too overpowering, so that you can truly taste each and every spice. While I could have coated these in some shiny white icing and glorious decorations, I decided to put that extra sweetness inside of the cookies!

Yes, like actually inside.

As you all know, keeping a jar of easy, homemade dulce de leche sauce in my fridge is as much a staple for me as are butter and eggs. It is oh so quick, and can be used in a multitude of recipes—like my Ginger Apple Cake, or Semifreddo, or even an insanely perfect topping for Apple Crisp!

Anyways, it also bakes just marvelously inside of these gingerbread cookies, adding just enough sweetness without giving anyone a toothache!

Do I sound old or what...

Don’t have dulce de leche? Want to sub caramels instead? Go for it! Homemade or store-bought works just fine—even chocolate fudge can make an excellent filling. Heck, you don’t even have to stuff these cookies, but I know you won’t regret it if you do!

Gingerbread people and houses will forever have a special place in my heart, and my tummy come Christmas night, but these Stuffed Gingerbread Cookies are a new tradition that I’m starting right now!

ingredients

Butter—8 oz, or 1 C

Brown Sugar—5.5 oz, or ¾ C

Molasses—3.25 oz, or 1/3 C

Eggs—2

Vanilla—0.1 oz, or 1 tsp

Flour—18 oz, or 3 2/3 C

Baking Soda—0.25 oz, or 1 ¼ tsp

Salt—0.15 oz, or ½ tsp

Cinnamon—1 tsp

Ginger—¾ tsp

Nutmeg—¾ tsp

Allspice—¼ tsp

Dulce de Leche—1 can, recipe shown here


process

Cream together the butter and sugar.

Once light and fluffy, add in the molasses.

Add in the eggs, one at a time, and the vanilla.

Sift together the dry ingredients: flour, baking soda, salt, cinnamon, ginger, nutmeg, and allspice.

Slowly add in the dry ingredients to your mixer.

Once the dough has formed, wrap it in plastic and allow to chill for about an hour.

When you’re ready to bake the cookies, preheat your oven to 350˚ F.

This is when it gets fun!

These cookies are delightful without a filling, but adding a caramel or dulce de leche brings them to a whole different level.

You may use store bought caramels, this dulce de leche recipe here, nutella, whatever your little tummy desires!

To fill the cookies: take two equal sized pieces of cookie dough (1 oz for me!), and roll into balls.

Take one of them and make into a small bowl, this is where you will put your caramel.

Take the second ball and make it flat, this will be a cover for your bowl.

Pinch the sides together to seal in your filling, roll to make a seamless ball.

Do this until you have used up all of the dough—should make around 15-18 cookies depending on what size you decide to make, as well as how much of the dough you eat!

Put your cookies on a pay that has been sprayed with nonstick spray, about 3x3, because the cookies will get rather large.

Bake for 13-15 minutes.

Remove from the oven and allow to cool for just a few minutes before eating for a gooey center.


Bon Appétit!

Peppermint Mocha Brownies

Happy Peppermint Mocha Season!

Oh, whoops, I mean Happy Holiday Season, of course!

How has everyone’s December been so far? Filled with love and candy canes? Blue, white, green and red twinkly lights and eggnog? Endless peppermint mocha lattés and adorable gift-wrap with snowmen on it?

As most of you know, if I could, I would celebrate this season all year long, Michael Bublé’s holiday album would be forever playing in my car, and I would have our Christmas tree up and lit 365/24/7! So, I guess I’m really in my prime for the next couple of weeks.

After returning from a long weekend in Miami for Art Basel and Roberto’s birthday with my favorite couple (and future sister-in-law!), I was ready to pack away the little rompers and bring out the super hip sweaters with fuzzy polar bears on them—but it happens to be 70˚ here this week, so I guess I’ll just overheat in my dress-sweater combo, while pretending that it’s blizzarding outside.

This all includes lot and lots of hot chocolate with a candy cane, some yummy stew made by my one and only, and peppermint mocha brownies!

Yes, I am excited for the first two, but who doesn’t love super fudgy, extra rich, mocha and minty brownies?! I have no clue—especially when they are topped with a sweet white chocolate glaze and basically a snowstorm of candy canes!

The small amount of flour in these brownies, and lots and lots of chocolate, allow them to become oh so gooey in the center, while the outside has a slightly crisp “shell.” If the combination of a smooth center, and an even creamier white chocolate glaze isn’t enough for you, how about the fact that there’s extra caffeine fun with coffee grounds mixed in! Yes, my sweet, cheery, latté loving friends, I have just made your dreams come true with this here dessert—basically an edible peppermint mocha. I don’t believe I can say it enough times, or with enough excitement!

Peppermint. Mocha. White Chocolate. Candy Canes. Brownies.

Please do yourself a favor and make these as soon as possible, because while I write this post, I’m already on my second…or maybe third…slice!

IMG_6011.JPG

ingredients

Butter—8 oz, or 1 C/2 sticks

Semi-Sweet Chocolate—4 oz

Candy Canes, crushed—3

Cocoa Powder—1 oz, or 1/3 C

Eggs—3

Sugar—14 oz, or 1 ¾ C

Coffee Grounds—0.2 oz, or 2 tsp

Vanilla Extract—0.1 oz, or ½ tsp

Peppermint Extract—0.1 oz, or ½ tsp

Flour—5.25 oz, or 1C + 1 TBL

Salt—0.1 oz, or ½ tsp

Baking Powder—0.1 oz, or ½ tsp

Sweetened Condensed Milk—7 oz, or ½ can, or 2/3 C

Butter—0.5 oz, or 1 TBL

White Chocolate—6 oz, or 1 C

Candy Canes, crushed—4 or 5


process

Preheat your oven to 350˚ F.

Over a double boiler, combine the butter, semi-sweet chocolate, cocoa powder and candy canes.

While that is melting, beat your eggs together, using the paddle attachment, or, if using your hands, a whisk, with the sugar and coffee grounds for 3-5 minutes, so that they are light and fluffy. This will help keep them from coagulating when you add in the warm chocolate.

Add in your two extracts.

In another bowl, sift together the flour, baking powder and salt.

Once your chocolate mixture has melted, slowly stream it into your beaten eggs with the mixer on low speed.

Add in your sifted, dry ingredients.

Only mix until combined.

Pour batter into a pan that has been sprayed with nonstick spray. I like to use a springform pan, which makes for much easier removal of the brownies when you’re ready to eat them!

Baking for 27-30 minutes, until the center is just slightly jiggly—this is what makes them fudgy!

Remove from the oven and allow to cool completely.

Once cooled, melt together the sweetened condensed milk, 1 TBL of butter, and white chocolate.

Pour over the cooled brownies and sprinkled with the 4 or 5 (or more!) crushed candy canes.

Allow to cool and harden, then cut and enjoy!


Bon Appétit!

Pumpkin Chocolate Fudge Cake

IMG_5819.JPG

Here is dessert #1 of my little Thanksgiving Dessert Twists series. This year, I have decided to go on a different route than normal using the same major ingredients—pumpkin, apple, pecans. First stop is pumpkin pie!

While you can never replace a pumpkin pie, with its warm spices, natural wholesome pumpkin flavor, flaky, buttery crust, I believe you give it a nice chocolate friend for us that are super obsessed! I know that you’re seeing pumpkin everything everywhere right now—from the latté to the candy, the chip to even the beer, it’s been absolutely huge this fall, and rightfully so. Pumpkin is something that obviously screams autumn, and holidays, and warm coziness. As you have read in many, many of my most recent posts, you just can’t make it through September-November without a pumpkin baked good! Like here and here.

So, naturally, I have added yet another pumpkin dessert to the table, but this time not only is it full of rich chocolate, this fudge cake can be made in fabulous individual ramekins—basically made to order! After an extremely long afternoon of eating that incredible Thanksgiving dinner, you can pop one of these little cakes into the oven, digest for 30 minutes while it bakes and cools slightly, and then truly indulge. They can even be made a day ahead of time—bonus points!

I love the denseness in this cake. Looking at the ingredients, chocolate is what it’s mostly made up of! You’ve got a tiny bit of butter + the pumpkin purée for a bit of fat, eggs to bind it, a touch of sweetness, and then some flour to give it some body. There isn’t even that much sugar in it! Can we argue that it is mildly healthy?! Sure!

And, it is Oh. So. Fudgy. Like, out of this world. This is like a deluxe, eat at a really nice restaurant dessert—and you can have it for any party, not just Thanksgiving, and blow people’s minds!

Choose your favorite chocolate, try not to eat half the bar like me, and treat yo’self to the most luxurious chocolate pumpkin fudge cake there is!

IMG_5811.JPG

ingredients

Semi-Sweet Chocolate (melted)—4 oz

Butter—0.75 oz, or 1 ½ TBL

Brown Sugar—1 oz, or 2 TBL

Eggs—2

Flour—0.65 oz, or 2 TBL

Salt—pinch

Puréed Pumpkin—1.25 oz, or 2 TBL

Cinnamon—0.1 oz, or ½ tsp


process

Over a double boiler, melt your chocolate. Once melted, remove from the heat and allow to cool slightly.

Preheat your oven to 425˚ F.

Rub the inside of 2 ramekins with butter.

In the bowl of your mixer, cream the butter and brown sugar.

Add the eggs.

Once combined, add the flour, salt, cinnamon and pumpkin.

When all is mixed well, add a small amount of the melted chocolate, just so that the eggs won’t be shocked by the warm chocolate therefore they won’t cook.

Once the chocolate has been mixed well with the batter, slowly stream in the rest of your chocolate. Mix until just combined.

Pour the batter evenly into the 2 ramekins, they should not be filled any higher than ¾ of the way.

Place on a sheet pan and place in the oven.

Bake for 12 minutes, the cake will just start to pull away from the sides of the ramekin.

Remove from the oven, allow to cool for just a couple of minutes.

The center is slightly molten, and will become extra rich and fudgy the more that it cools!

You may either eat right out of the dish, or invert onto another place, dust with confectioner’s sugar, add a little bit of whipped cream, and enjoy!


Bon Appétit! 

Cinco de Mayo Churro Cake with Mexican Hot Chocolate Frosting

This is the most fabulous food to ever accompany a margarita. You start with an incredibly moist cinnamon cake, add cayenne pepper spiced pecans between the layers, and a spicy-sweet milk chocolate frosting. It does not get any better than that! You have a bit of heat paired with the ever so wonderful cinnamon, a nice crunch, all wrapped in smooth milk chocolate. Grab your margarita and get to baking!

Read More